Adventures in Bead Storage

Well, moving is a nightmare.

Ethan and my original plan fell through and after a whirlwind of stress and panic, we have ended up in a temporary situation in a big, beautiful, moldy old house. The owners are trying to sell it, so they could tell us at any time that we need to move out in 30 days, but until then, we only have to pay the cost of utilities.

I finally have my own bead room, but the caveat is that I really can’t do any major organizing (e.g. no hanging things on the walls). So I was hoping to show you a post of all the nifty storage ideas I had and how I was going to customize my bead room. Instead, I will leave you with a brief comparison of the apartment beading situation and my new one.

At the apartment Ethan and I shared until now, my poor beads lived in the bottom of the broom closet.

Yes, I have three bead towers. Judge not.

Yes, I have three bead towers. Judge not.

When I wanted to bead, I would typically spread all those containers out in a semi-circle on the living room floor and plop down in the middle. I usually had about an hour before my butt was completely numb and my legs were asleep. It was not ideal.

This is a picture from Ethan's drum throne, but you get the idea.

This is a picture from Ethan’s drum throne, but you get the idea.

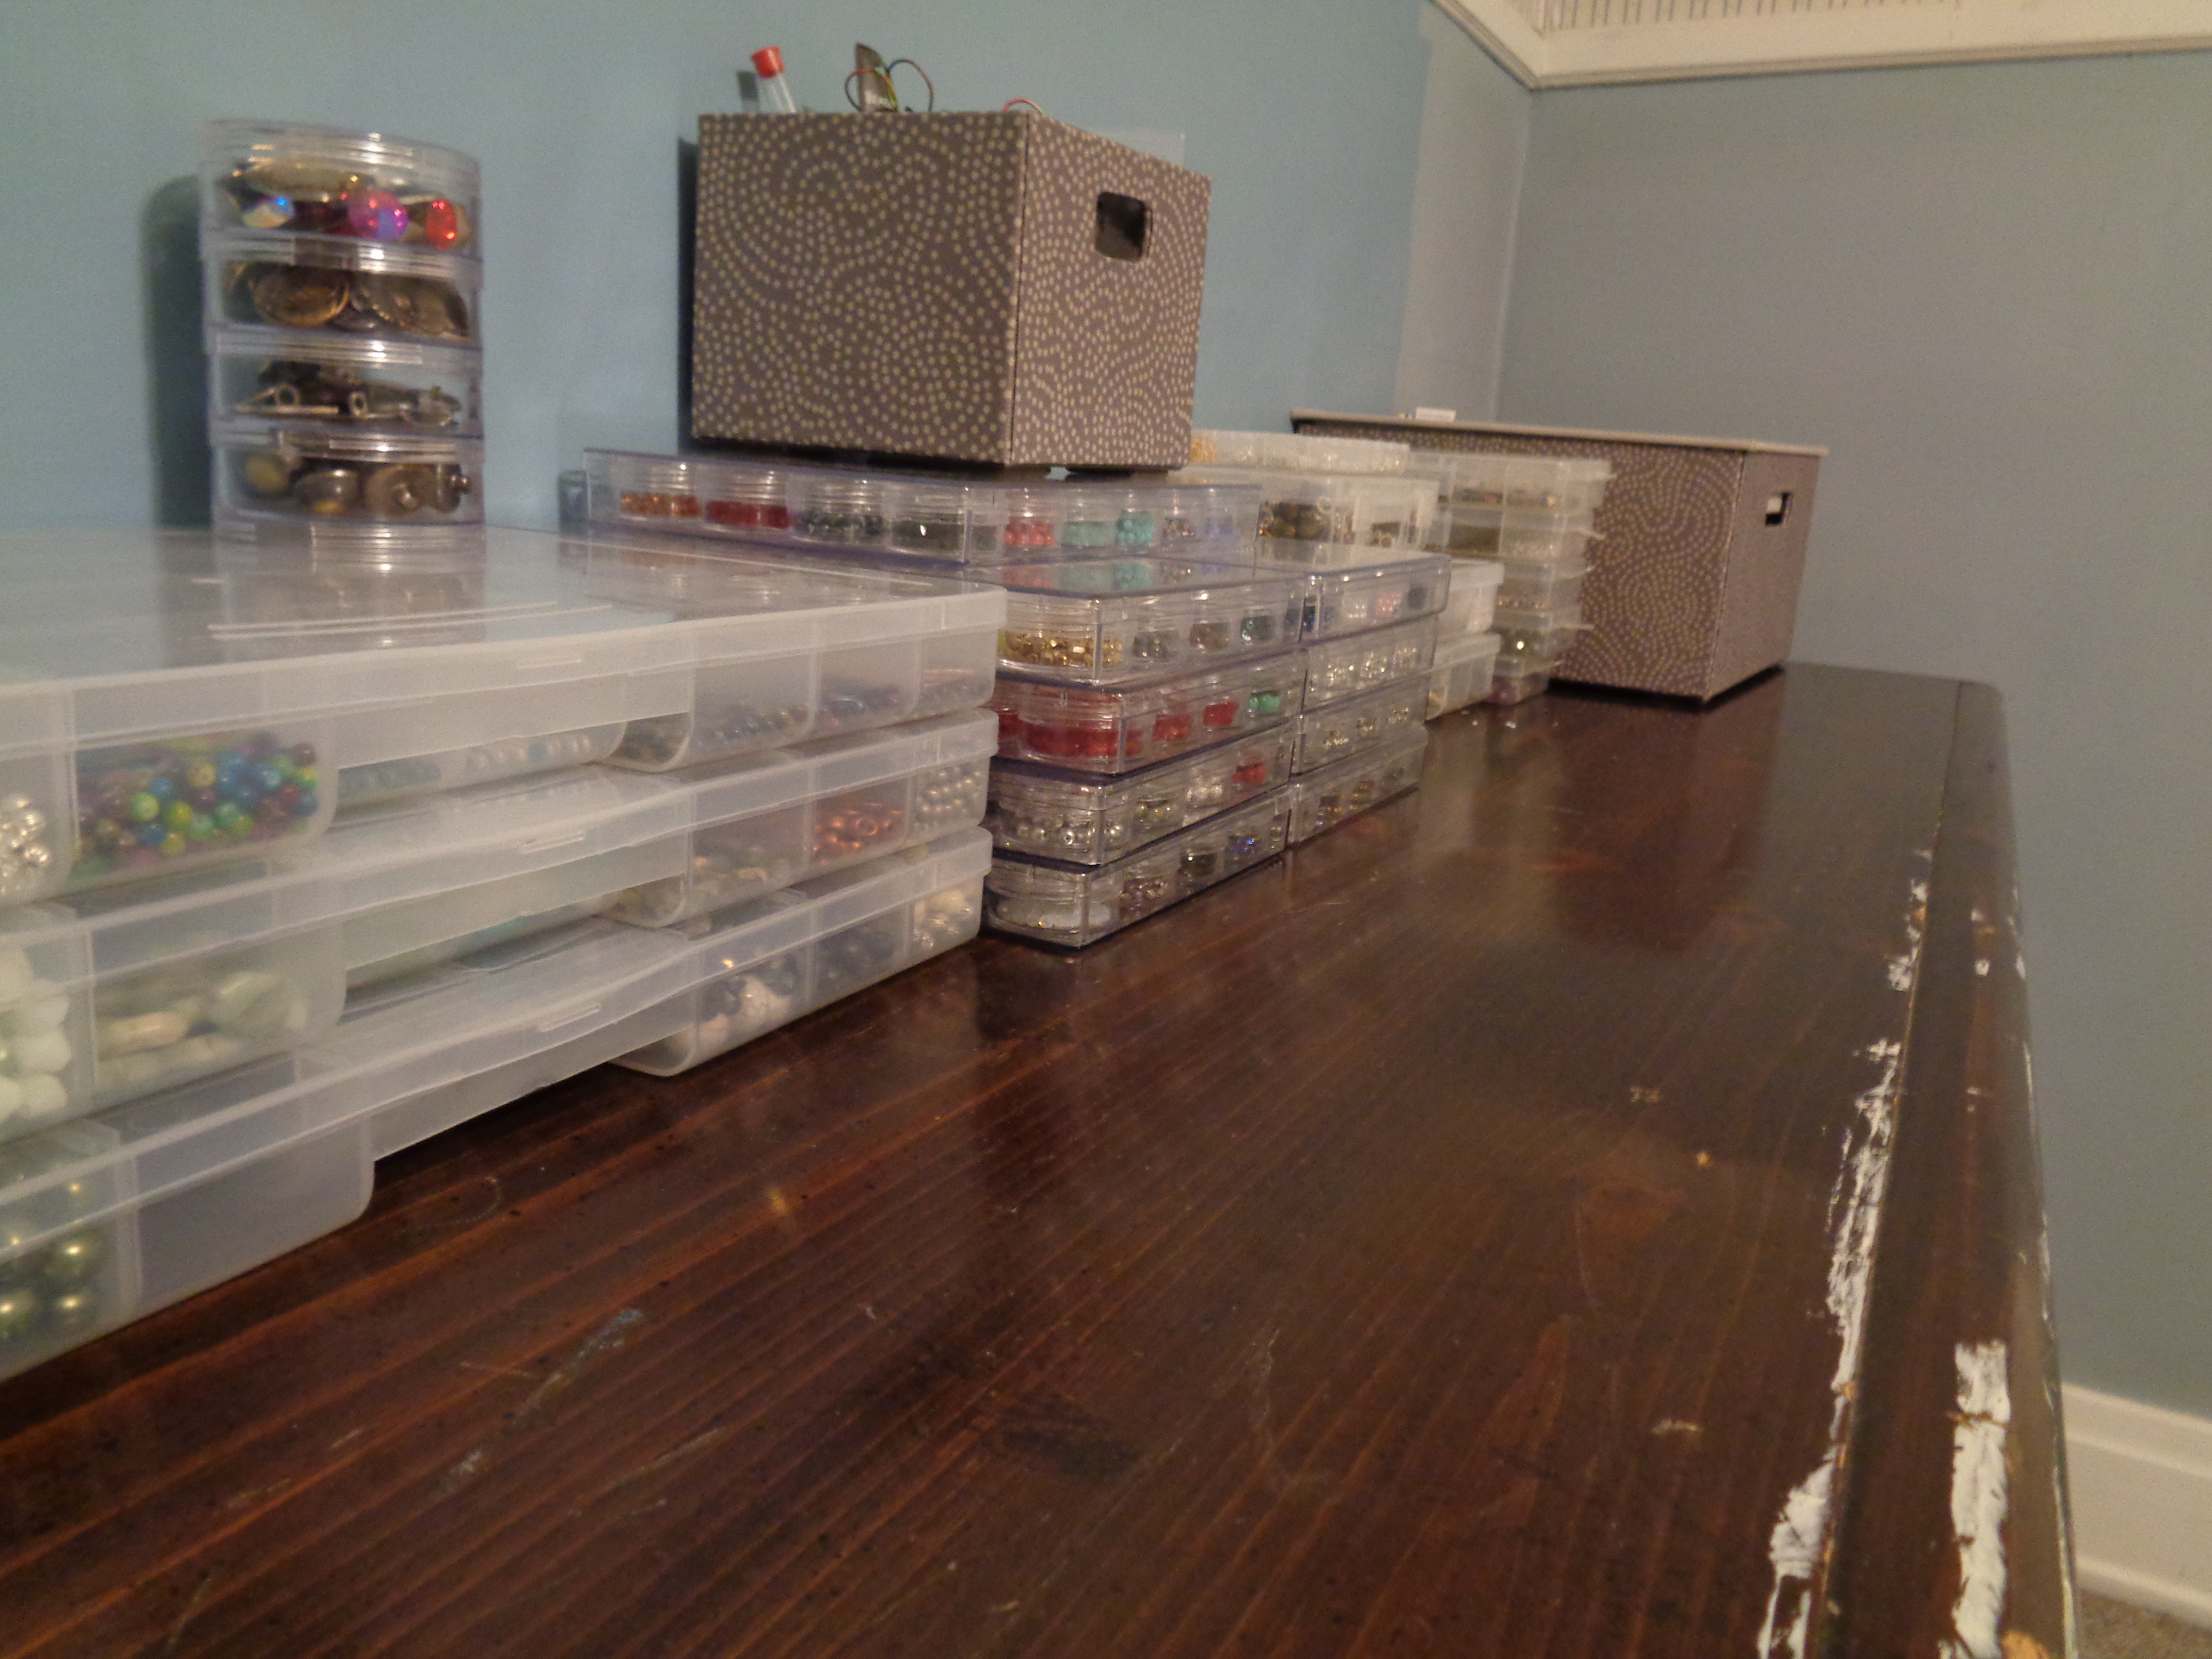
Hopefully, this floor sitting is at an end! I picked out one of the bedrooms upstairs to serve as my bead room. It has a north-facing window, so there should be some natural light in the evening when I want to bead after work. The last tenants left a dresser (wrapped in shrink-wrap for some reason?) which I am essentially using as a shelf for all my boxed and sorted beading components.

DSC00113 DSC00114

Next comes my work desk. Unfortunately, I have yet to buy a work desk. When I obtain one, however, it will live here! Isn’t the little lamp convenient?

DSC00115

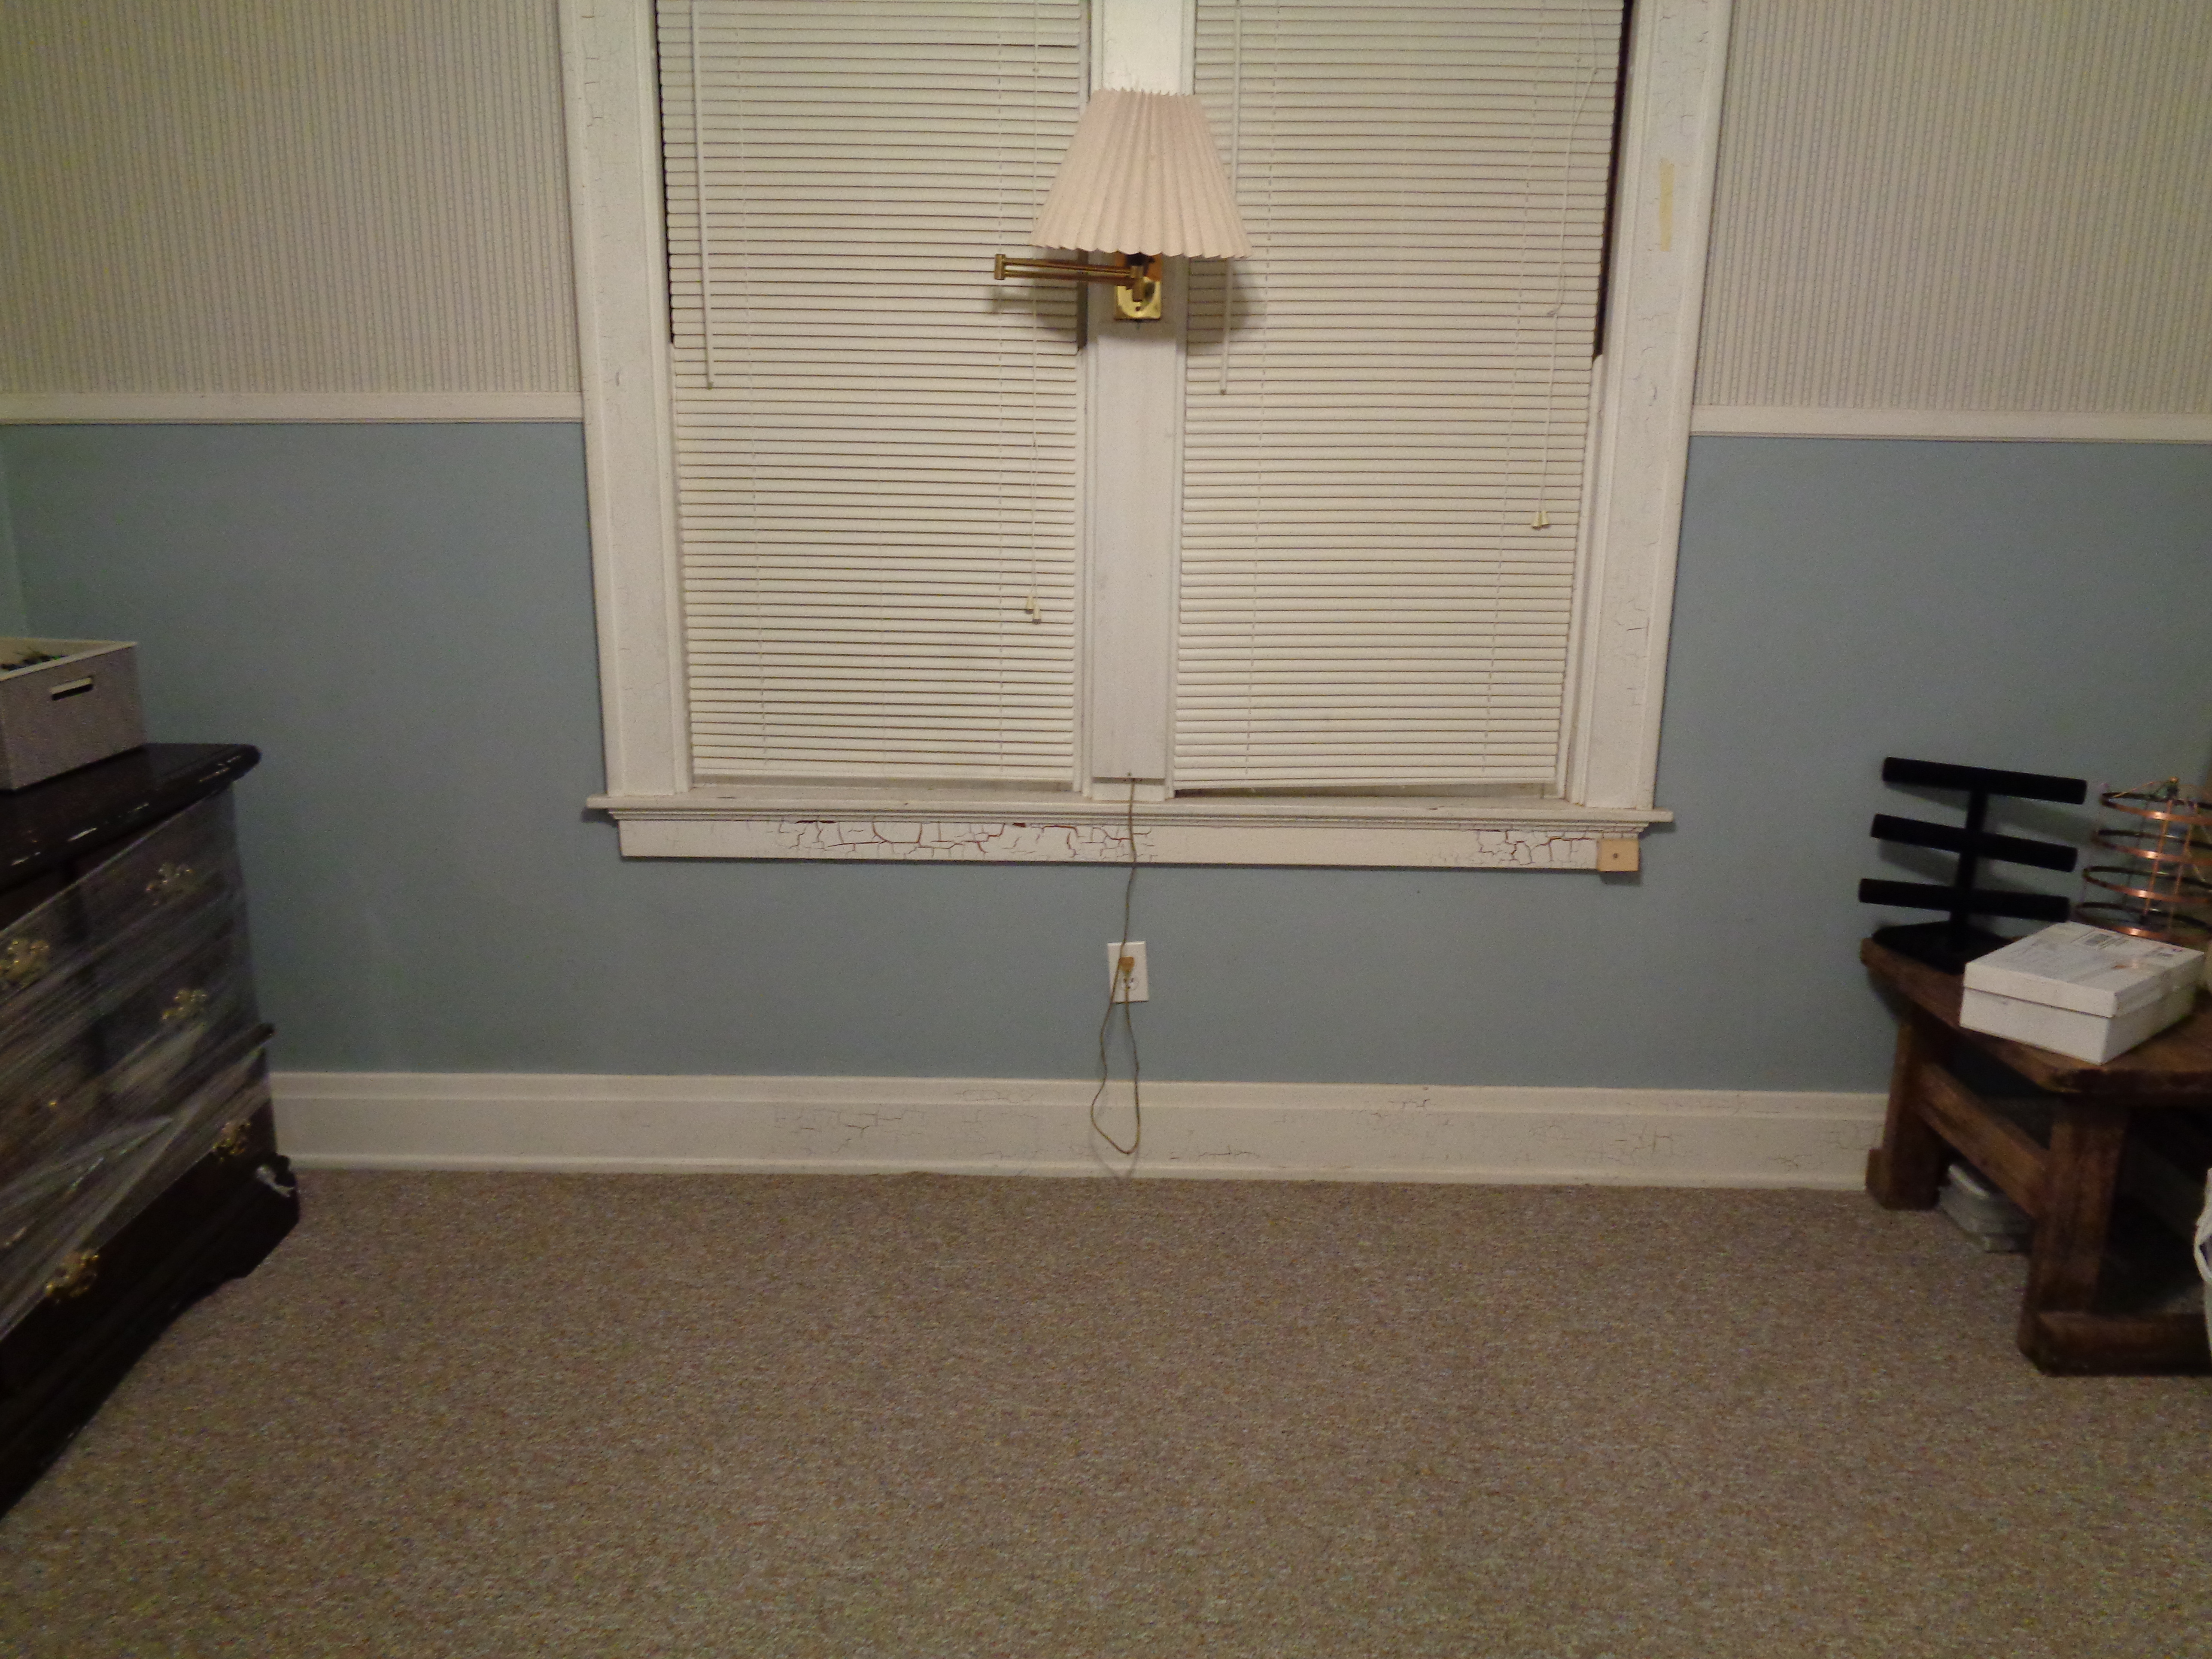
This little table was left in the room as well. I suppose it will hold my finished pieces that are available for sale on my etsy (at least, once I post everything again!).

DSC00116 DSC00124

The rest of my stuff (clipboards… bead embroidery foundation, my bag of empty seed bead tubes…) is currently lined up on the floor, but it’s organized. Organized is really all I need.

DSC00117


Then I’ve got a mirror on the wall so I can check necklace and earring lengths. There are also extra speakers in here, so I can listen to audio books and podcasts while I work!

DSC00118 DSC00125


Here’s a panorama shot of the whole room. It’s pretty empty, but it is so nice to have the space to spread everything out.

DSC00123

Tada!

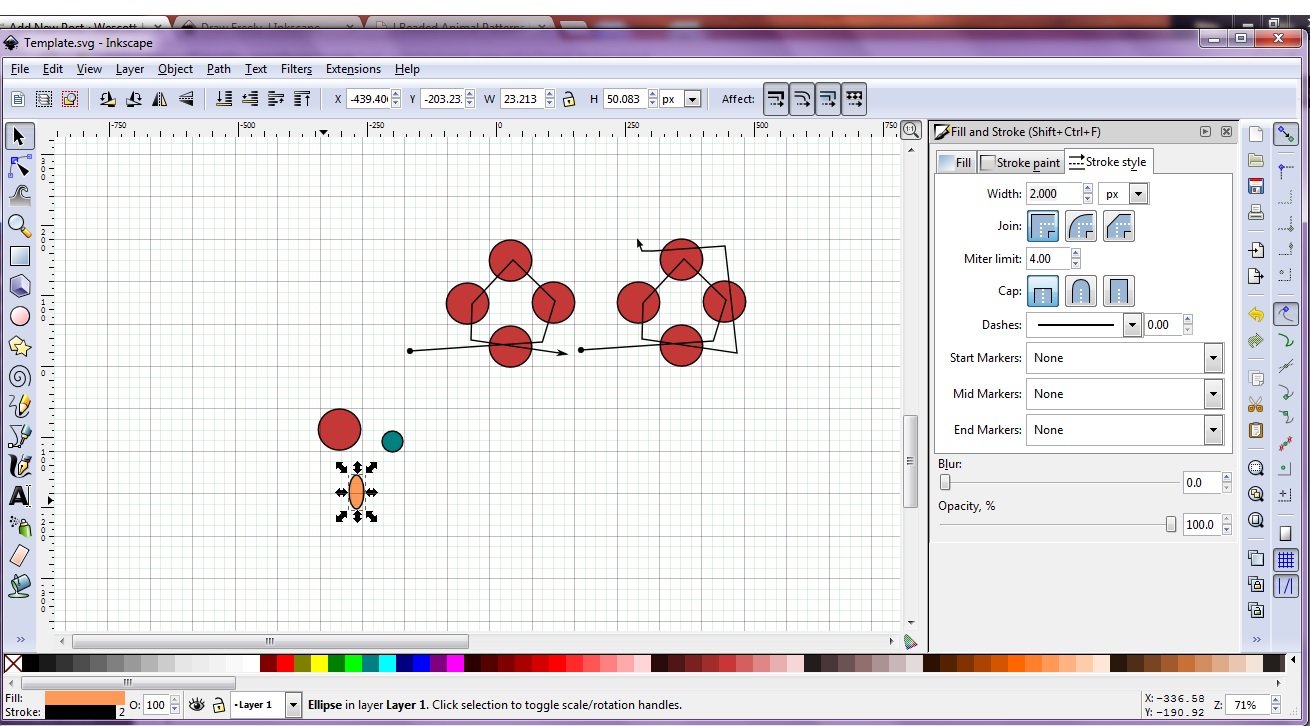
I’ve really missed beading and blogging, so I cannot wait to get everything unpacked and relax in here. I’ve got two new patterns all cooked up in my head. They just need written!

I’ll keep you all posted!

Posted in Storytime | Tagged , , , , , , , , , , , | Leave a comment

Where’d All the Jewelry Go?

whaaaa

Nobody panic! I can explain!

Just a heads up for everyone who might be a bit confused by my almost-empty Etsy shop (since I know you all check my store daily). My husband and I are moving from our cramped apartment into an actual adult-sized house! While this is going to be a great transition, it is still just that – a transition. So for now all my finished jewelry is packed up in a little (ish) box and not available for sale.

Never fear! My patterns will still be available, since a downloadable PDF is not going to hinder my packing frenzy. All my original design patterns are still available here.

Wish us luck with this massive undertaking (and happy beading while I’m gone!)

Sam

Posted in Blog and Shop Announcements | Tagged , , , , , | Leave a comment

This Little Beader Went to Market

Hello, fellow beaders!

So, this weekend the Intergalactic Bead Show came to Cincinnati and I managed to pop in for a bit of lightening-quick bead shopping. Since I work weekends and the show has limited hours, I was only able to shop for about an hour and a half, but I am very pleased with my haul.

And I managed to keep my spending in check this time!

And I managed to keep my spending in check this time!

My first stop was, as always, to the Queen’s Beads booth to say hello to Karen and browse their excellent selection.  I had spent a lengthy afternoon at their booth when Gem Street came to town a few weeks ago and had overdosed on dichroic glass cabochons and my very first Shibori pleated ribbon. This time, I stuck to seed beads and shaped beads.

The Long Magatamas are going into a kumihimo braid that I've been planning for some time and the Tilas and Delicas are going together in a herringbone piece.

The Long Magatamas are going into a kumihimo braid that I’ve been planning for some time and the Tilas and Delicas are going together in a herringbone piece.

After I made my regular stops, I decided to spend some time at some booths that actually make handmade glass beads. I had made a mental note that my stash was fully stocked on basics, but lacked special art beads to compliment pendents and add that perfect pop.

I met Elizabeth Girod of Fire and Fibers at the recommendation of my good friend Joyce and was amazed at her beautiful lampwork beads and pendants. She also hand-dyes silks and other fabrics for multi-media pieces. Her beads were beautiful. I indulged in a few owls, some faux-antique copper drop beads, and some pre-dyed Lacy’s Stiff Stuff for all the bead embroidery.

But goodness, aren't the owls absolutely precious!

But goodness, aren’t the owls absolutely precious?

After Fire and Fibers, I hopped to the next booth, Thornburg Bead Studio. Nikki was super cheerful and her lampwork is also gorgeous. I bought a couple of her signature flowers, albeit in muted tones – her work is generally very vivid and bright! I also indulged in a few lovely swirled glass rings and a pair of beautiful blue/brown roses. I can feel my creativity stirring already!

DSC00078

I am so thrilled about those muted flowers! And the roses are even prettier in person.

After visiting the two glass booths, I had fifteen minutes and ten dollars left to spend. I whirled through the booths and found some beautiful Czech leaves at the Beadroom. Her Czech collection is wonderful and these leaves just called my name. I snagged them up with five minutes to spare before the show closed and I skipped out the door with my purchases.

These are so my colors.

These are so my colors.

If you’ve never been to a bead show, I highly recommend them. While I am very protective of my local bead stores and try to do the majority of my shopping there, a show brings in new stock to freshen up your stash. It also gives you the chance to participate in the larger beading community in your town and is great for networking.

I haven’t been to many bead shows, since only Intergalactic Bead Show and Gem Street USA tend to come to Cincinnati and I really can’t travel. I have, however, been to enough shows to have garnered a collection of tips.

Sam’s Bead Show Tips

1. If you haven’t been to a particular show before, look at every booth before you begin purchasing. Get a feel of who has what and where the best deals are. There is nothing for frustrating than buying something at the first booth you see and then finding it for much less at the second booth.

2. Know ahead of time how much money you want to spend. Bring cash (most convention centers have ATMs inside) and leave your credit card at home, so you aren’t tempted to breach your pre-set limit.

3. That being said, acknowledge that shows are kind of a special occasion and don’t beat yourself up over overspending. Just make sure you use everything you buy! If you regret a purchase, try to swap with a friend.

4. Talk to people! Beaders are a very friendly lot and it is often very easy to strike up a conversation with the person rummaging through the bin next to you. You may find out about a nearby store, and upcoming show, or the newest trends!

5. More specifically, talk to the vendors! It’s important networking for designers and bead-makers, but it also increases the chances that they will recognize you next time you shop there and possibly be more willing to grant quantity discounts or give tips about good deals.

6. Sign up for free admission. Smaller shows tend to give out free admission coupons to bolster the amount of shoppers who show up. If you sign up on Intergalactic’s website. for instance, they will usually send free admission tickets in the mail!

7. Have fun and think outside the box. Try to buy things you can’t find outside the show and be willing to experiment with new colors or new shapes!

Most of all, just have fun. Bead shows are a wonderful treat and can be a great resource, both for beads and for meeting your fellow beaders! The beading community is pretty great and I highly recommend you dive in and join the fun.

So, what are your favorite bead shows? Have any tips that I missed?

Posted in Tips and Tricks | Tagged , , , , , , , , , , , , , , , , | Leave a comment

New Pattern – Follow the Rulla Brick Road

Next Sunday I will be making the drive up to Kettering, OH to teach my Follow the Rulla Brick Road bracelet at Carole Ohl’s lovely bead shop – The Bead Stash.  Carole’s shop is a wonderful place to spend a Sunday afternoon and I am always honored to teach there.

This month’s bracelet is the Follow the Rulla Brick Road bracelet (named by my dear friend Terry), which incorporates either Rulla or Czechmate Brick beads with 4mm rounds, bicones, and seed beads. The color combinations are endless. These two are currently at the Stash on display.

FollowRUlla


I’ll also be bringing some extra bracelets for color palette examples and inspiration. I’ve made bunches of this design and they can range from stylish and casual to delicate and dressy with just a few changes in bead selection.

P1050959 P1050828 P1050954 P1050824

The red/gray bracelet in the upper right corner and the black/metallic bracelet from Carole’s photo are both made with Rulla beads, while all the others are made with Czechmate Bricks. Both shapes work just fine with this pattern, but I have found more color finishes that I like in the Bricks.

The class runs from 1pm – 3pm on Sunday, July 13th. There’s more information here about the class as well as contact information for Carole to sign up if you’re in the area.

If you don’t live nearby or aren’t really the class-taking type, I also have the pattern available for sale on Etsy here.

il_570xN.588694522_d33p

Anyway, I hope to see some familiar faces next Sunday! Happy Beading, everyone!

Posted in New Pattern Annoucements | Tagged , , , , , , , , , , , , | Leave a comment

Here There Be Dragons!

WARNING: This is a long, treacherous post full of Serpents, Dragons, and about a million links. Continue at your own risk.

I’d been working on a gift for a friend lately and she finally got it in the mail, so I can post about it without ruining the surprise!

P1060264


This is Kate’s baby Slytherin serpent in Ravenclaw colors, to represent her mixed Harry Potter affiliations. I’m just glad she’s not a Hufflepuff, like me. Can you imagine trying to bead a badger?

P1060265         P1060263

Kate doesn’t wear much jewelry, which made making her a gift very difficult, since I’m a bit of a one-trick pony. She did, however, just get a brand new car that she adores (and has named Vera), so this little guy was made to hang from her rear view mirror.


P1060262


This little serpent is my version of Rrkra’s S-Dragon Tutorial, and by “version” I mean simply that I left off the spiked tail and head decorations to turn her dragon into a snake.  She has two tutorials available for this design. This is the original tutorial that I learned from and then this one is more photo-oriented for those folks who are more visual.

All her tutorials are free, and this amazing artist is kind enough to allow her designs to be sold, even without credit. (But seriously, guys, give her credit if you use her designs. It’s only fair and I will be so disappointed in the beading community if you take advantage of her generosity.)

P1060279 P1060281  P1060282 P1060280

She also has way more tutorials available through her Deviant Art account, including one for these darling fishies that I made awhile back. This fish tutorial can be found here.

She has other fish tutorials, as well as instructions of how to make components, like wings, wings, more wings, and this feather. My dear friend Jenni decided to take up beading a few years ago (in addition to her amazing knitting) and then whipped up these babies in a heart beat.

jenni fish jenni wee dragon little toothless teeny night fury


The tiny fish tutorial is here and the blue dragon is Jenni’s combination of the S-Dragon tutorial and one of the wing tutorials. The little black one (modeled after Toothless from How to Train your Dragon!) is from this tutorial here.

Jenni’s beadwork is amazing, but you’ve also gotta check out her knitted mythical creatures. Dragons everywhere! Check out Jenni’s blog here – you won’t regret it! There are dragons and unicorns and all sorts of beautiful, poseable, knitting masterpieces. The lady is mad, I tell ye.  I mean, look at this beauty!

1476702_10201121439219734_1458542822_n

Anyway, that’s enough shameless plugging for one blog post, but I’m sure you guys were getting sick of my stuff. Seriously though, check out Rrkra’s tutorials and Jenni’s work as well. There are some pretty amazing things out there. But, of course, be careful not to get too close to one of these dragons’ craft stashes, or you may get toasted!

Posted in Beading Techniques and Experiments, Storytime | Tagged , , , , , , , , , , , , , | Leave a comment

Bridget’s Modeling Career

I have a pretty good system now for publishing my original patterns. Whenever I come up with a new design, I teach it at Beaded Bliss in Harrison, OH to a group of my dearest bead-lady friends. This last Saturday, for example, we all gathered together to work up my new  Stash Worm Bracelet.

DSC02731

Mine is the peach/brown one on the upper left.

During these classes, the ladies are kind enough to proofread my work and roundly abuse me should I misspell anything or if any particular step in unclear. They let me have it the one time I skipped  “figure M” and went straight from “L” to “N”. They teased me mercilessly about having a degree in Literary Studies and not knowing my ABC’s.

After these classes, I usually dart home to get pictures of my samples before the sun sets. I can’t take the photos earlier, because my samples are usually in the shop advertising the class. This particular photo session went fairly well – I had a lot of sun and the tree near my balcony was dappling the light just right.

Then Bridget decided to make her modeling debut.

Bridget's little calico butt is interrupting my photo shoot.

Bridget’s little calico butt is interrupting my photo shoot.

P1060259P1060261


Eventually, the little drama queen realized that fighting inanimate objects for my attention was beneath her and allowed me to continue. I actually got some pretty good shots of the bracelets before the light finally died away completely.

P1060256 P1060247

P1060255 P1060257

My last step before publishing is to add my logo to the cover photo along with the name of the pattern. Then the listing can be posted to Etsy and a new pattern is born! I could never get these out so quickly or review them so meticulously without my wonderful friends at Beaded Bliss. And while Bridget was certainly not helpful with her camera-hogging ways, it’s nice to have her about to admire my work.

Click through the picture for a link to the pattern.

Click through the picture for a link to the pattern.

Posted in Storytime | Tagged , , , , , , , , | Leave a comment

In which Sam makes a mistake…

Generally, I use 6lb or 8lb Fireline and I like to be well-stocked in both sizes and both Smoke and Crystal colors. Unfortunately, when I ordered my last role of Fireline, I apparently bought 20lb instead of 8lb.

What on earth am I supposed to do with 20lb Fireline?

What on earth am I supposed to do with 20lb Fireline?

Now, 8lb Fireline is already a bit stiff to work with and does not get along well with my stash of 15/0 seed beads, so you can imagine my dismay upon realizing my mistake. But, since I bought a huge 125 yard roll of the stuff, I figured that I would need to find some way of using it. I glanced through my bead stash to see what I had on hand with a larger interior diameter.

P1060201

Cubes to the rescue!


I found 4mm Miyuki squares! I absolutely love these colors together (Galvanized Gold, Matte Khaki Iris, and Matte Black AB) and decided to whip up this sturdy Peyote cuff with them. Working peyote stitch with these beads was an absolute dream. They just clicked right together, like giant Delicas. Even with the thick thread, there was plenty of room for reinforcement and tightening up the edges. I did need to use a big eye needle, though. There was no way that thread was going through the eye of my size 10 or 12 needles.

P1060198 P1060197 P1060196 P1060199

The squares were big enough that I could use jump rings to attach my clasps. I chose two strong magnetic clasps in a complimentary antique tone. Normally, I don’t like to use magnet clasps without a safety chain, but having two of them eased my mind a bit. Plus, with the use of the jump rings, I could easily extend this bracelet if it did not fit a prospective buyer.

Such was my first inventive use of my accidentally obtained 20lb Fireline. I let you know what else I come up with, since I have so much left. It’s been a fun to challenge to think up ways to use it, but I’ll definitely be more careful next time I order.


Posted in Bead and Product Chatter, Beading Techniques and Experiments, Storytime | Tagged , , , , , , , , | 6 Comments

How I Illustrate my Patterns

I get a lot of questions when I teach classes about my written patterns and how I illustrate the steps, so I thought I would do a quick write up about it here. Quick warning: I am not a professional illustrator and definitely consider myself a beginner. The more I write patterns, the more the illustrations improve, but I am certainly not an expert.

The software that I use is Inkscape, which is a wonderful tool for creating vector illustrations. Even more importantly – it absolutely free. You can download Inkscape for Windows, Mac OS, and even Linux. Just click on the Download tab and choose your operating system. It’s not piracy because the creators have chosen to make it available to the public, so don’t worry about illegally downloading anything. The link is legal and safe.

You can download Inkscape here.

Once you download Inkscape, don’t be overwhelmed by the amount of tools and buttons. There is a lot that you can do, yes, but I personally only use two or three tools for my patterns.  I learned how to use Inkscape from a wonderful beader who wrote a tutorial about how to use Inkscape specifically for writing beading patterns. It’s a long tutorial (about six pages), but she’ll show you how to get Inkscape all set up for beading designs and will walk you through the project step by step and in great detail.

Her tutorial is here.

I usually make my illustrations in Inkscape and then just copy and paste them into a Word document, where I write my instructions and add labels to the pictures.

Inkscape

This is what the screen looks like after you get your template set like the tutorial.


It’s easy enough software to use, with a bit of practice (and that tutorial is very detailed). Hope this helps any prospective designers out there! Now get those creative juices flowing and start writing patterns!

Posted in Tips and Tricks | Tagged , , , | 3 Comments

Finished Earrings!

P1060186 P1060187 P1060188


I finally decided to just dangle some antique bronze jump rings and the rest of the 3mm bicones and czech crystals that I used in the Rivoli bezel. I also attached them to long antique bronze kidney ear wires, to give them extra swing! I am really pleased with how these turned out and might make some similar ones soon.

P1060184

Posted in Beading Techniques and Experiments | Tagged , , , , , , | Leave a comment

Wednesday Bead Night – What’s on my bead mat?

I went to Beaded Bliss this past Wednesday to hang out and work on a wedding order that I got. A bride-to-be saw a picture of my one of my SuperDuo Fishtail bracelets and requested that I make some in her wedding colors: white, yellow, and gray. Sounds easy enough, right?

P1060168P1060172

Well, she has a rather large wedding party and needs ten of them. Ten!  That’s not a difficult order and she doesn’t need them for a few months, but I must admit – I’m starting to dream in yellow, gray, and white!

So, after making a few of these little bracelets, I decided that I desperately needed to work on something else. I’ve been in love with really long earrings ever since I cut my hair short, so I decided to work up a pair of those. I only got the Rivoli bezels done and I’m not sure what I am going to do to finish them up, but I really wanted to share them.

P1060167

I started with 14mm Rivolis, 3mm Czech crystals in an aqua/topaz color, and iridescent 3mm Swarovski bicones in a soft green color. The seed beads in a pile in the corner are 15/0 Miyuki in matte olive.

P1060182

P1060183          P1060181

Didn’t they turn out nice? I used Sahara 14mm Rivolis and used Gail Damm’s Rivoli Dangles pattern from Creative Beading vol. 4. She uses a picot stitch to capture the Rivolis, which I much prefer to making peyote bezels. (My loathing for making peyote bezels is beyond human understanding, I tell you). I also left the back open (the bottom left photo is how the Rivolis look from the other side), since long earrings tend to twist.

All in all, it was a great bead night at Beaded Bliss and I am quite pleased with how these components came out. I will be sure to post pictures for the finished earrings when I decide what to dangle from them!


Posted in Beading Techniques and Experiments | Tagged , , , , , , , | 1 Comment