It’s Sale Time!

Hello, everyone! I hope you all have had a wonderful holiday weekend filled with pie and shopping and all sorts of goodness. I just wanted to make a quick post to remind everyone that Monday is Cyber Monday, a day where Western capitalist frenzy spills over onto the internet. Since, I sell jewelry and beading patterns online, I am taking advantage of this mass hysteria and extending my Black Friday sale!

black friday ad - 2014 copy

I have a lot of finished jewelry for sale, but the beadweaving patterns are also on sale, just be sure to use the coupon code “handmadeholiday” during checkout. After you add the items you want to the cart, click on your cart, and you should see a little line saying “Apply Coupon Code”. It can be hard to see, so I took a screen shot.

CouponCode

I blurred out the purchase for privacy reasons, but that pendant is from THEAElements on Etsy. I adore her stuff.

Hope that helps clear things up. This is a great opportunity to grab up beadweaving patterns too. I’ve got lots of new stuff and many patterns feature new bead shapes!

I’ve got my Diadem Bracelet for Silky Beads and my Peony Necklace for Piggy Beads…

cover       Cover

My Oculus Pendant for Luna Cabs & my Toying with Tiles Bracelet for Czechmate Tiles…

cover      Toying with Tiles Pattern

Follow the Rulla Brick Road can use Czechmate Bricks or Rulla Beads…

RullaBrick Road copy

And, of course, plenty of patterns for SuperDuos…

P1050573 P1050344 copy P1040783 copy 164898_532566206781495_538603971_n copy

And regular beads and seed beads as well.

487396_451883928183057_858248646_n copy Cover copy Title Pic P1050296 copy CoverWorm copy


Lots and lots to choose from! Enjoy shopping, everybody!
And don’t forget “HANDMADEHOLIDAY” ! :)


Posted in Blog and Shop Announcements | Tagged , , , , , , , , , , , , , , , , , , , , | Leave a comment

Sam Goes to Class

So, I have teaching jewelry classes frequently for at least three years now. When I worked in a bead shop, we would have at least two a month ranging on everything from basic earrings to bead weaving and kumihimo.  Now that we’re online and I don’t interact with customers directly, I teach my original designs at local bead stores as a guest instructor about once a month. I love teaching and like to think I’m not an awful instructor.

All that being said, I had never actually taken a beading class until a month ago.

Beaded Bliss is one of my favorite bead stores in the world. I hang out there for bead night once a week and teach there as often as I can. When I was visiting a while back, Cathy (the store owner) showed me a design she had recently come up with for the two-hole triangle beads.

DSC00155

It’s sort of modified flat spiral for two-hole triangles.

I loved the look of it and the class actually fit my schedule, so I signed up immediately! I picked out my beads…

I went with a safe olive/gray color scheme to start with.

I went with a safe olive/gray color scheme to start with.

And I made my first Dragon’s Back Bracelet! The second one was made quickly afterward to solidify the pattern in my head. I hope to make another one soon.

DSC00194 DSC00201 DSC00295 DSC00287

Taking a class from another designer was really, really fun and I hope to be able to do it again int he near future. Thanks for the experience, Cathy!


Posted in Storytime | Tagged , , , , , , , , , , , , , , | 3 Comments

New Design : The Diadem Bracelet with Silky Beads

Since I first started using SuperDuos and came up with my SuperDuo Rosette Bracelet, I decided to try to design with new bead shapes as often as possible. This round I made a bracelet using the new Silky Beads – the Diadem Bracelet!

Silky Beads are similar to Czechmate Tile Beads and Miyuki Tilas, but the two holes run through diagonally, making the bead diamond-shaped, rather than square. If your local bead shop doesn’t carry them yet, I recommend AriaDesignStudio and GCSuppliesTexas on Etsy.

ALABASTER LAZURE BLUE: 6x6mm Two-Hole Diamond Czech Glass Silky Beads (50 beads)


My Diadem Bracelet uses Silky Beads, SuperDuos, 3mm Bicones, and 11/0 Seed Beads. The pattern includes instructions with little connecting circles (left) and without (right).

DSC00266 DSC00273

It looks great in pale monochromatic tones, or in brighter colors…

DSC00278 DSC00309

You can leave out the center criss-cross, or replace the 3mm bicones with little drops…

DSC00335 DSC00344

And the units make great earrings!

DSC00328 DSC00259

All in all, I am really excited about this pattern – especially since my local bead store recently started carrying a wider selection of colors. There are so many fun color combinations to play with!

What about you guys? Doing anything fun with Silky Beads?

Posted in New Pattern Annoucements | Tagged , , , , , , , , , , , , , , , | 2 Comments

A Time to Stitch Six!

I have officially signed up for my first A Time to Stitch Challenge, hosted by Therese and Christine! I have been watching these for a while and I am so excited to finally participate. The challenge this round is to use a chart of some sort to make a piece using peyote, RAW, brick, or square stitch.

This challenge reminded me of a piece I made awhile back for a friend. It was supposed to be Wonder Woman themed and it was my first try at drawing my own Peyote pattern. (Sorry for the poor photos – I yanked them from my old phone)

WW1 WW2 WW3 WW4

I was extra proud of this piece because of the extra work of drawing the chart out on graph paper and then watching the piece come to life in my hands.

P1050653

I think I may try to recreate the experience for this challenge by using a chart that I make myself – as if I need to make my first blog hop challenge MORE difficult! Now I just have to decide on a stitch and design. Wish me luck!

Posted in Challenges and Blog Hops | Tagged , , , , , , , , , | 2 Comments

The Search for the Source

Despite the fantasy novel title, this post is about something pragmatic and useful – finding and crediting original designers of jewelry on the internet!

We’ve all experienced the annoyance of finding a picture of a beautiful piece of jewelry and having no idea where it comes from.  This is frustrating both for the beader looking to buy a pattern and for the designer whose work is floating around the internet without credit. Luckily, there is an easy way to solve this!

I have noticed that Pinterest in particular tends to have a lot of dead pins (pictures without sources or designer credit), so I’m going to use Pinterest in my example. This method will work just as well for any situation where you need to find the original source of a photo, though.

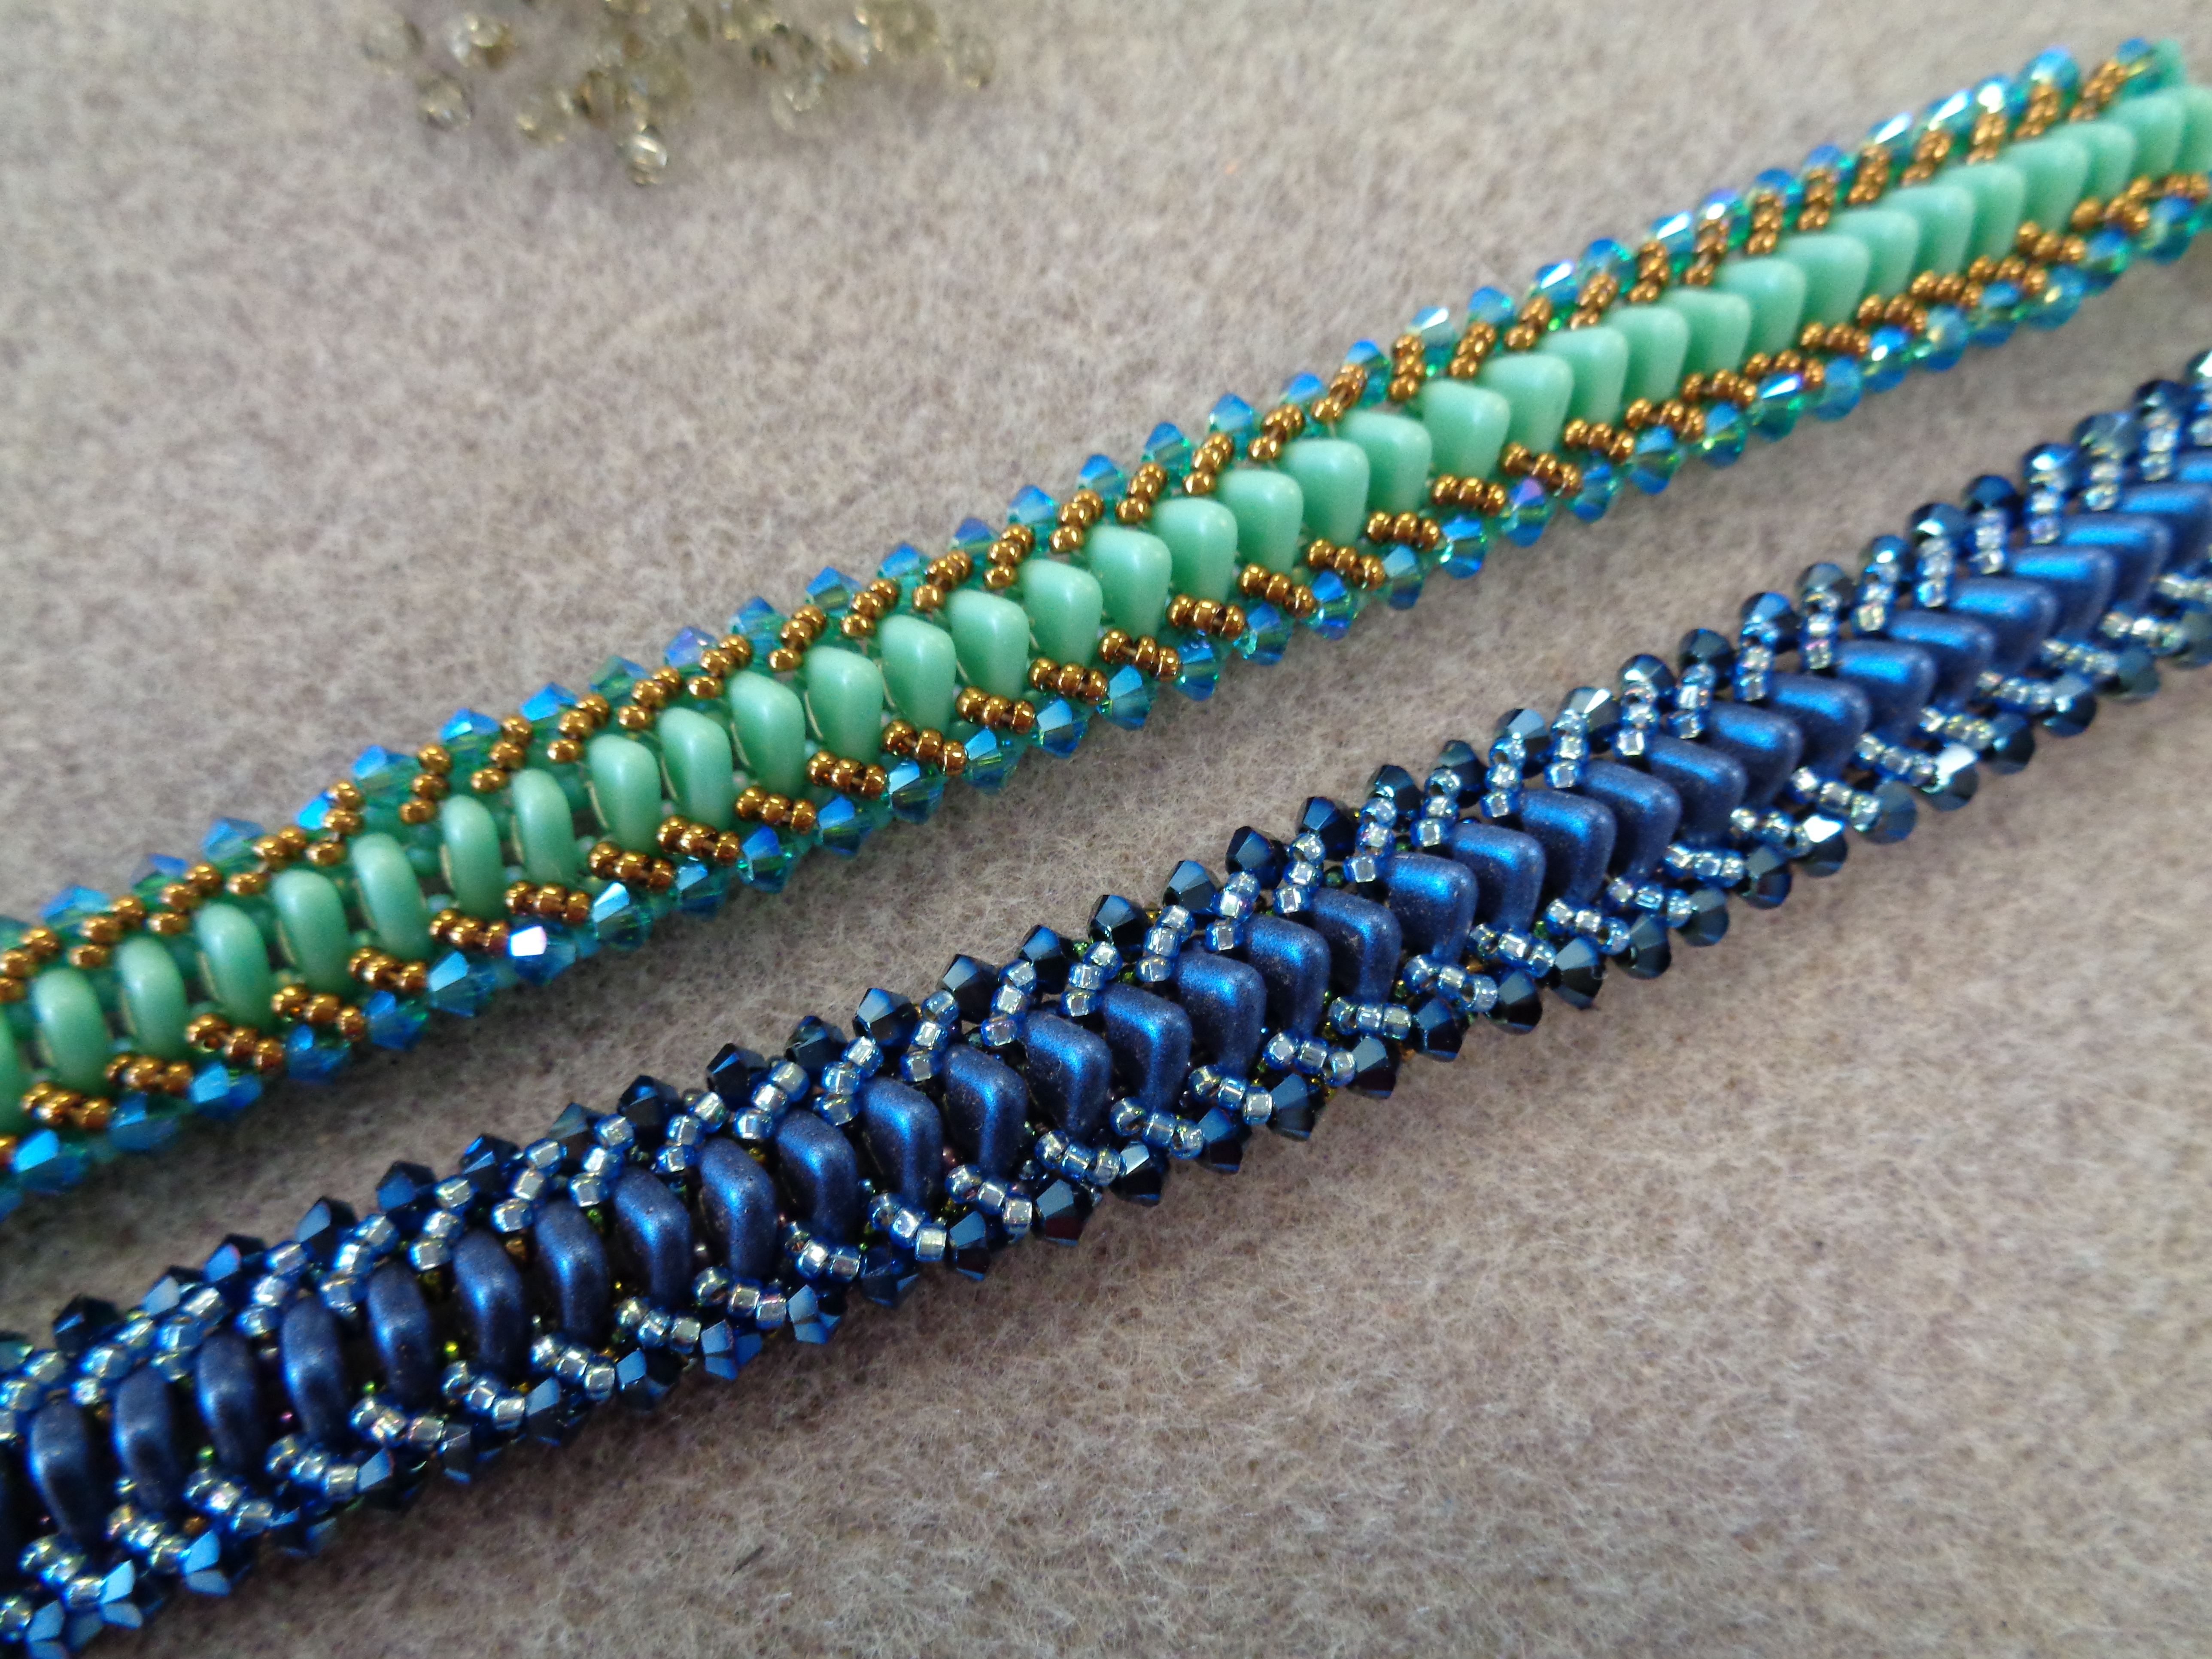
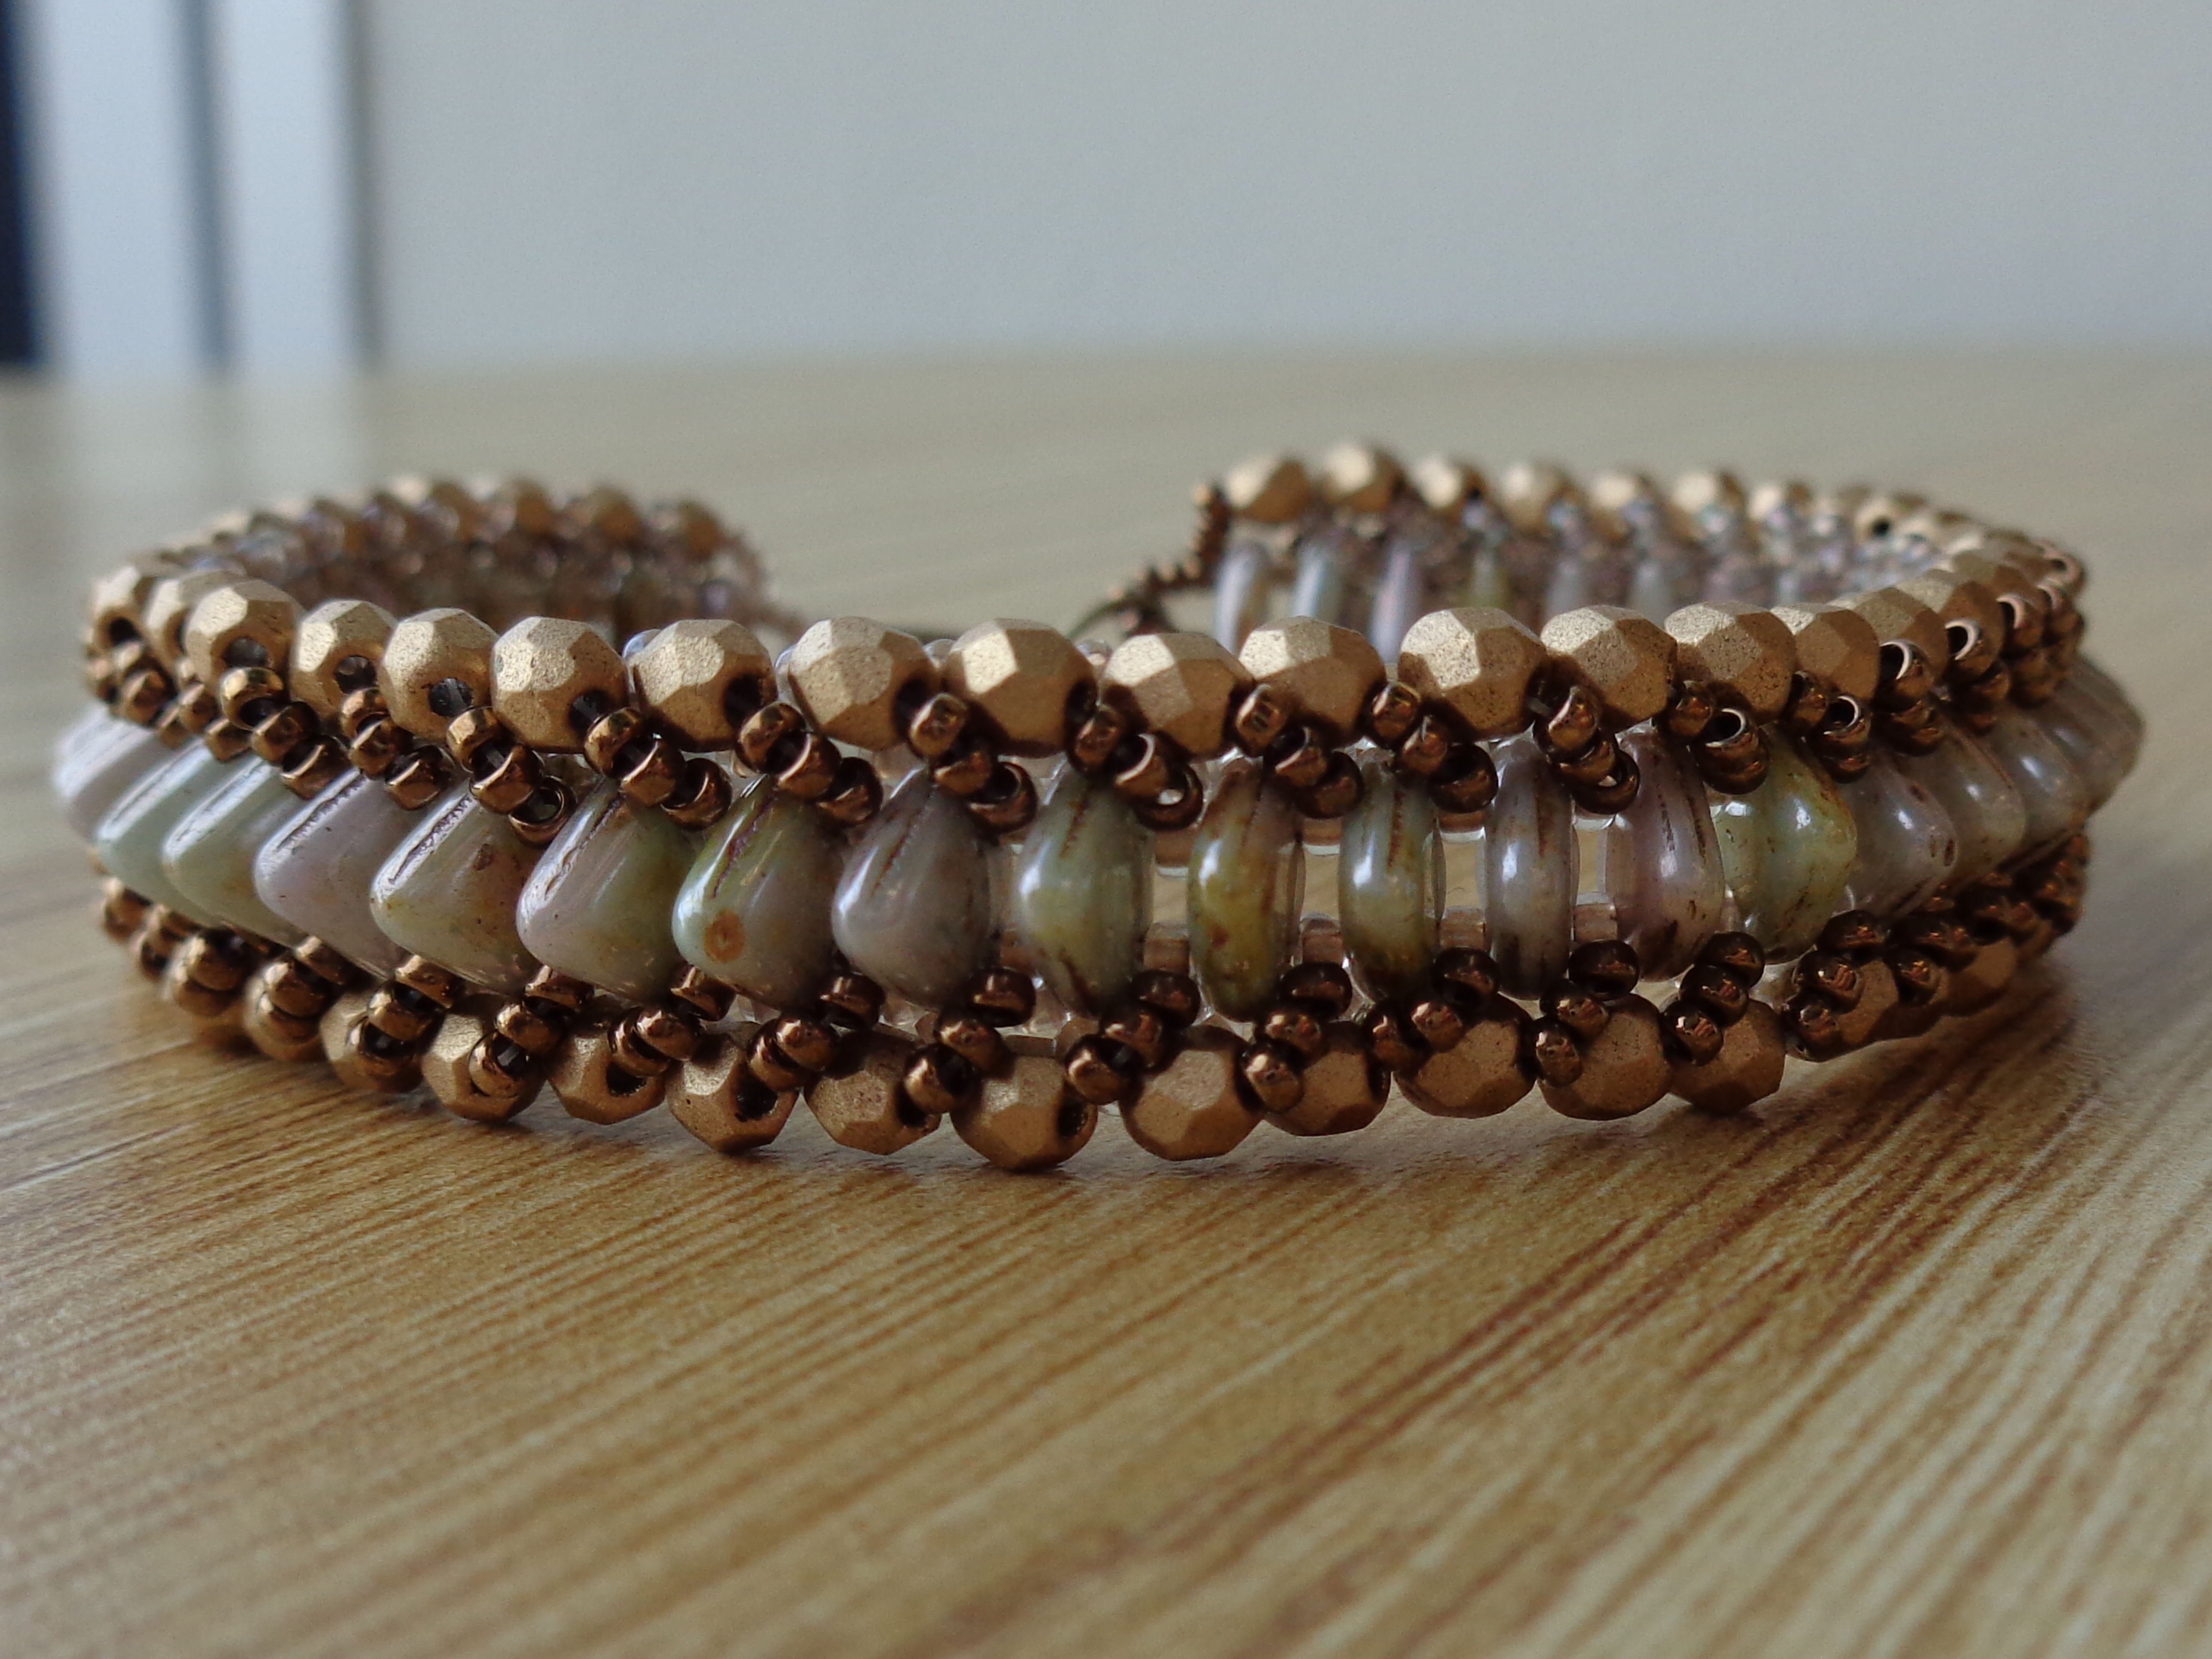
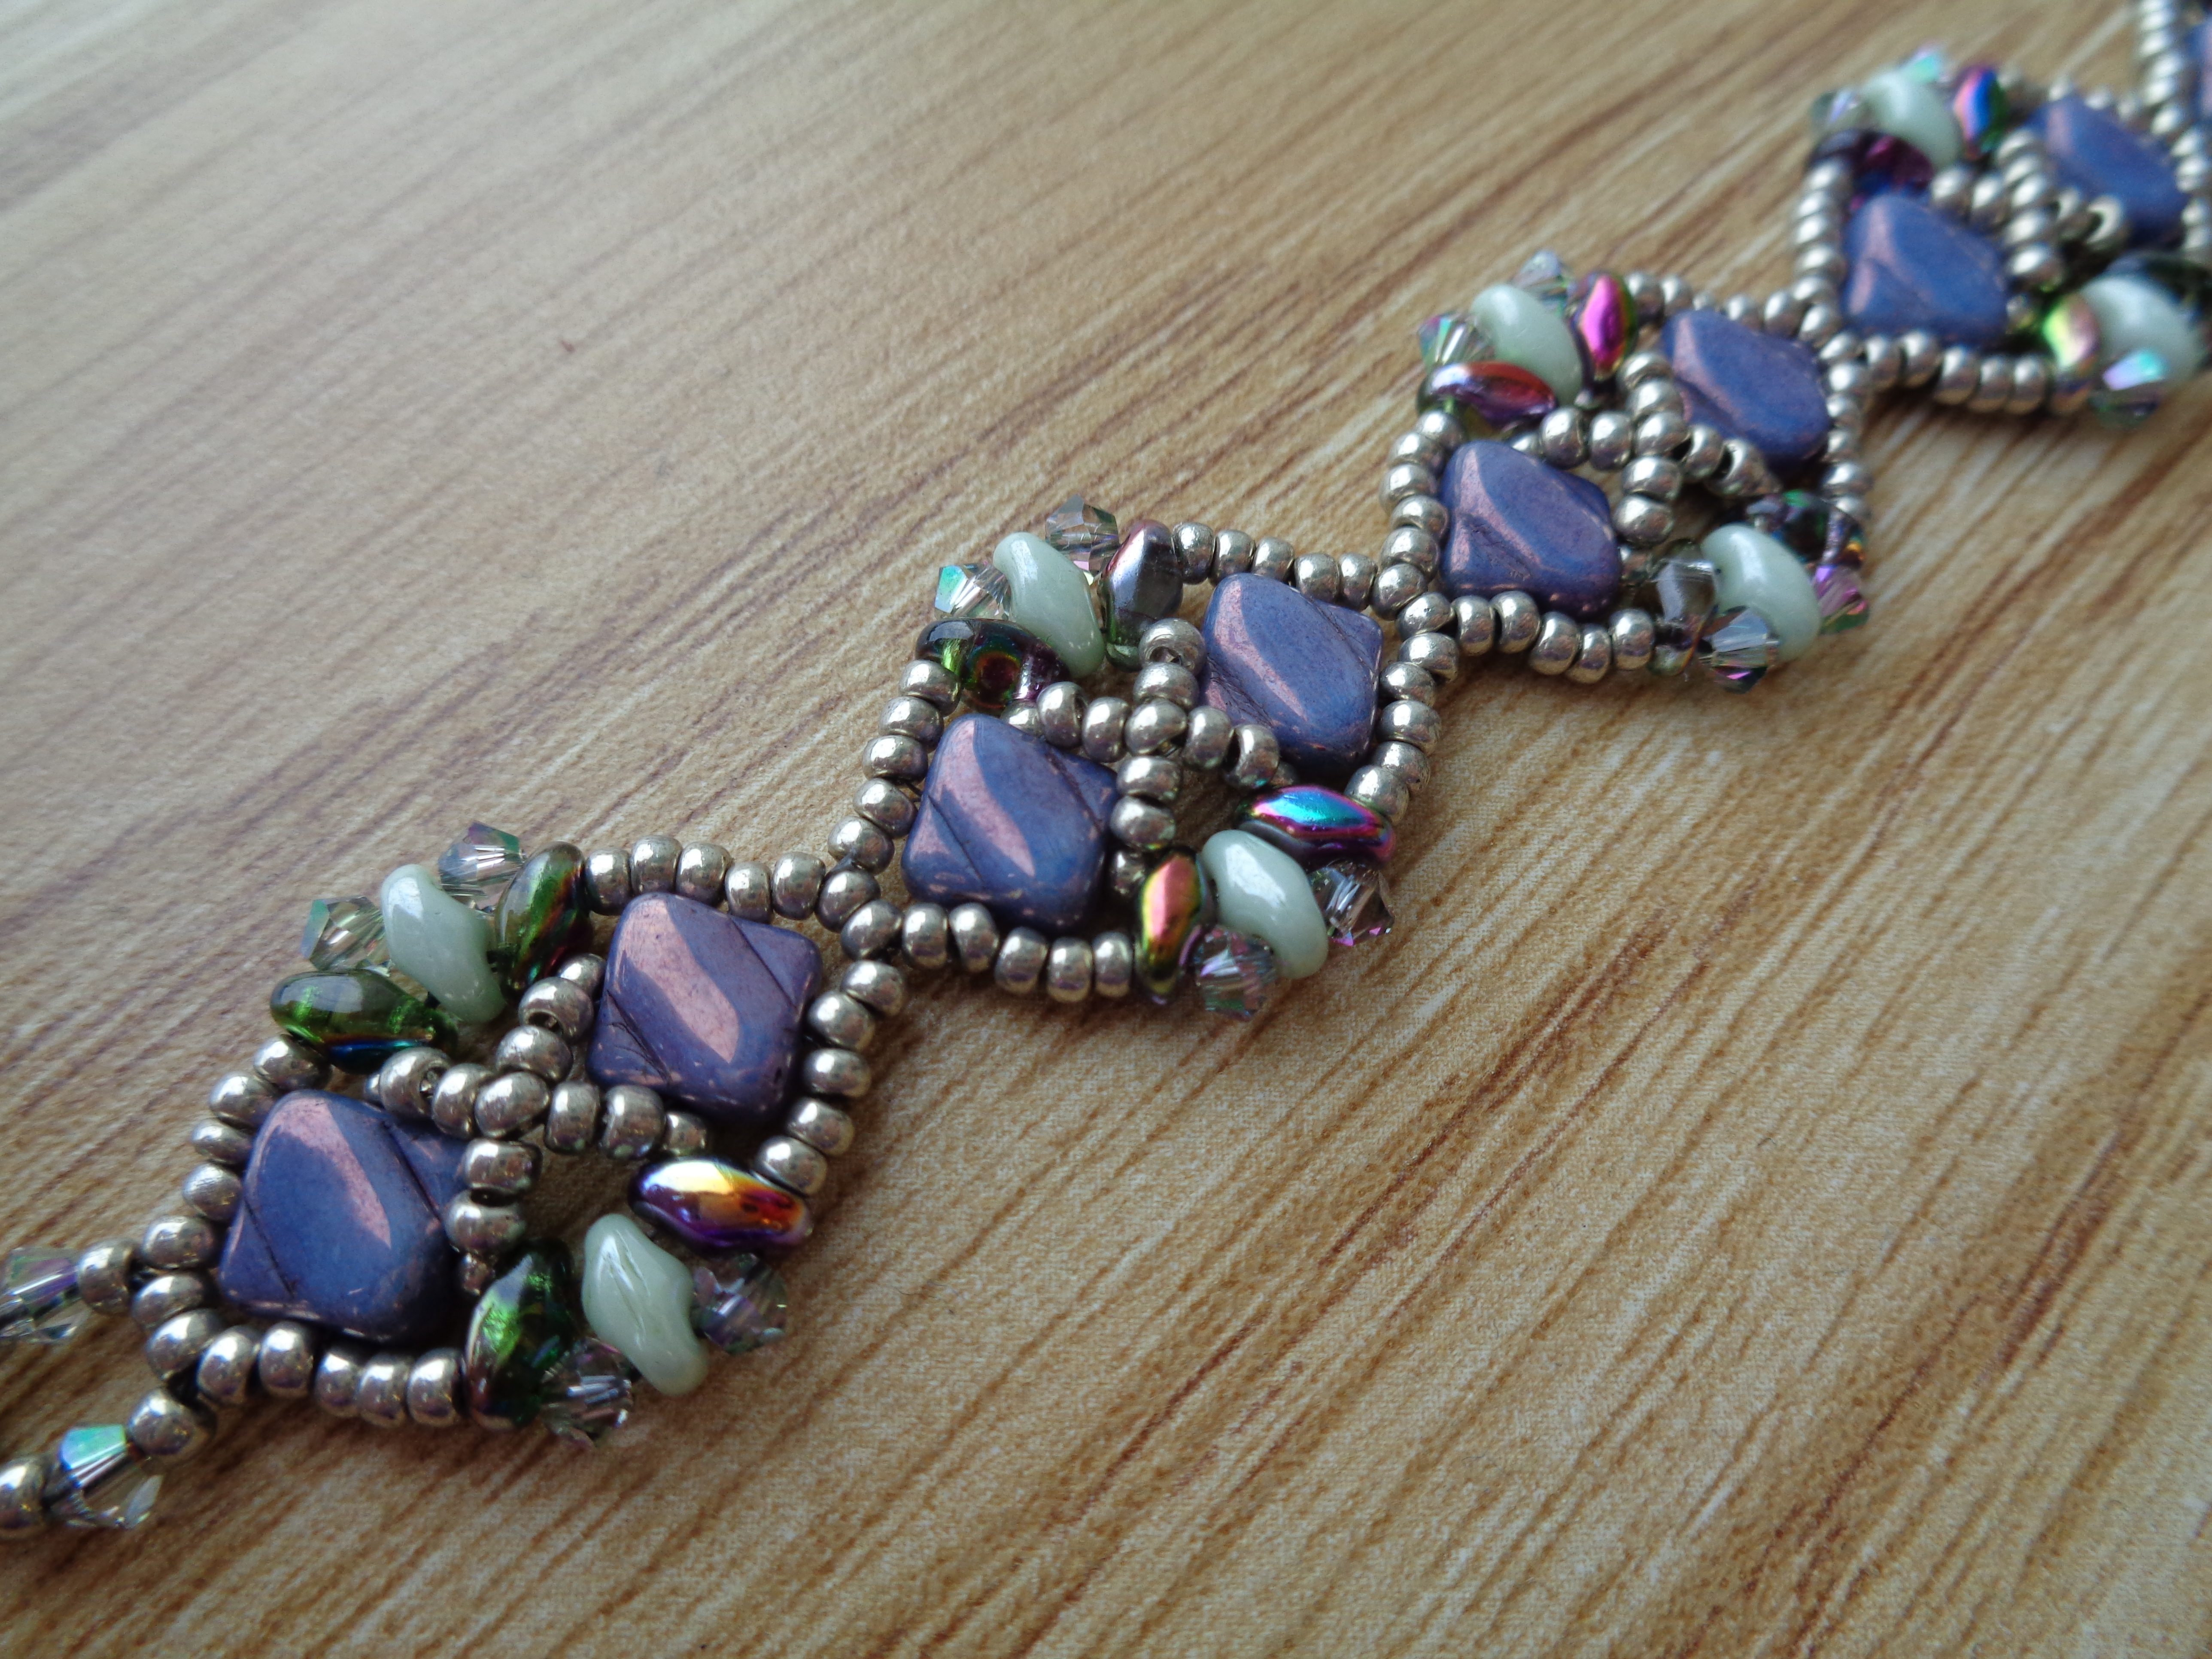
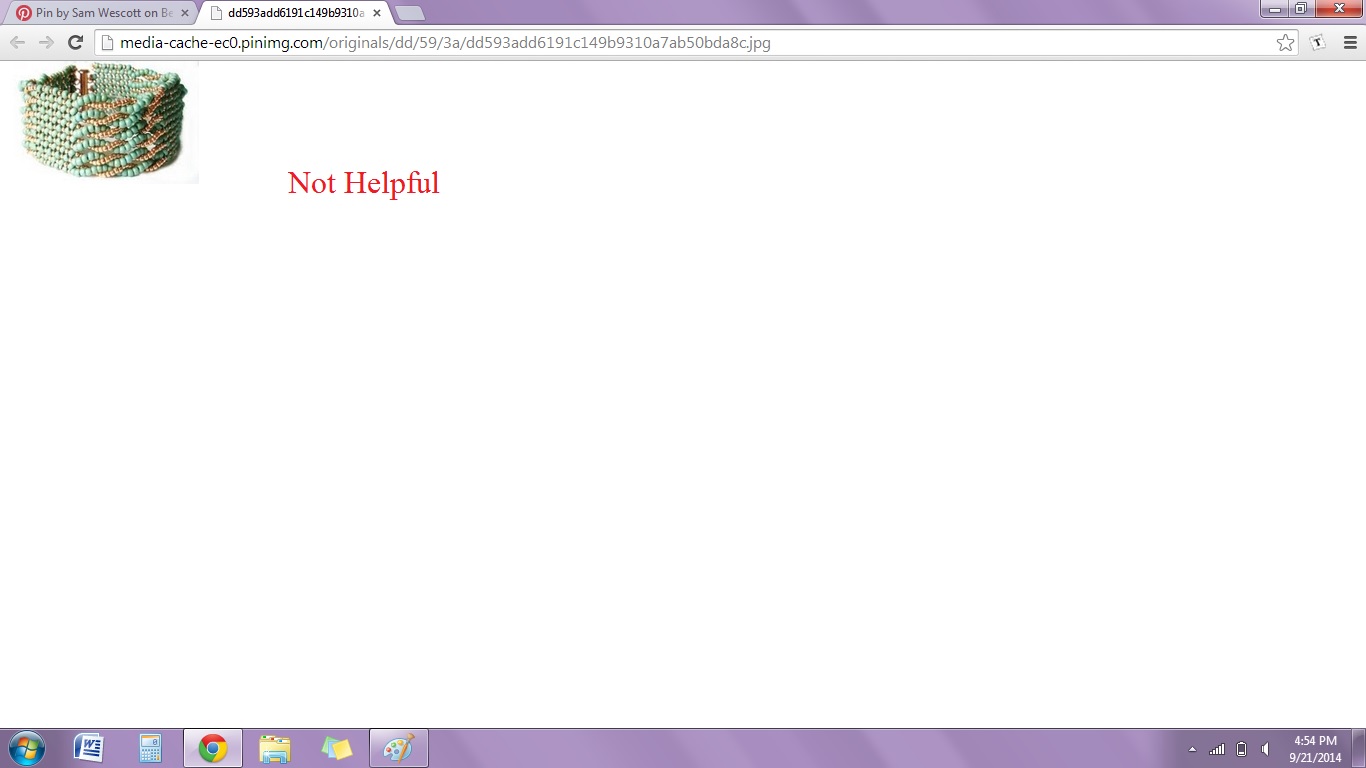
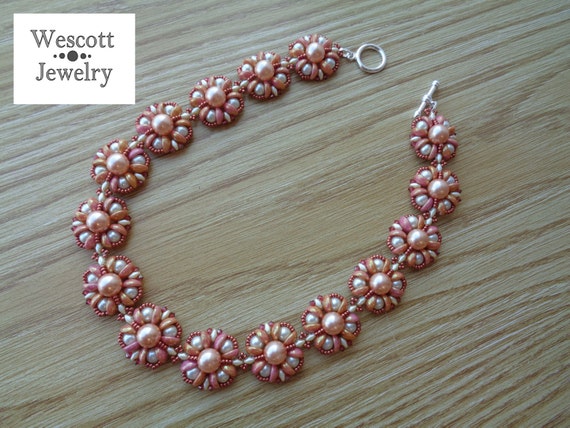
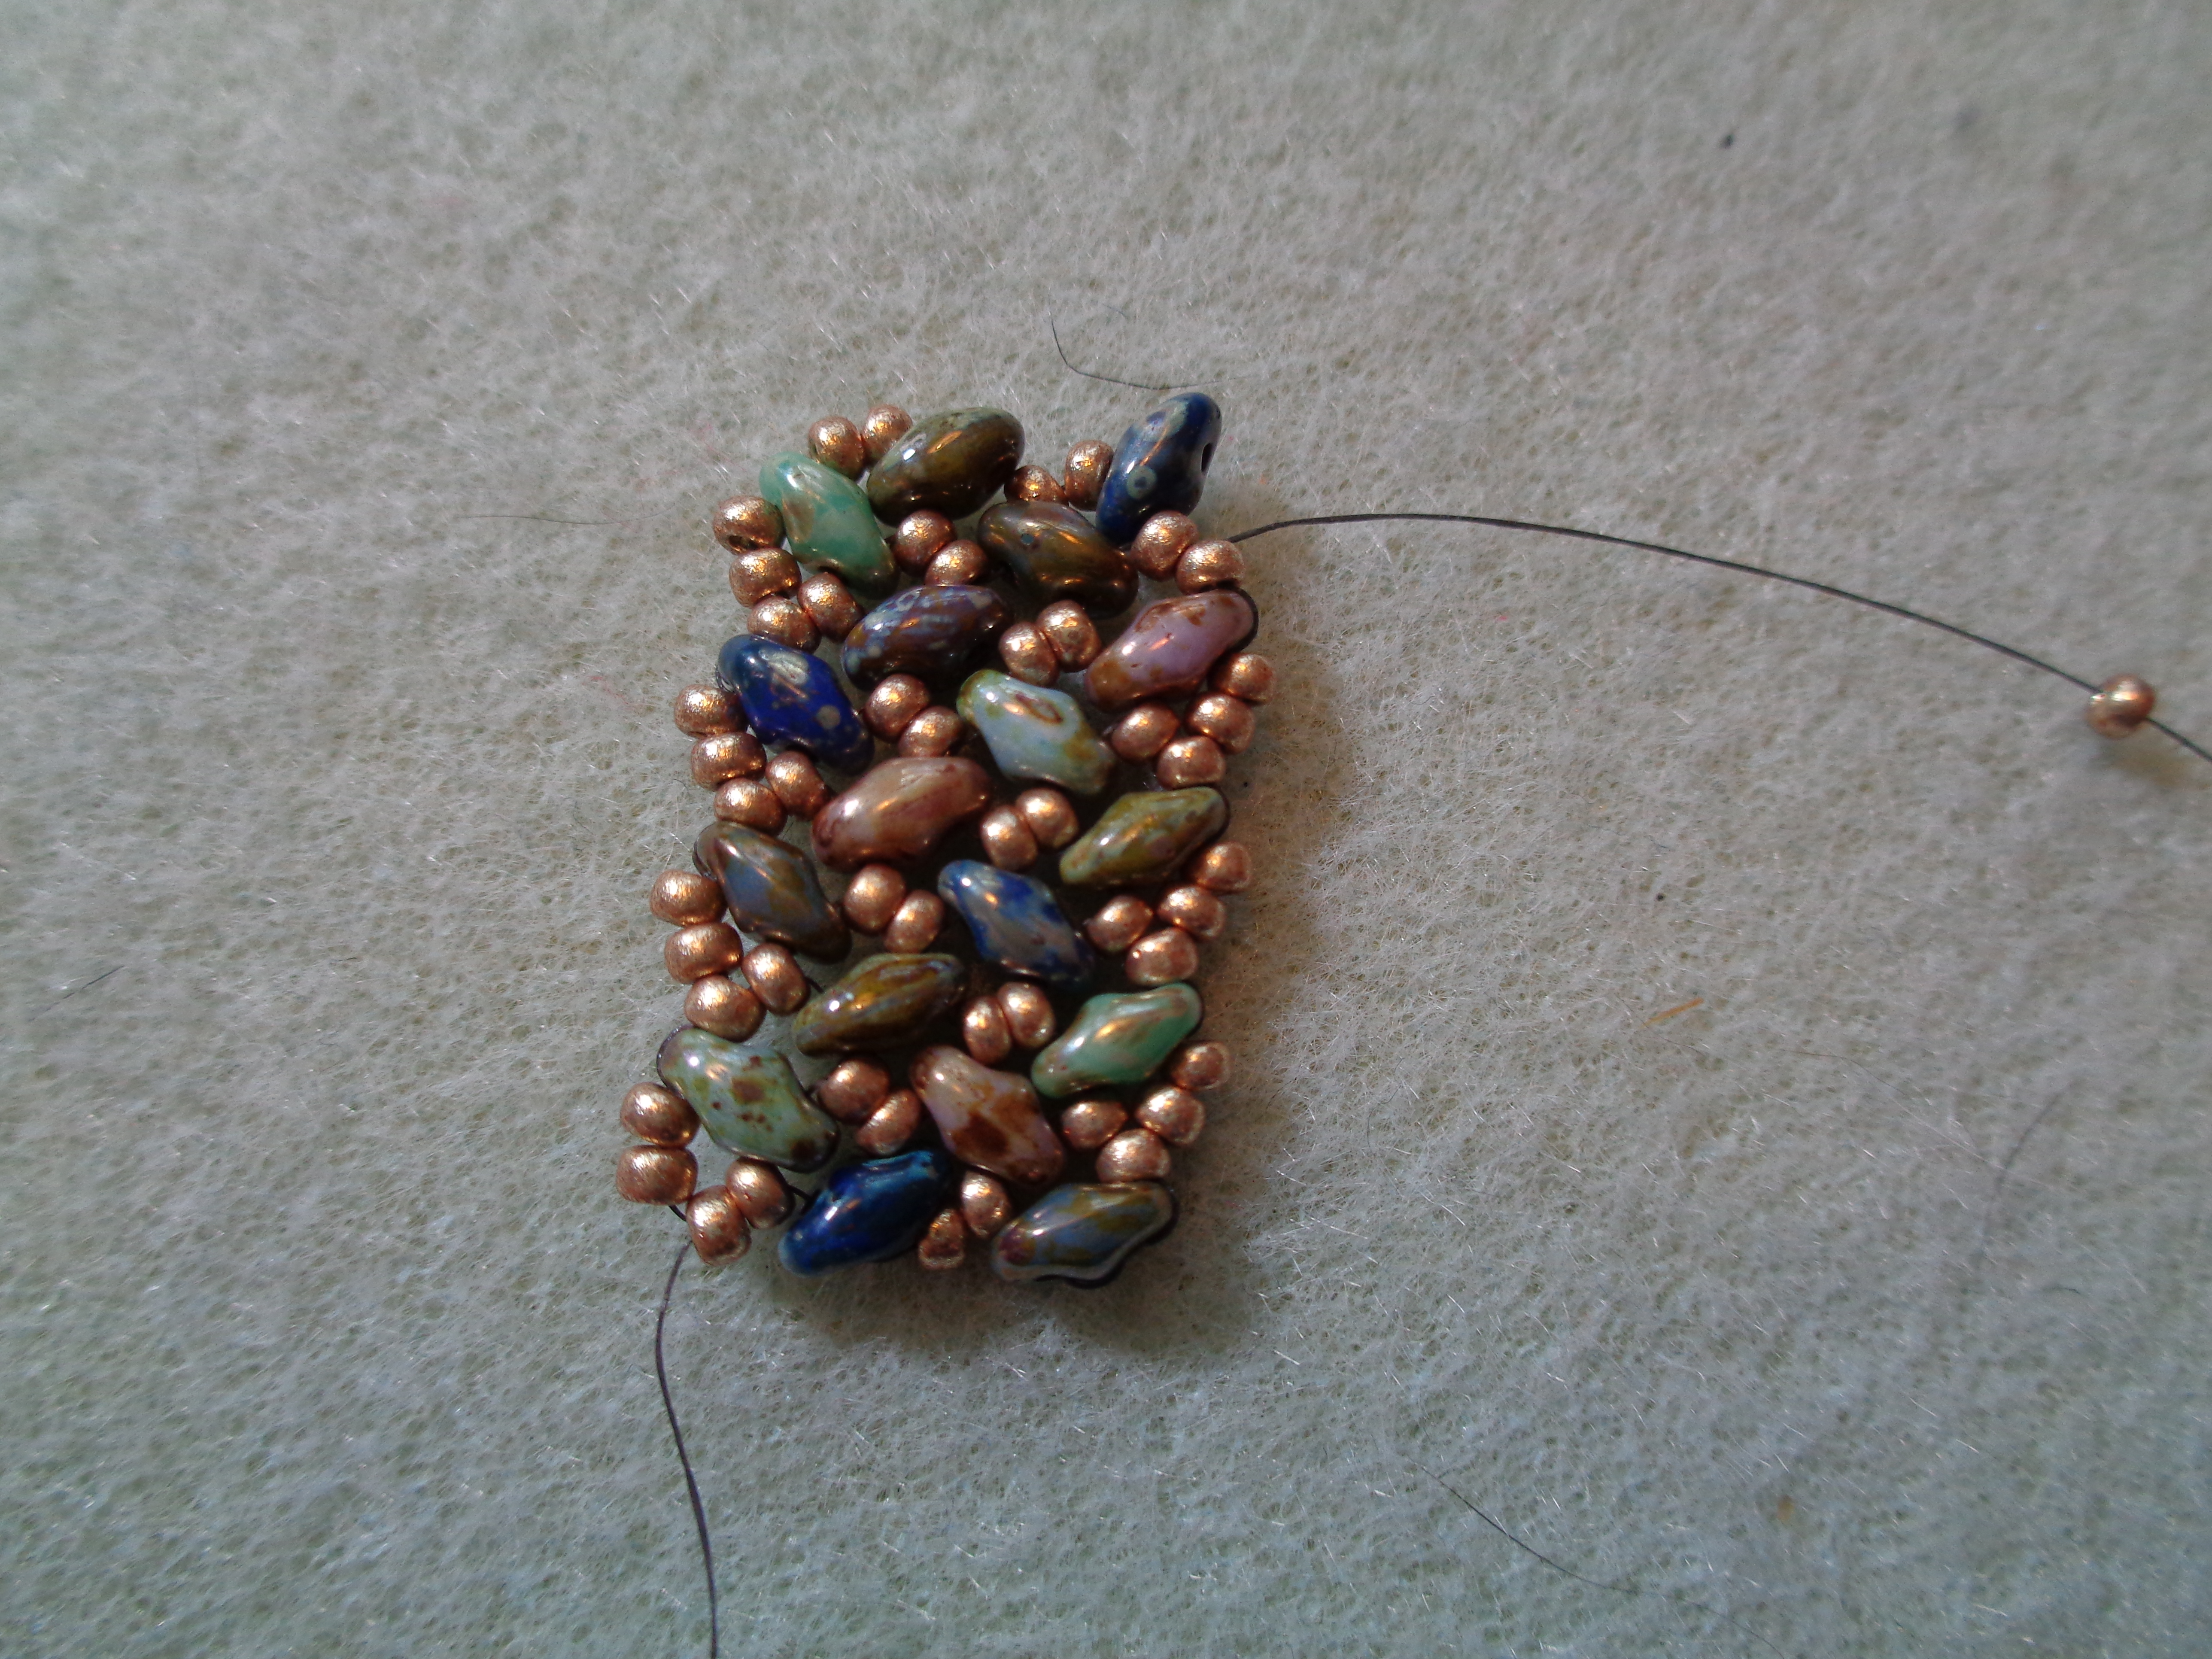
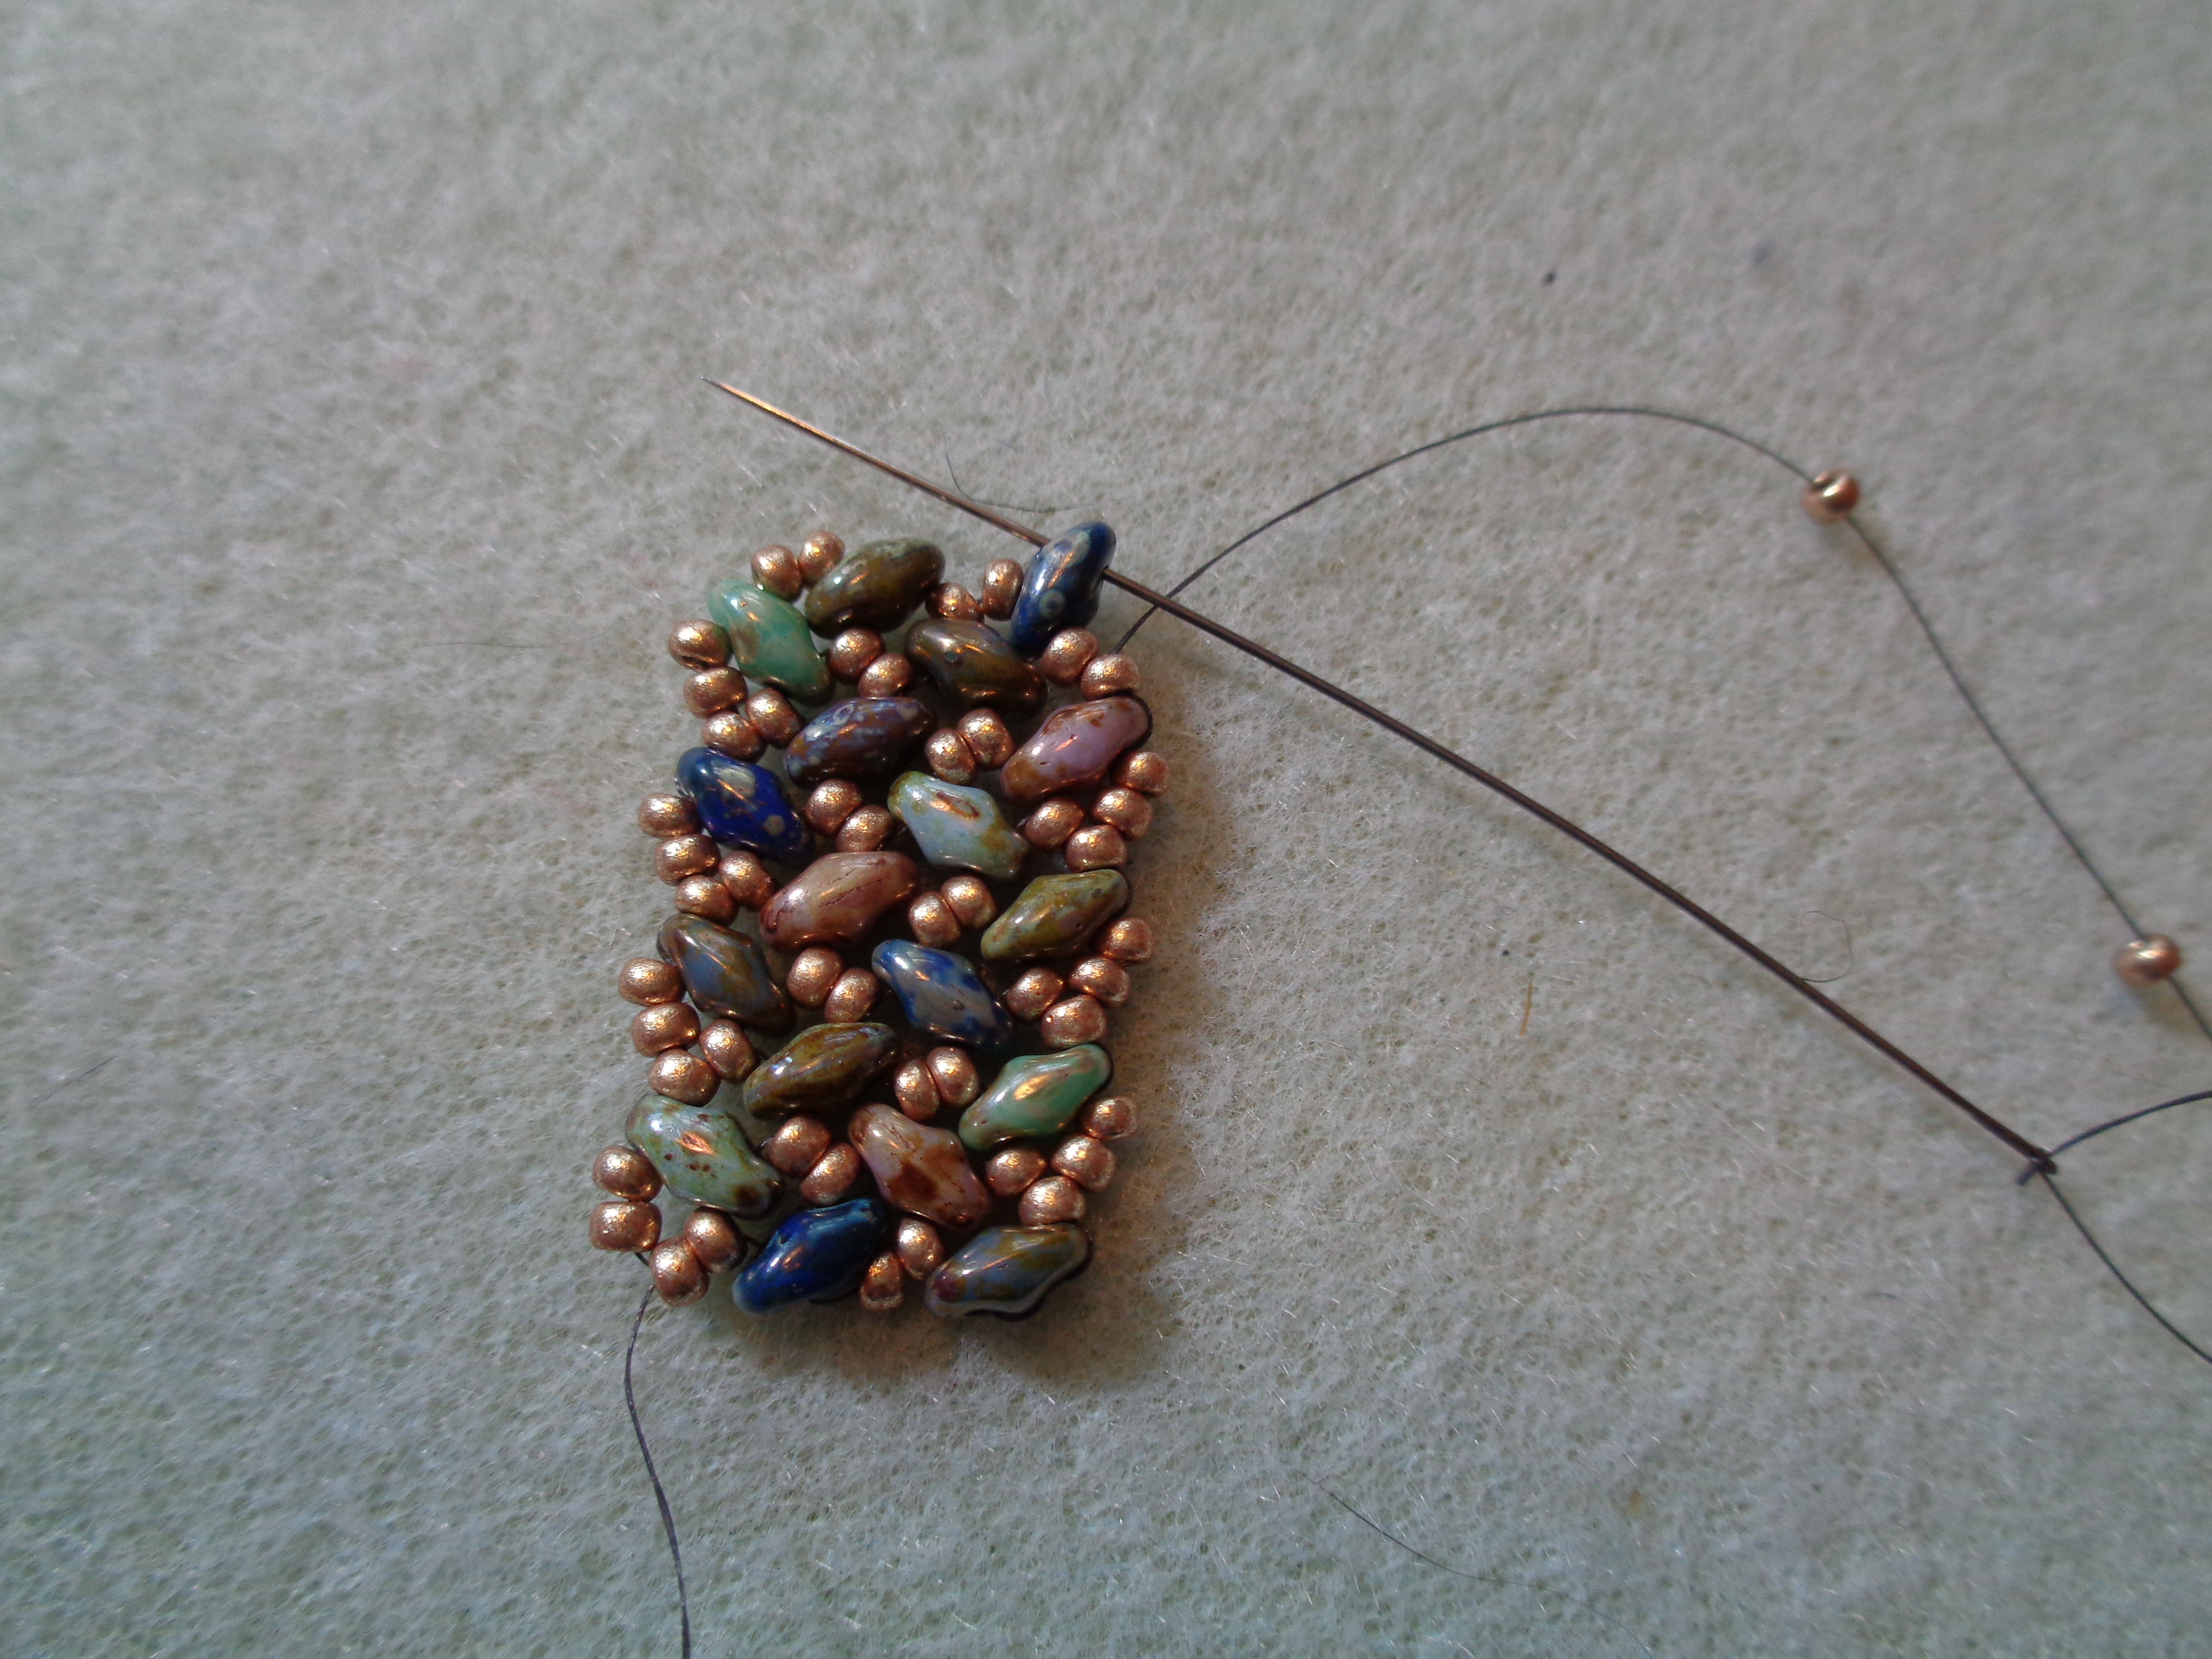
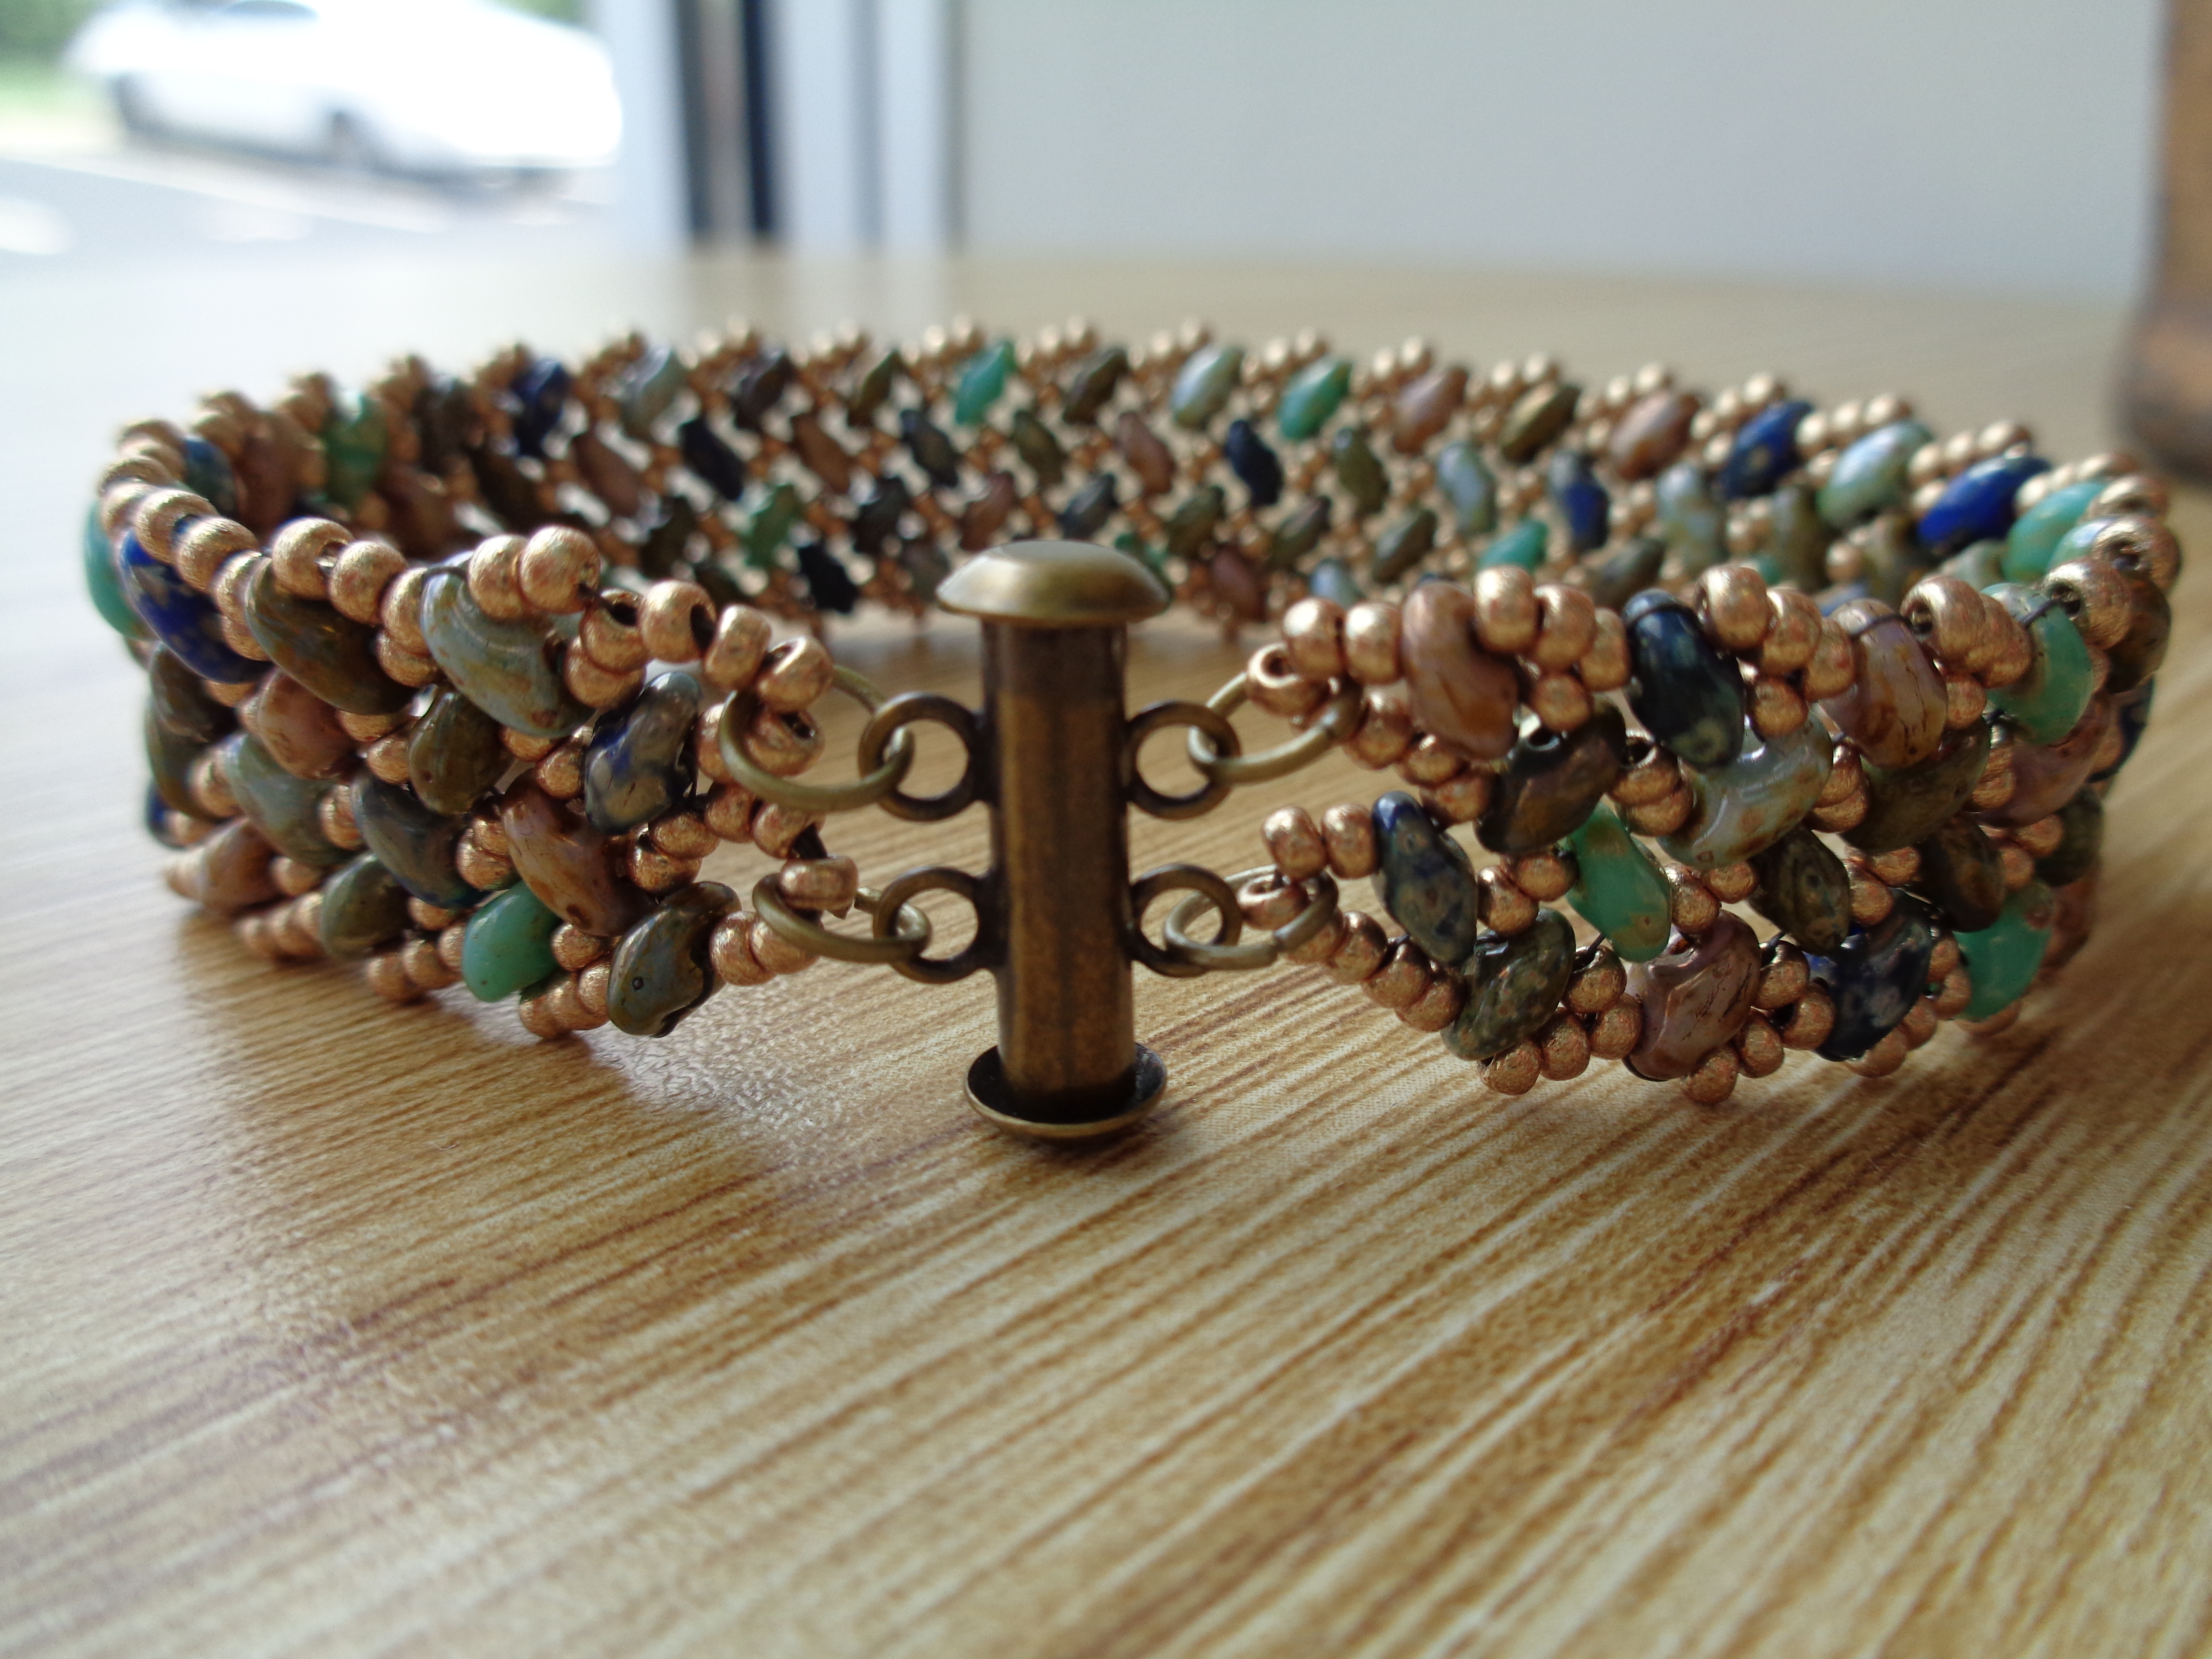
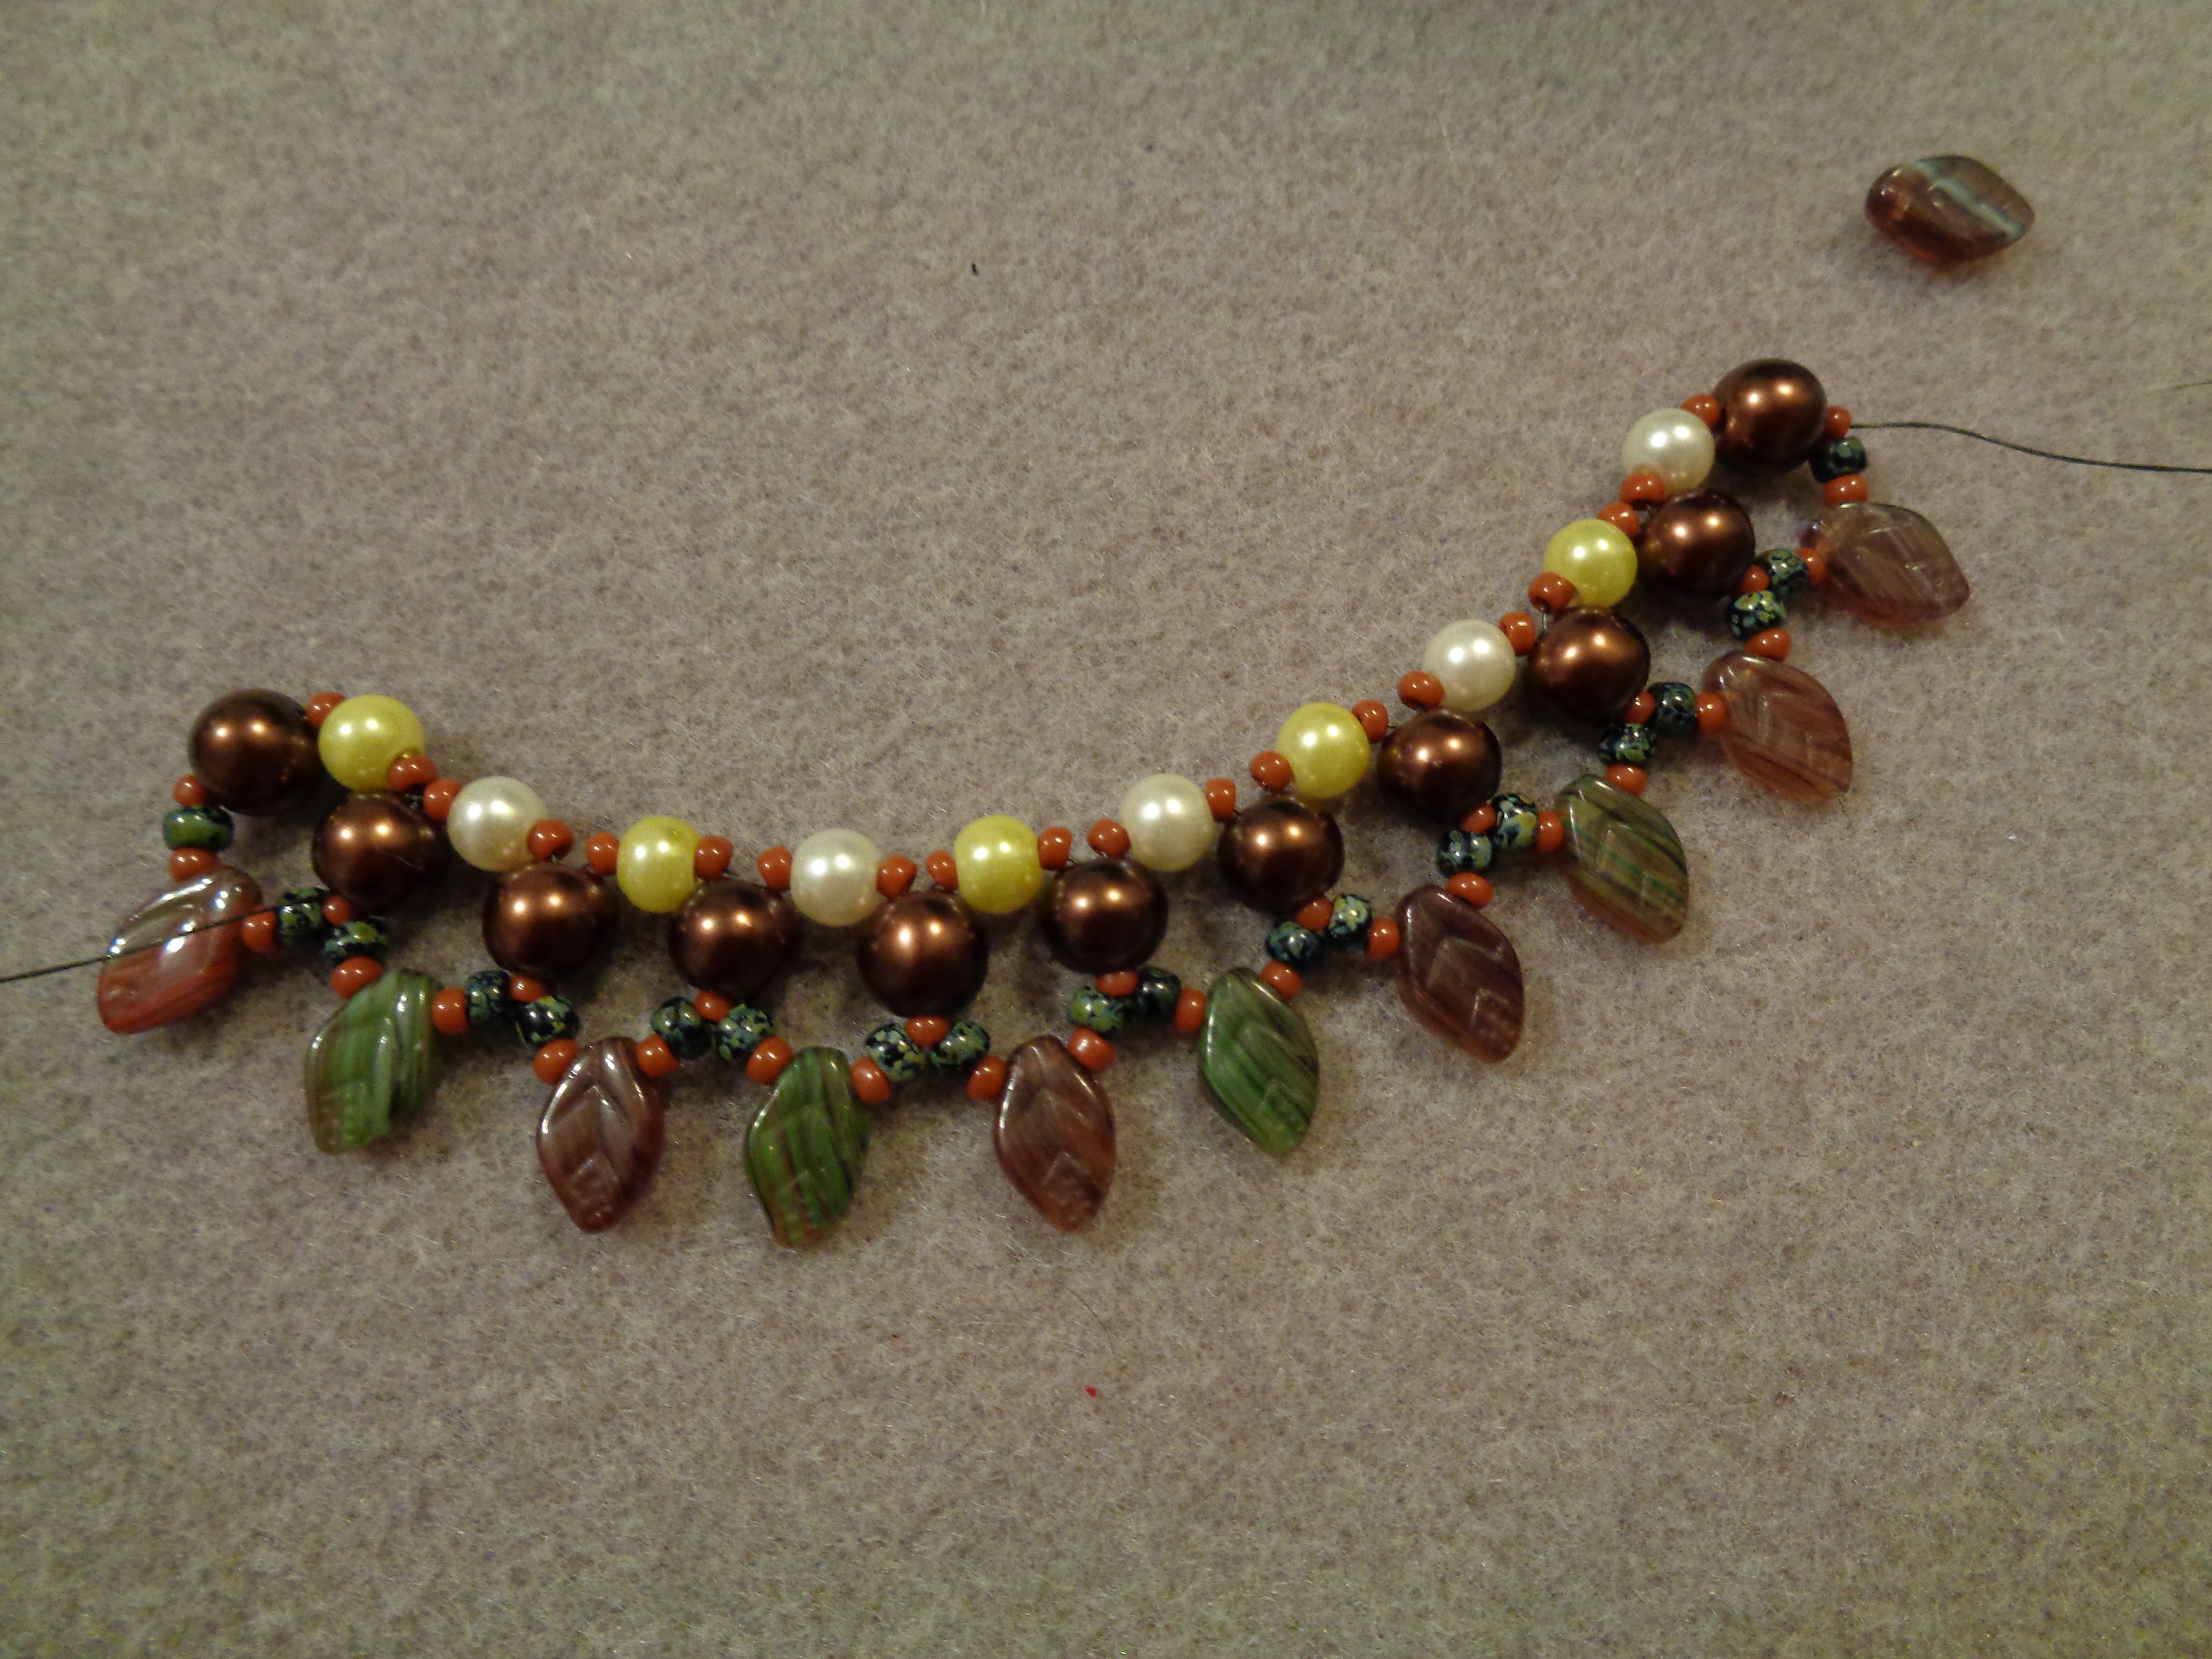
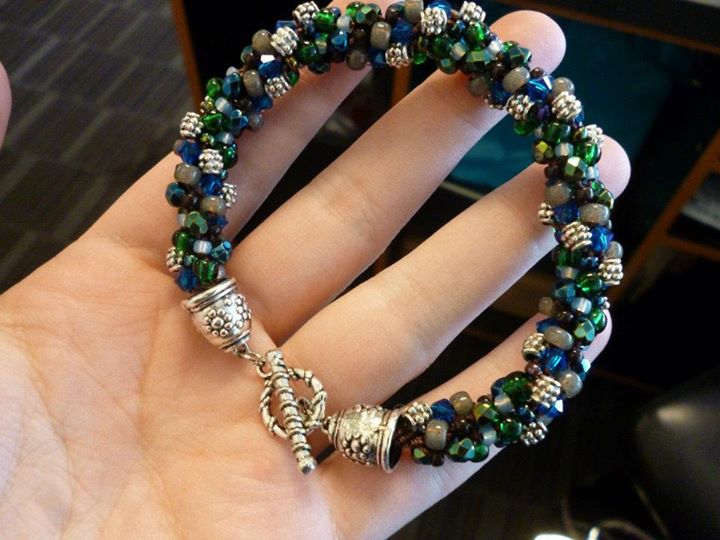
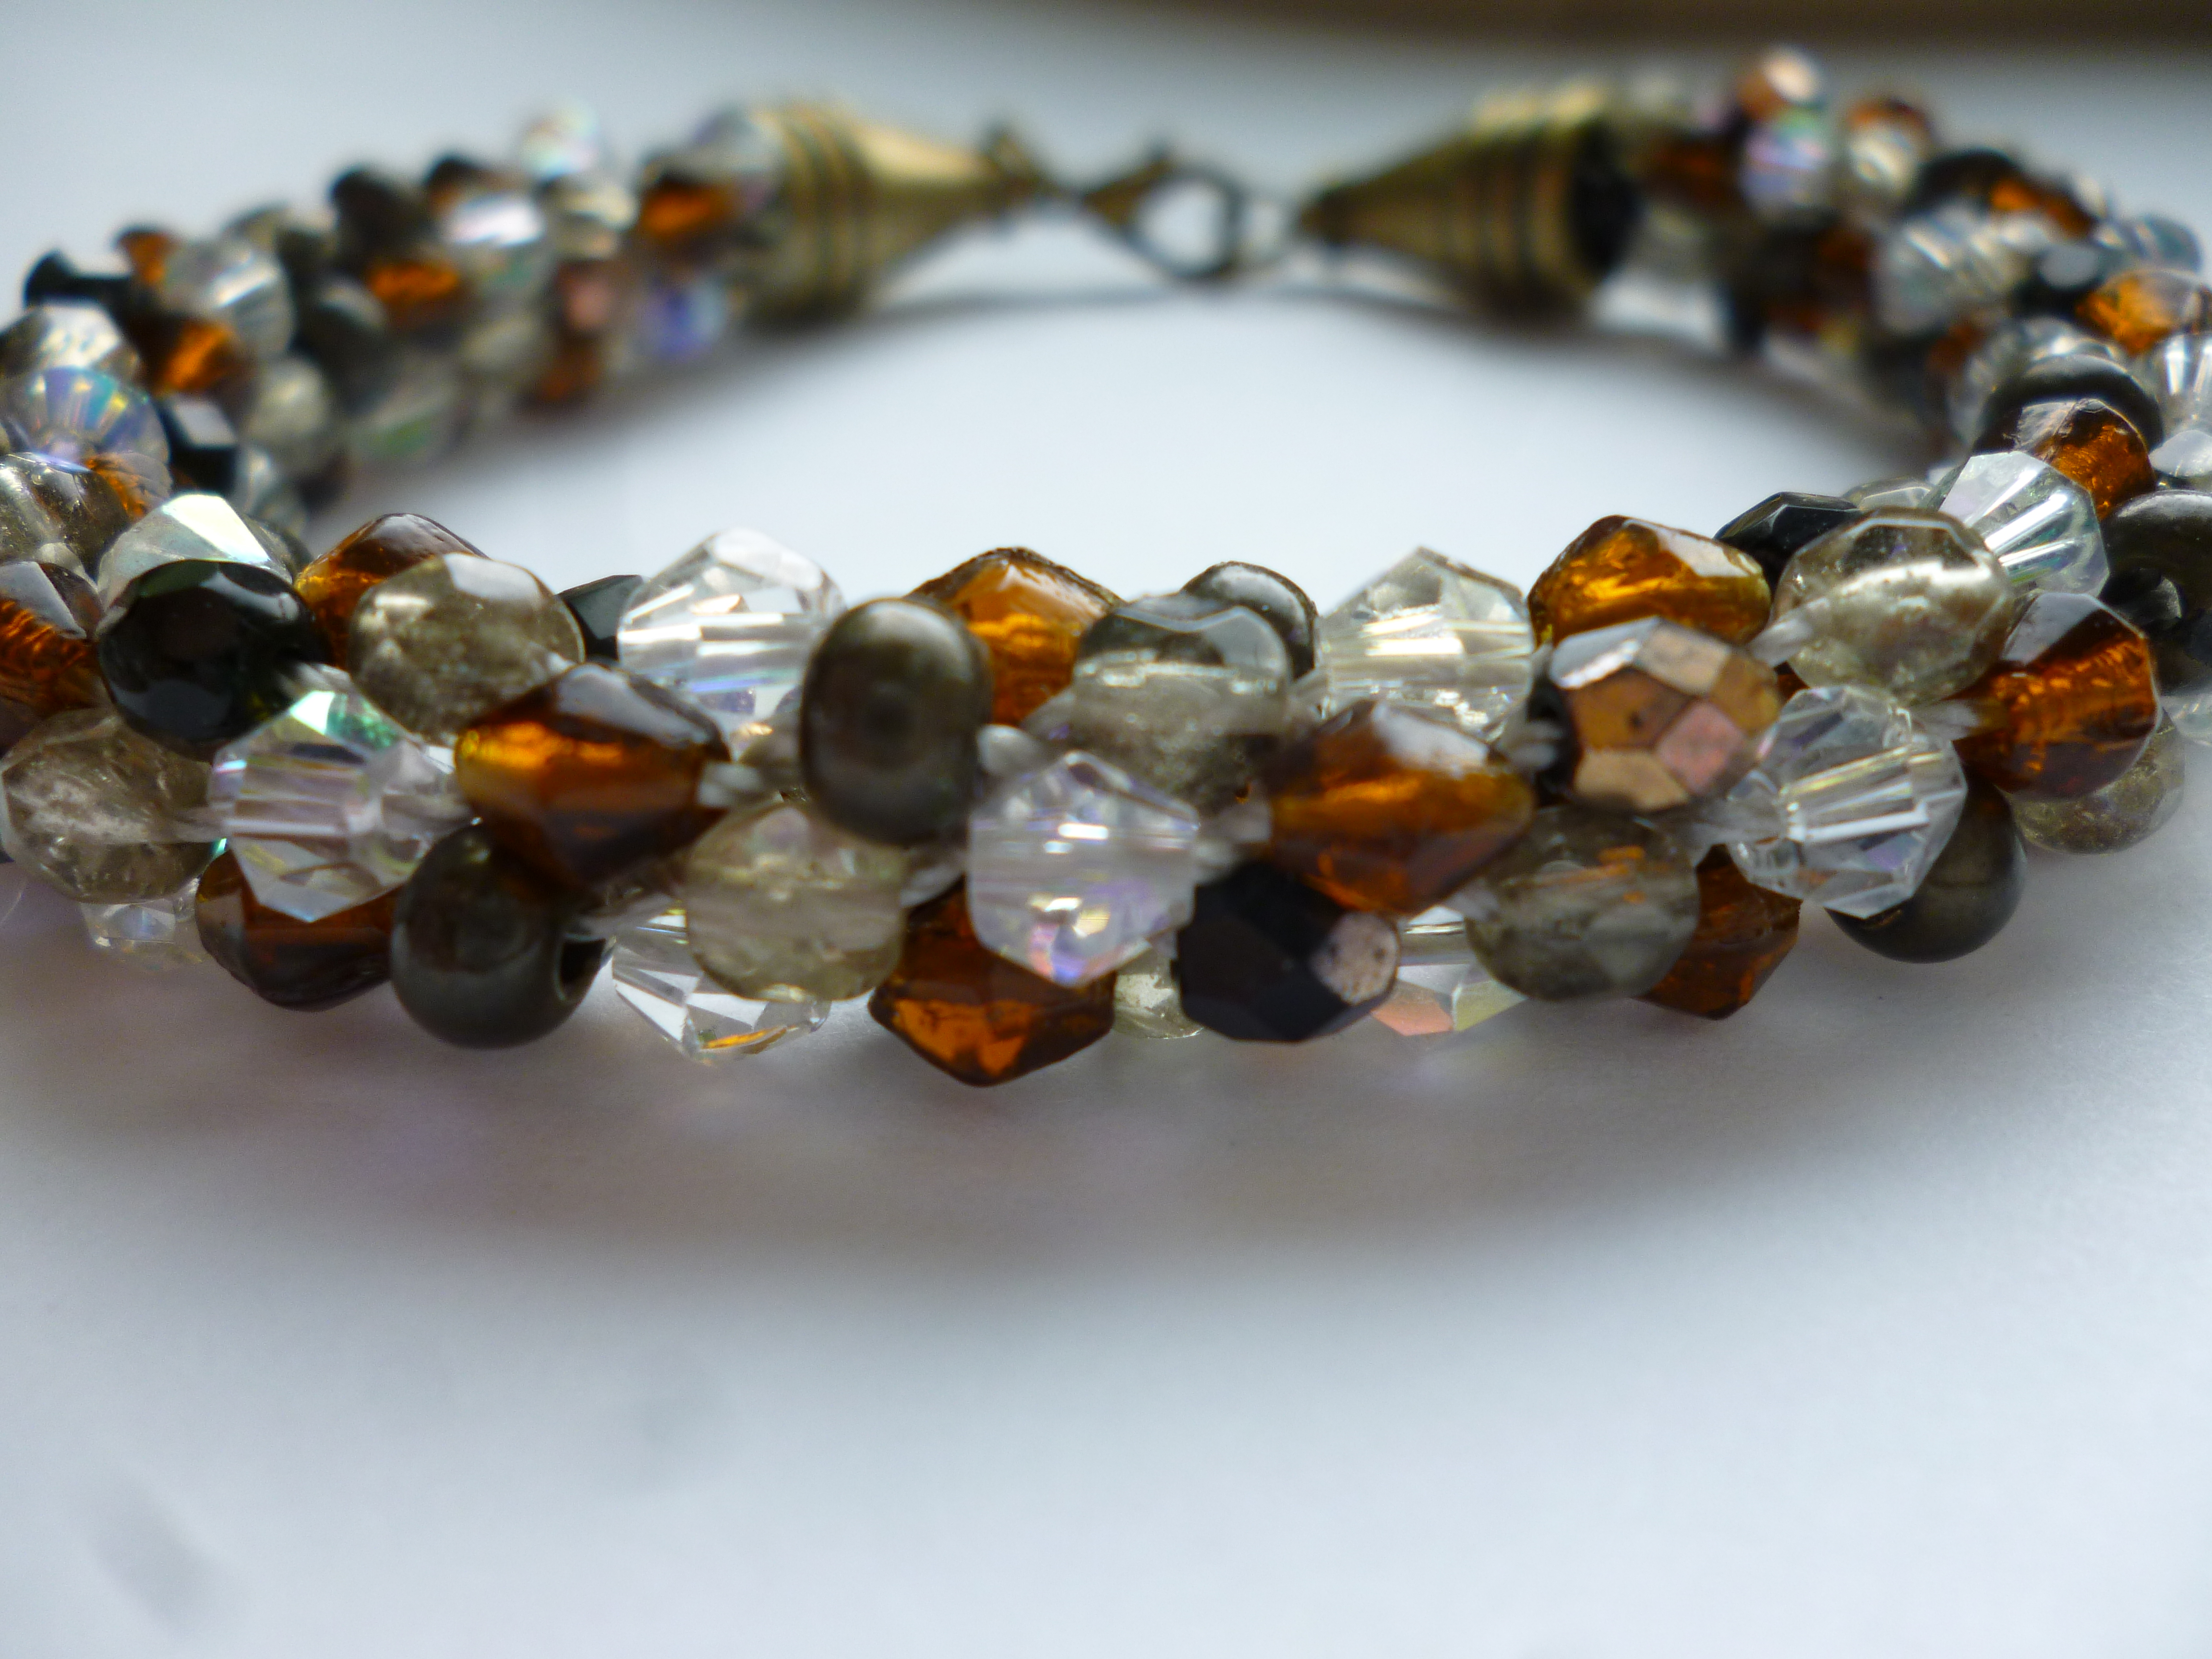
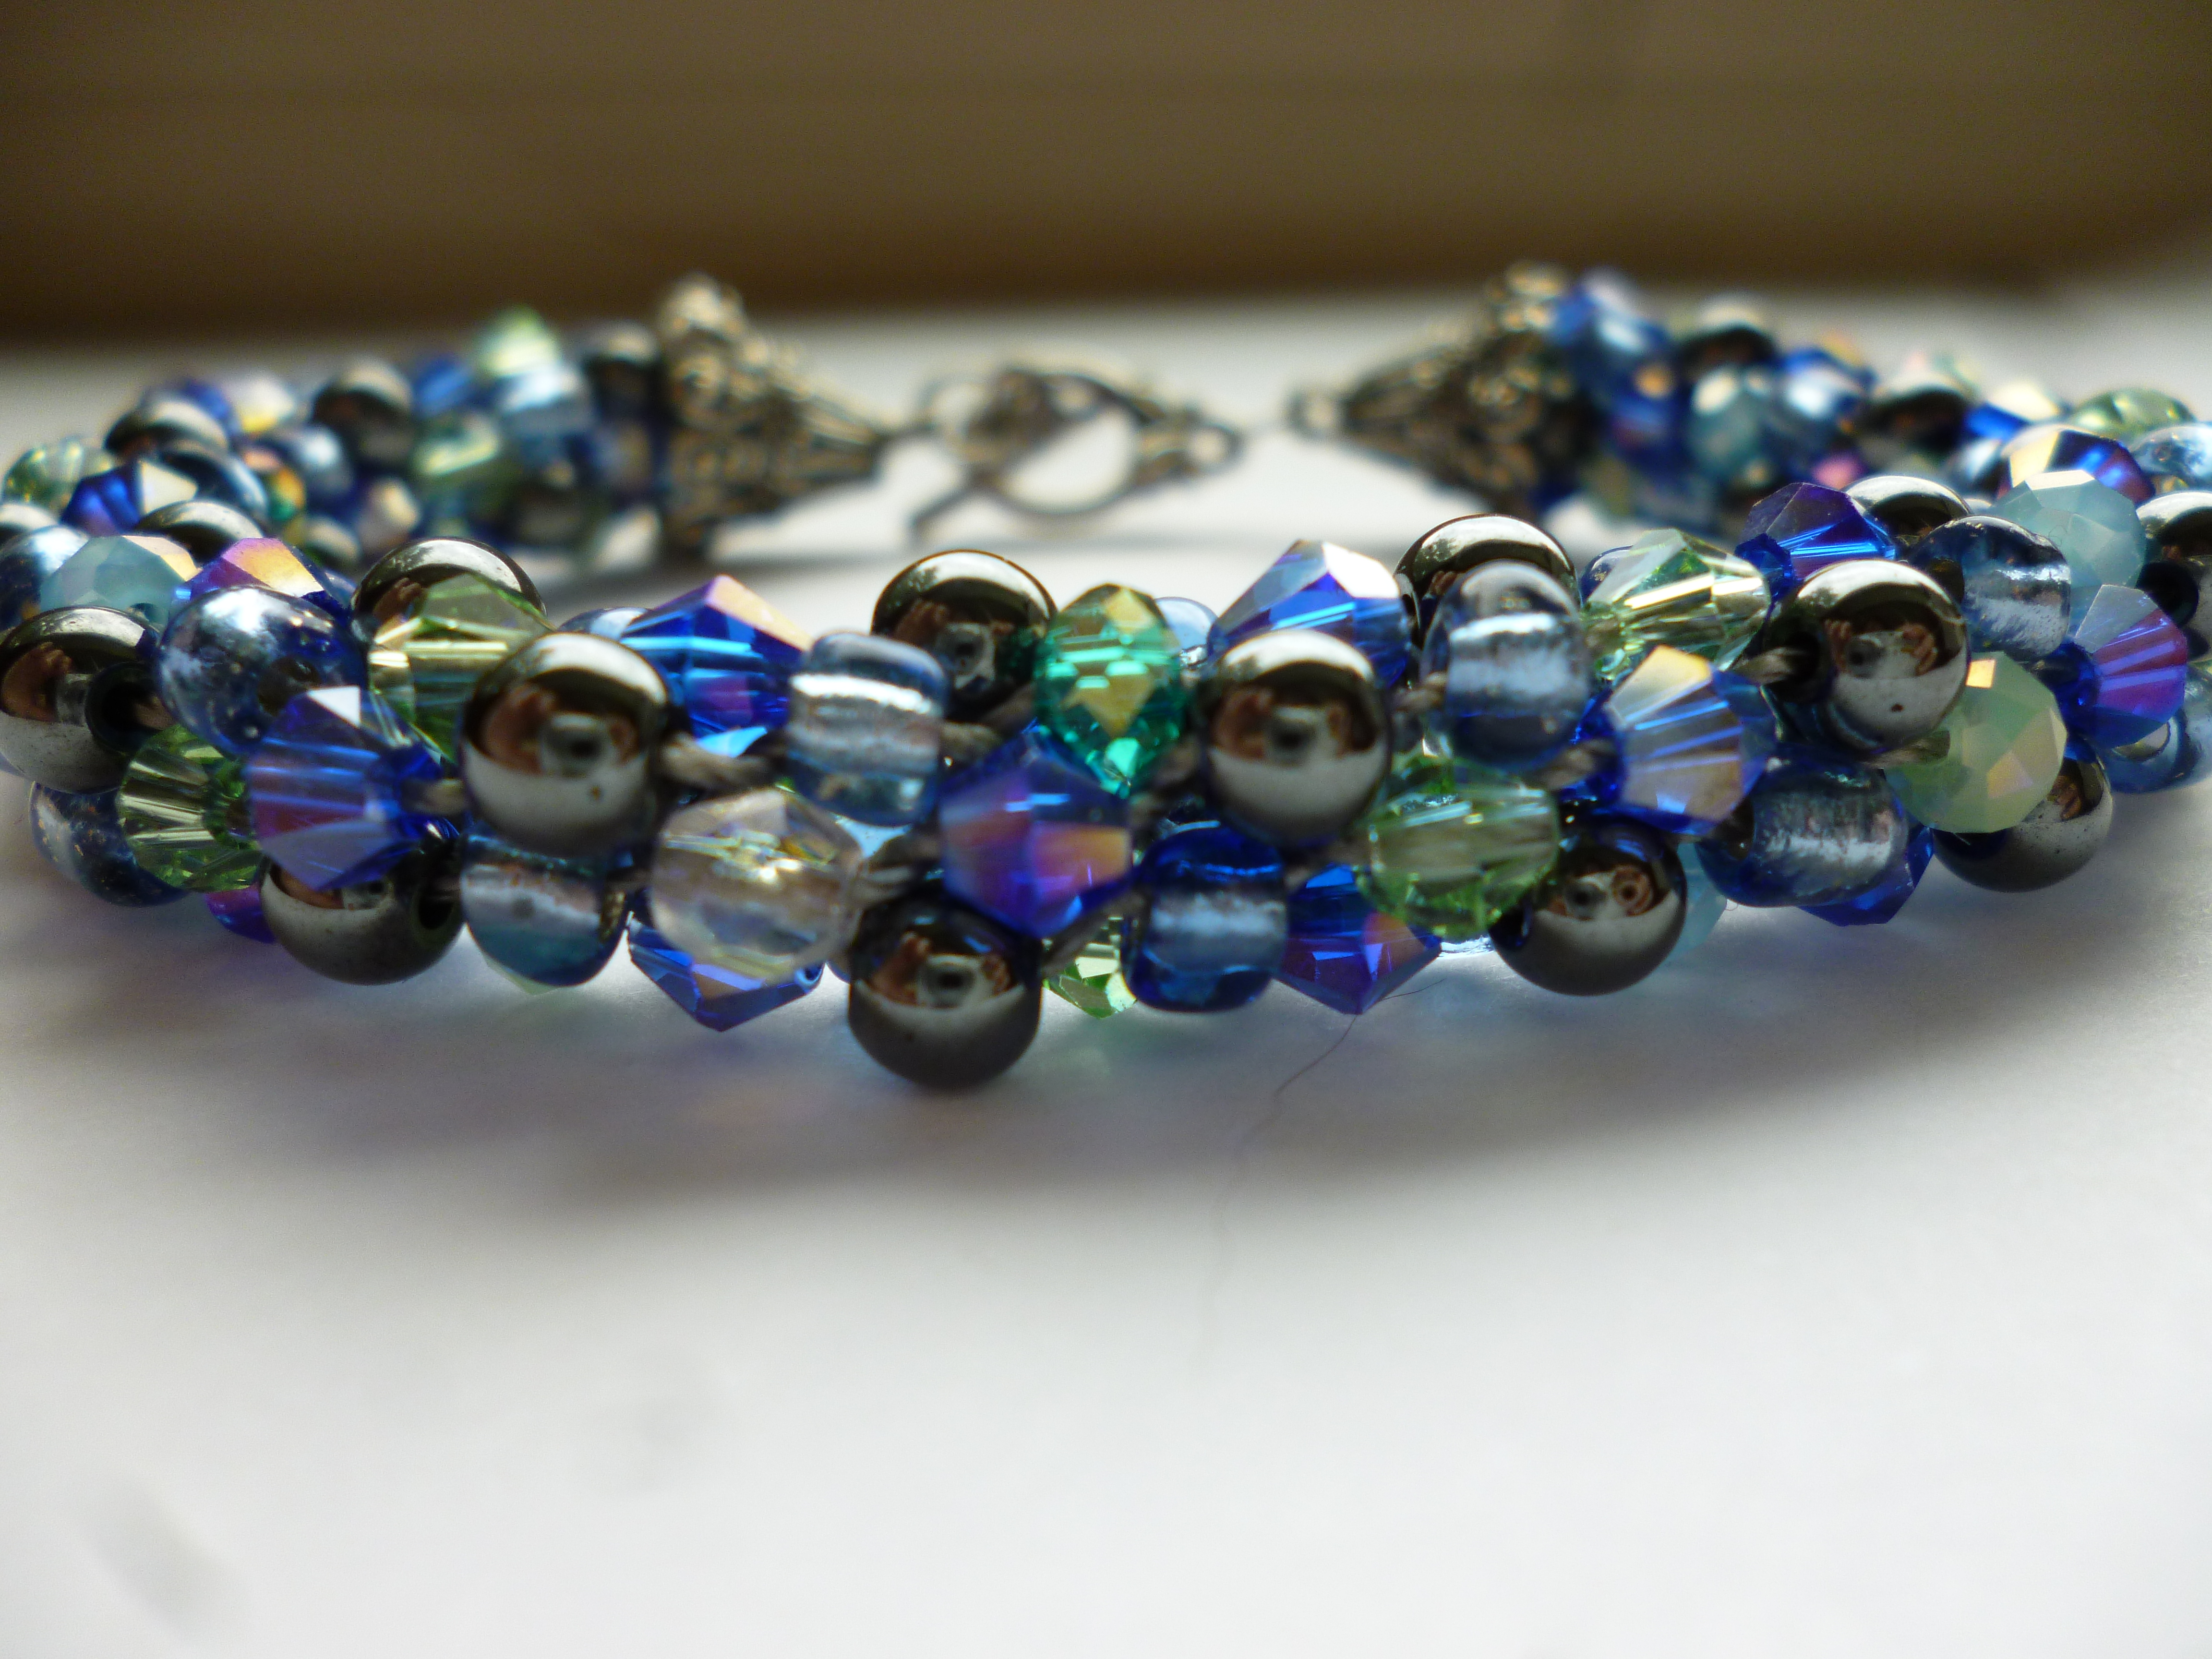
So, let’s say you are scrolling around Pinterest and you see a bracelet that you just love.

FindPin

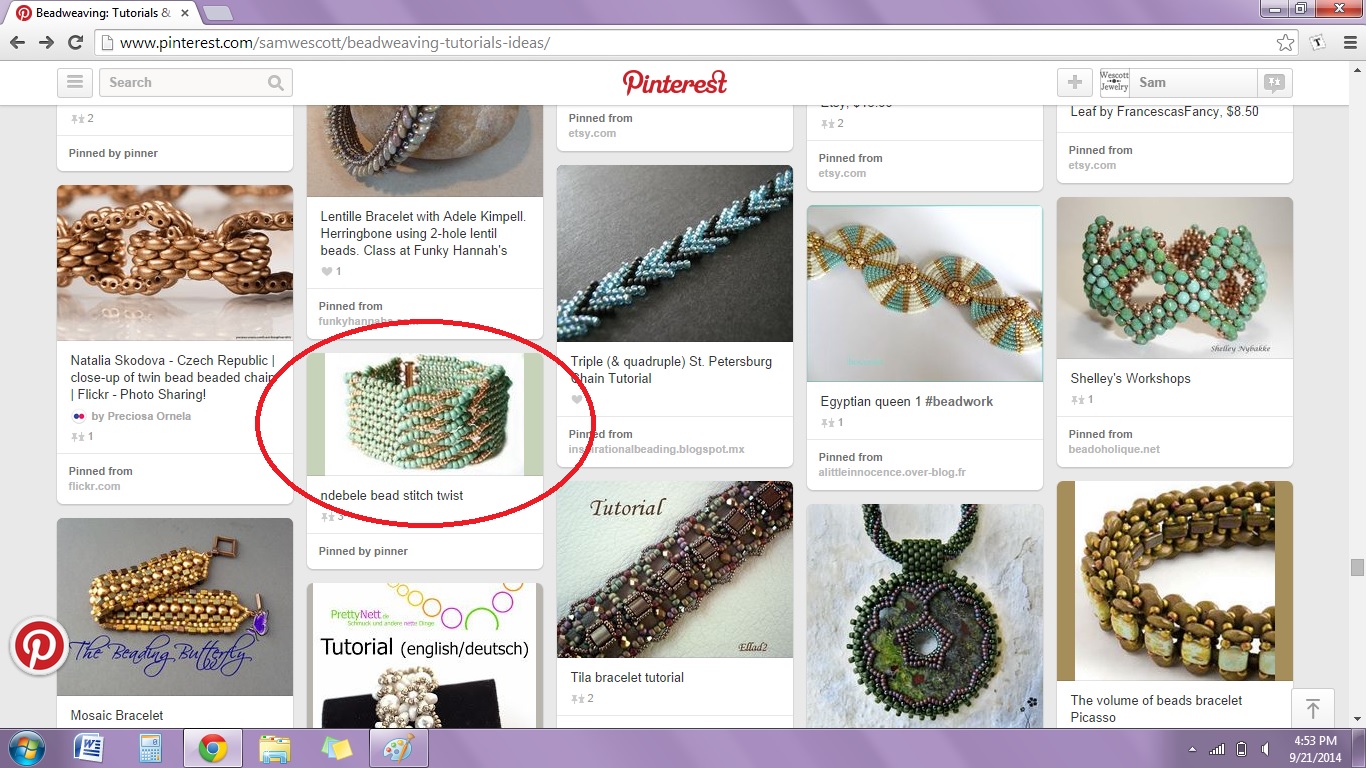
You click on it, hoping to find a link to a tutorial you can buy. Instead, you just see this –

NotHelpful

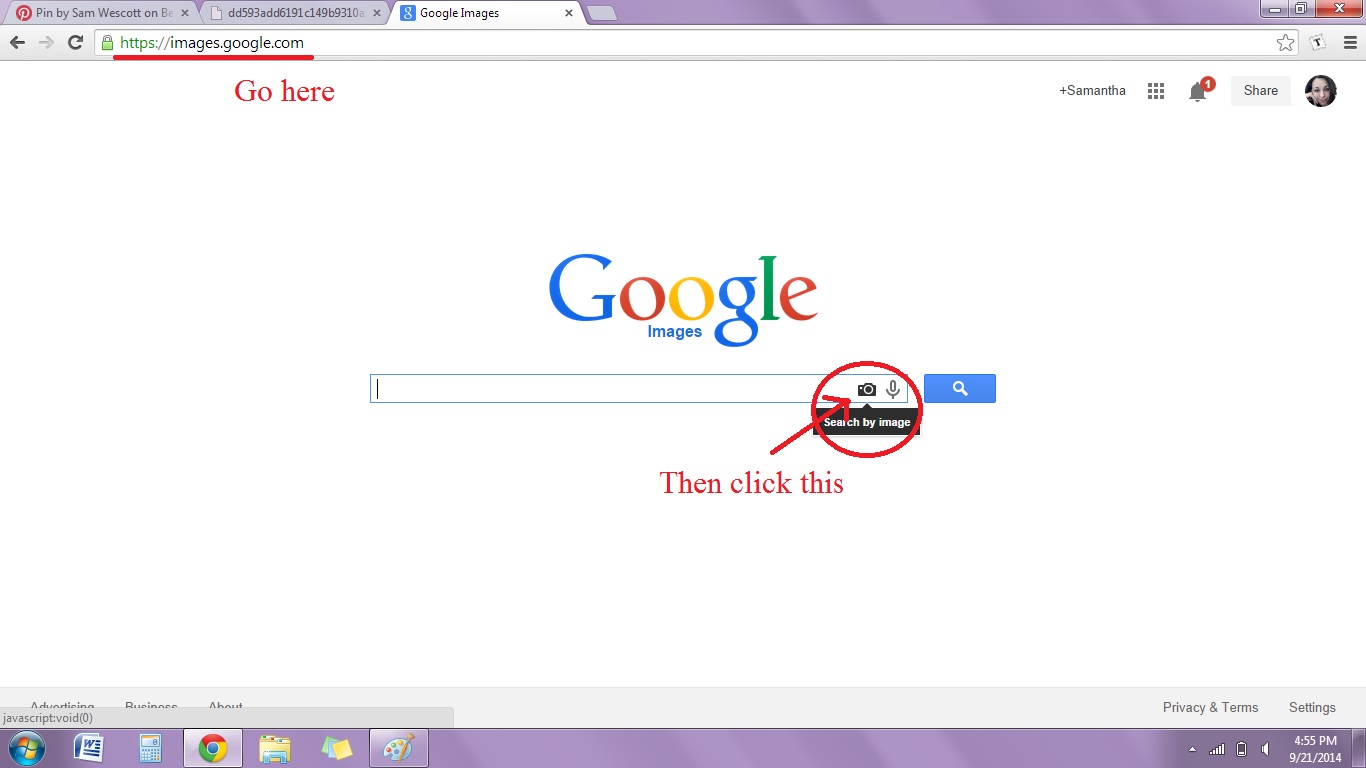
To find where this photo originally came from, we are going to do a reverse image search on Google. To do this, open images.google.com in a new tab and click the little camera icon in the search box.

imagesclick

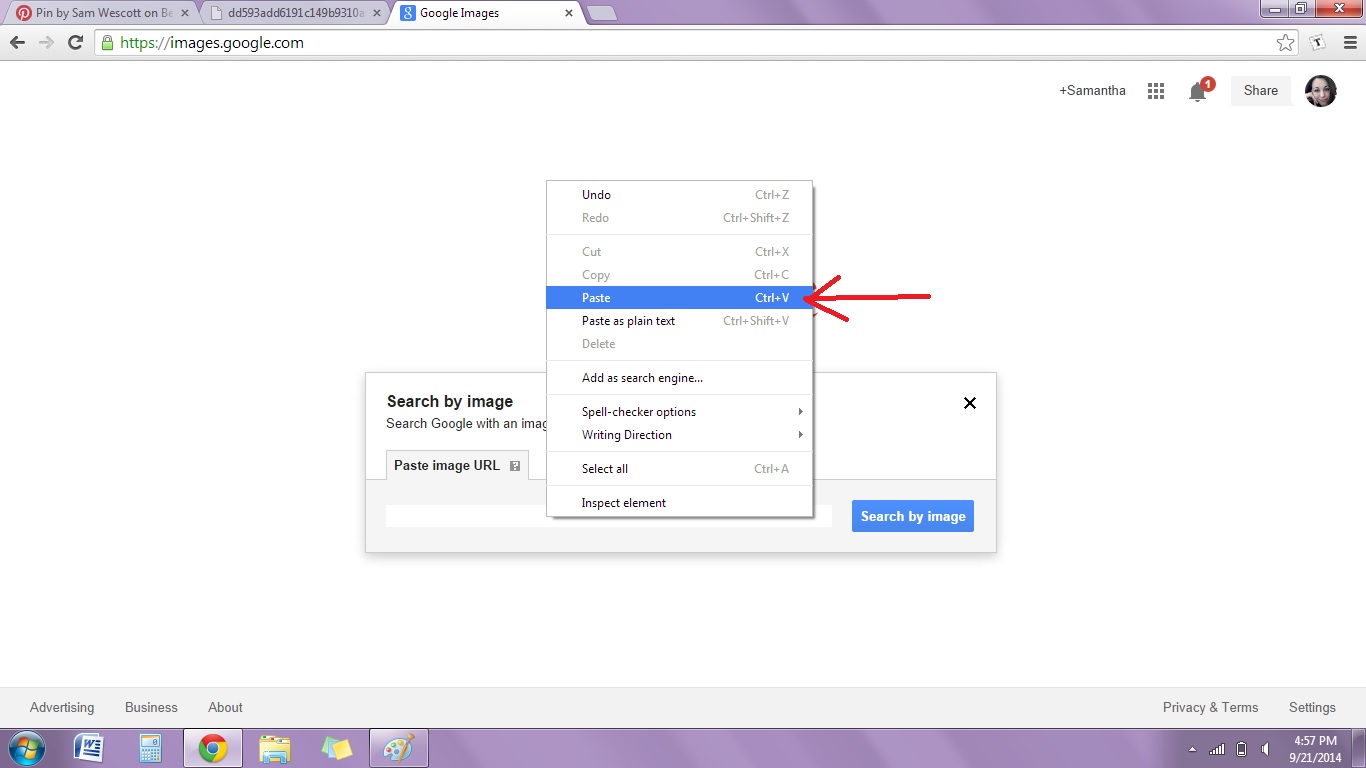
Now, go back to the tab with the picture and right-click on the photo itself. Then click “Copy Image URL”.

copyURL

Then go back to the Google Images page and paste the image URL into the search box.

pasteURL

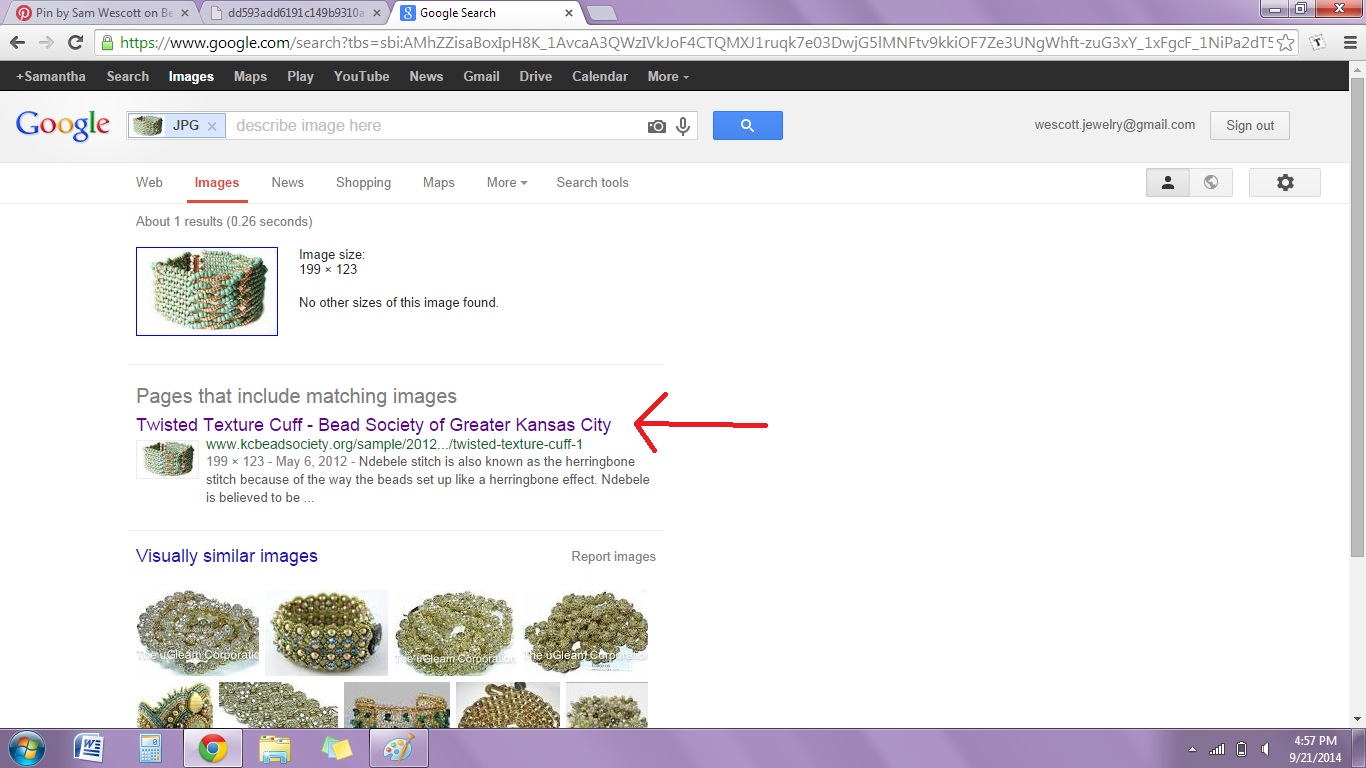
Once you paste and click “Search by Image”, you should find a list of websites with that exact image. Scroll paste all the ones from Pinterest (they are not the original source) until you find one from a blog or website.

AHA

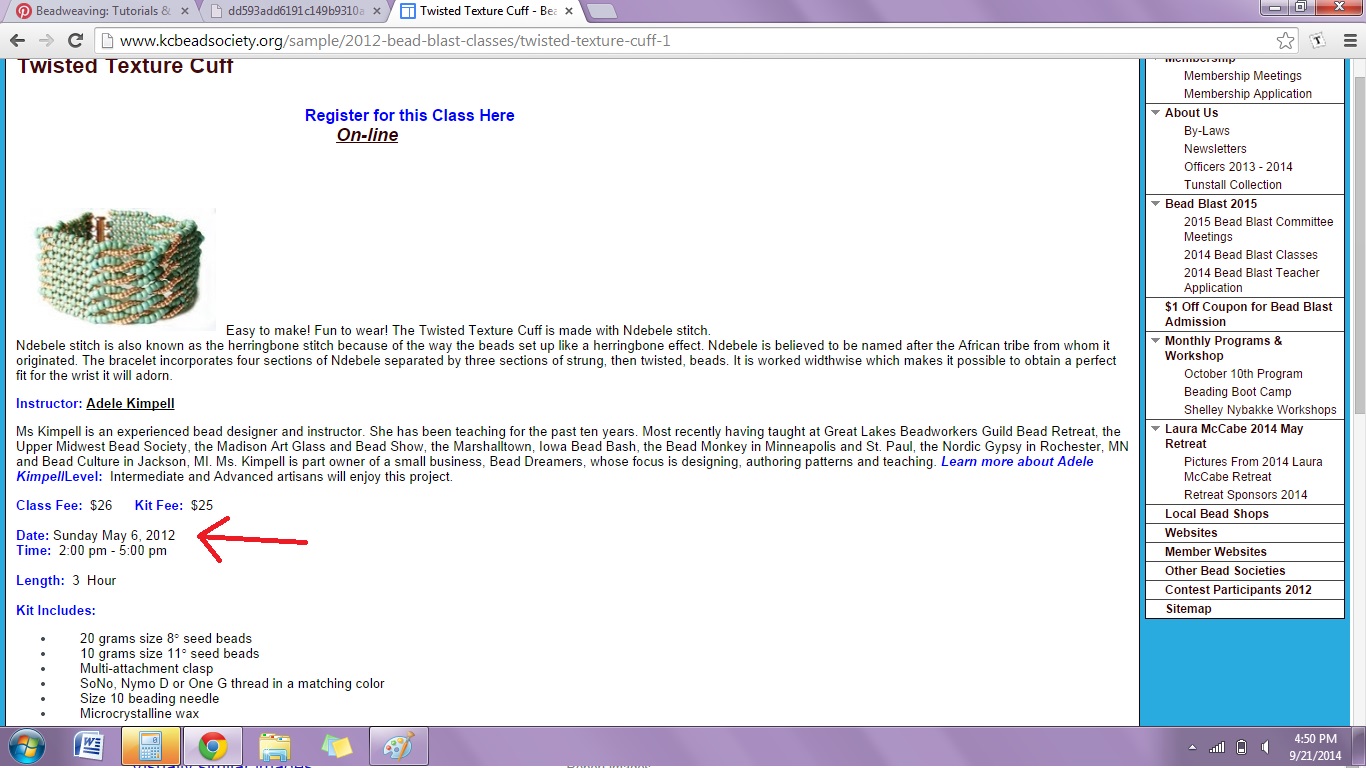
Click through the link to find the original source! For this particular source, it looks like a listing of a class from a few years ago.

OldClass

But after a bit of scrolling, I found the instructors contact information. Now, I can email her directly and ask if I can buy a pattern or if she is still teaching this class.

EmailInstructor

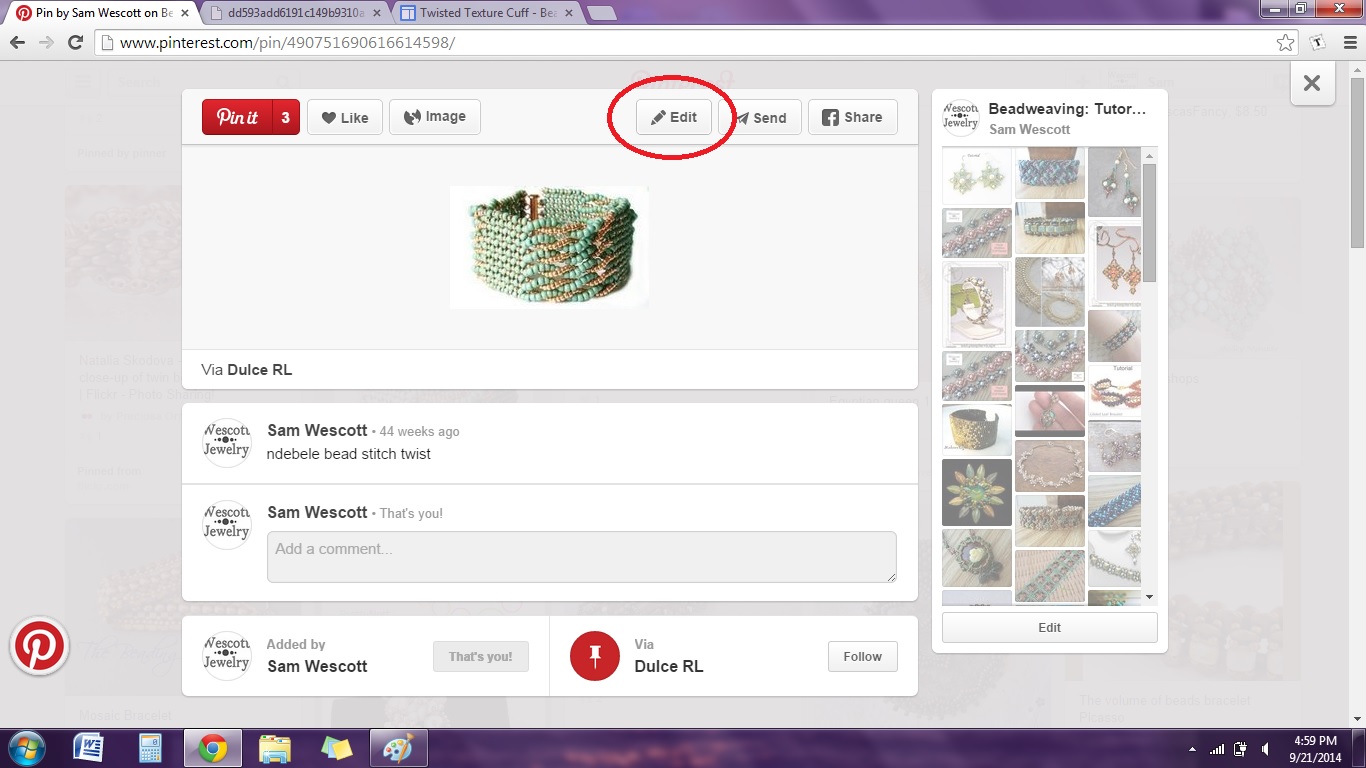
This could be the end of my search, but since I am a thoughtful part of the larger beading community, I want to add this source to the original pin. That way, anyone else who pins this photo will have a link to the original source and the designer will get credit. To do this, go back to Pinterest and click the pin. Then click “Edit”.

editpin

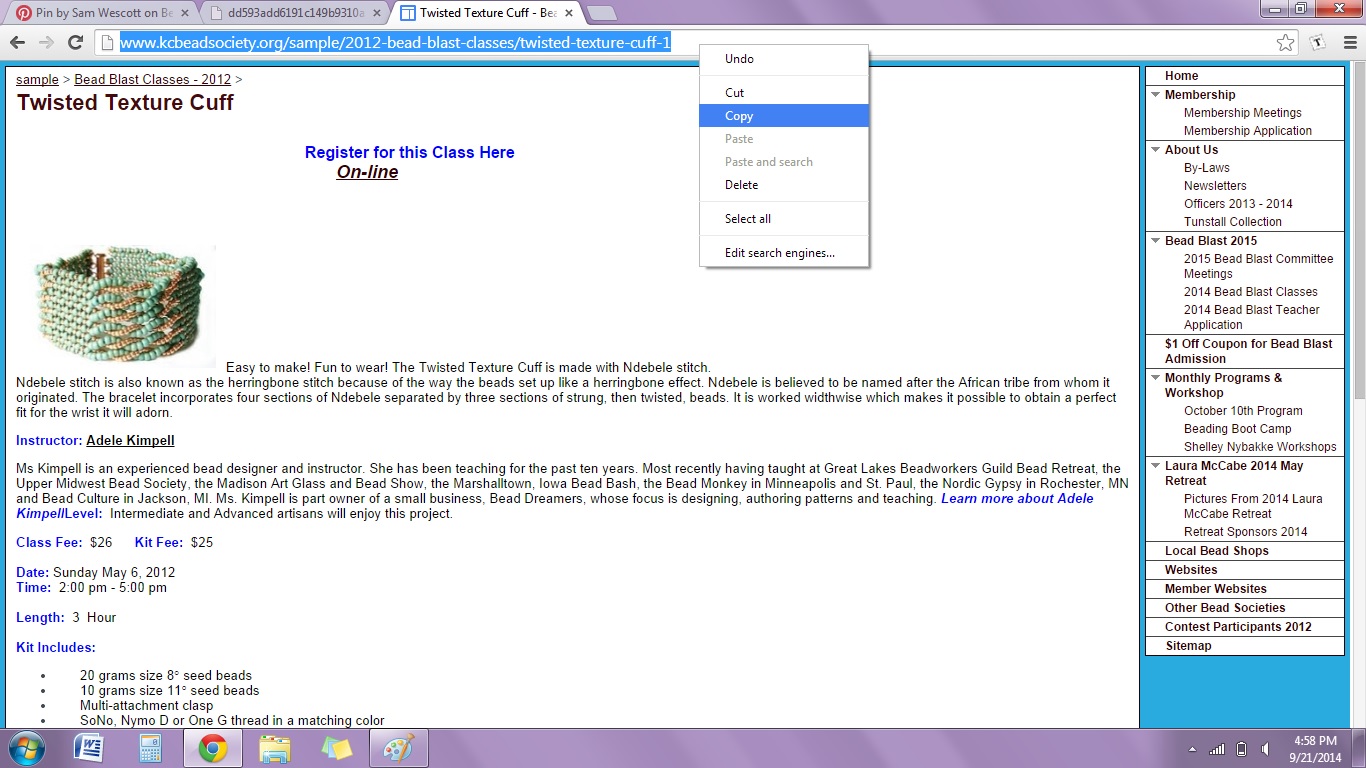
Go back to the new source that you found and copy the URL in the address bar.

copysource

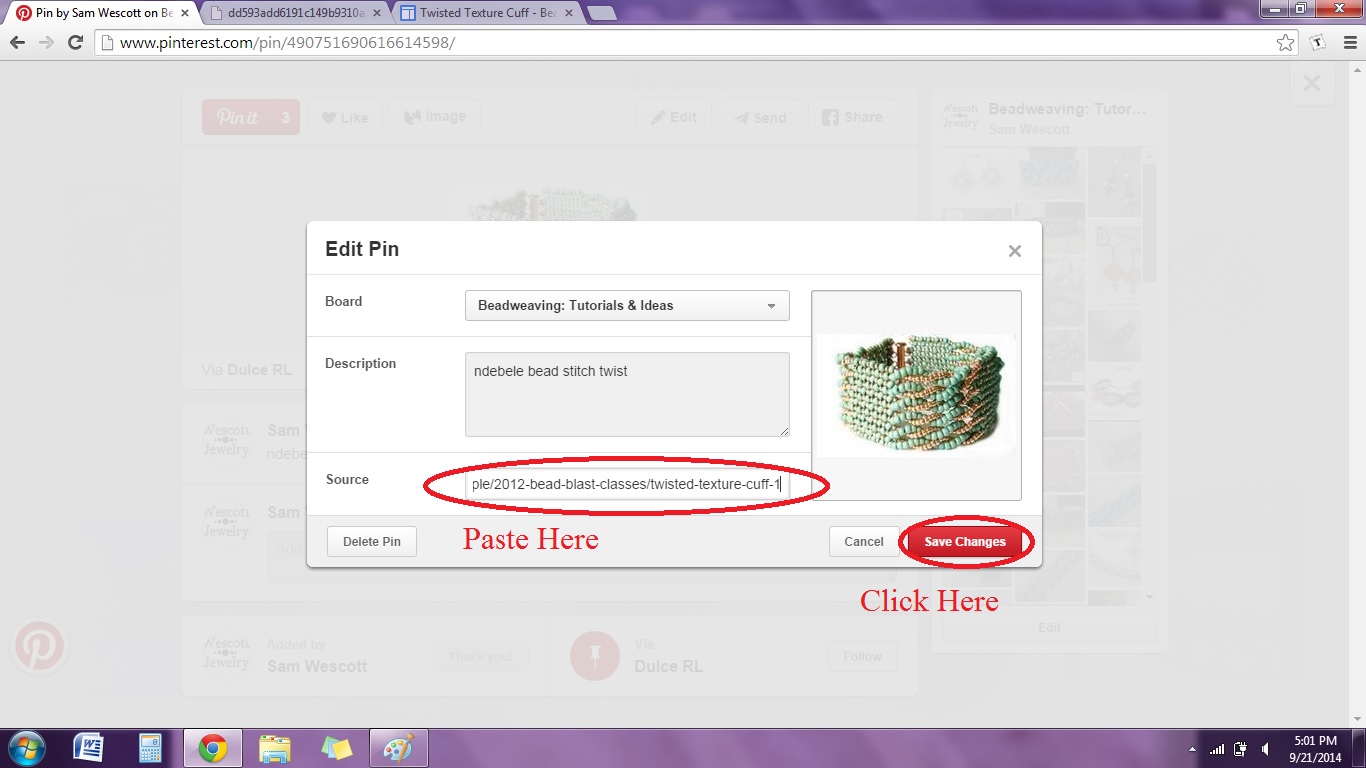
Paste the URL into the “Source” box and hit “Save Changes”.

AddSource

Voila! Now you are a hero. You have found the original source and made it available to anyone who pins the photo from now on.

I understand that is impractical to do this for every pin that comes across your path, but every pin that you fix gives credit to a designer who certainly deserves it.

So, next time someone on Facebook asks if anyone knows where a picture comes from, or you find a dead pin, you can use your new super powers to find the source. Have fun being super useful!

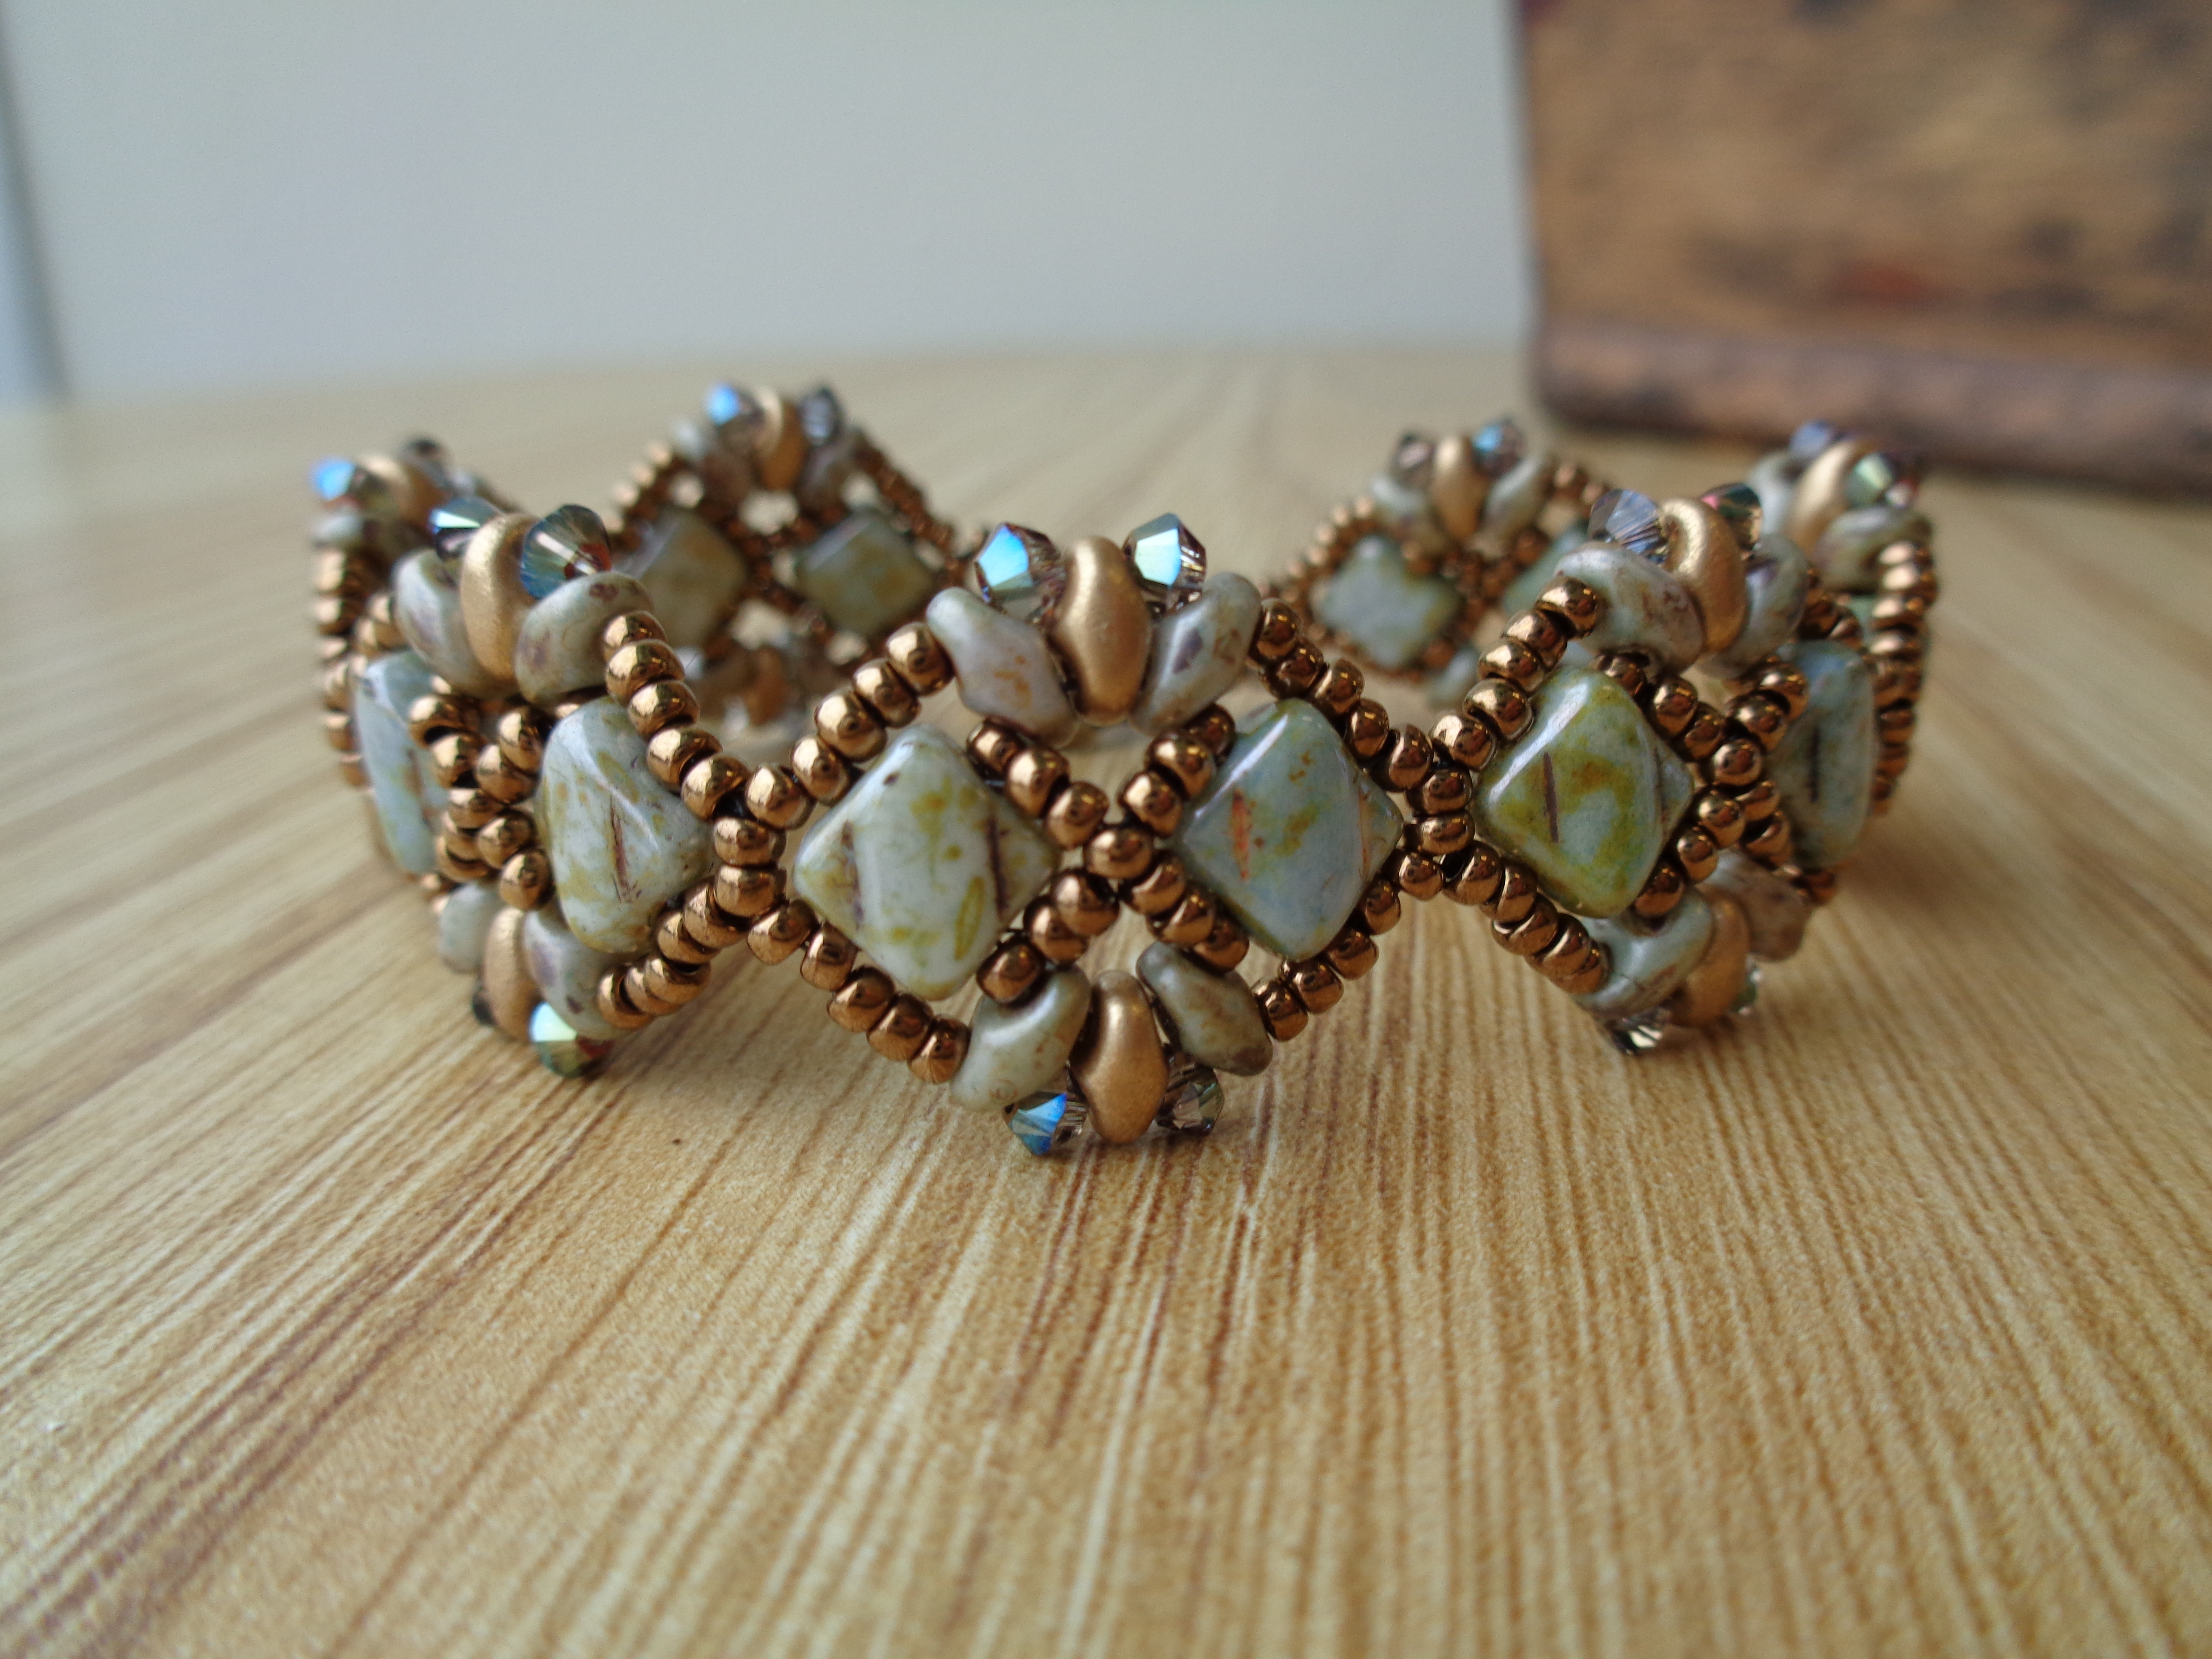
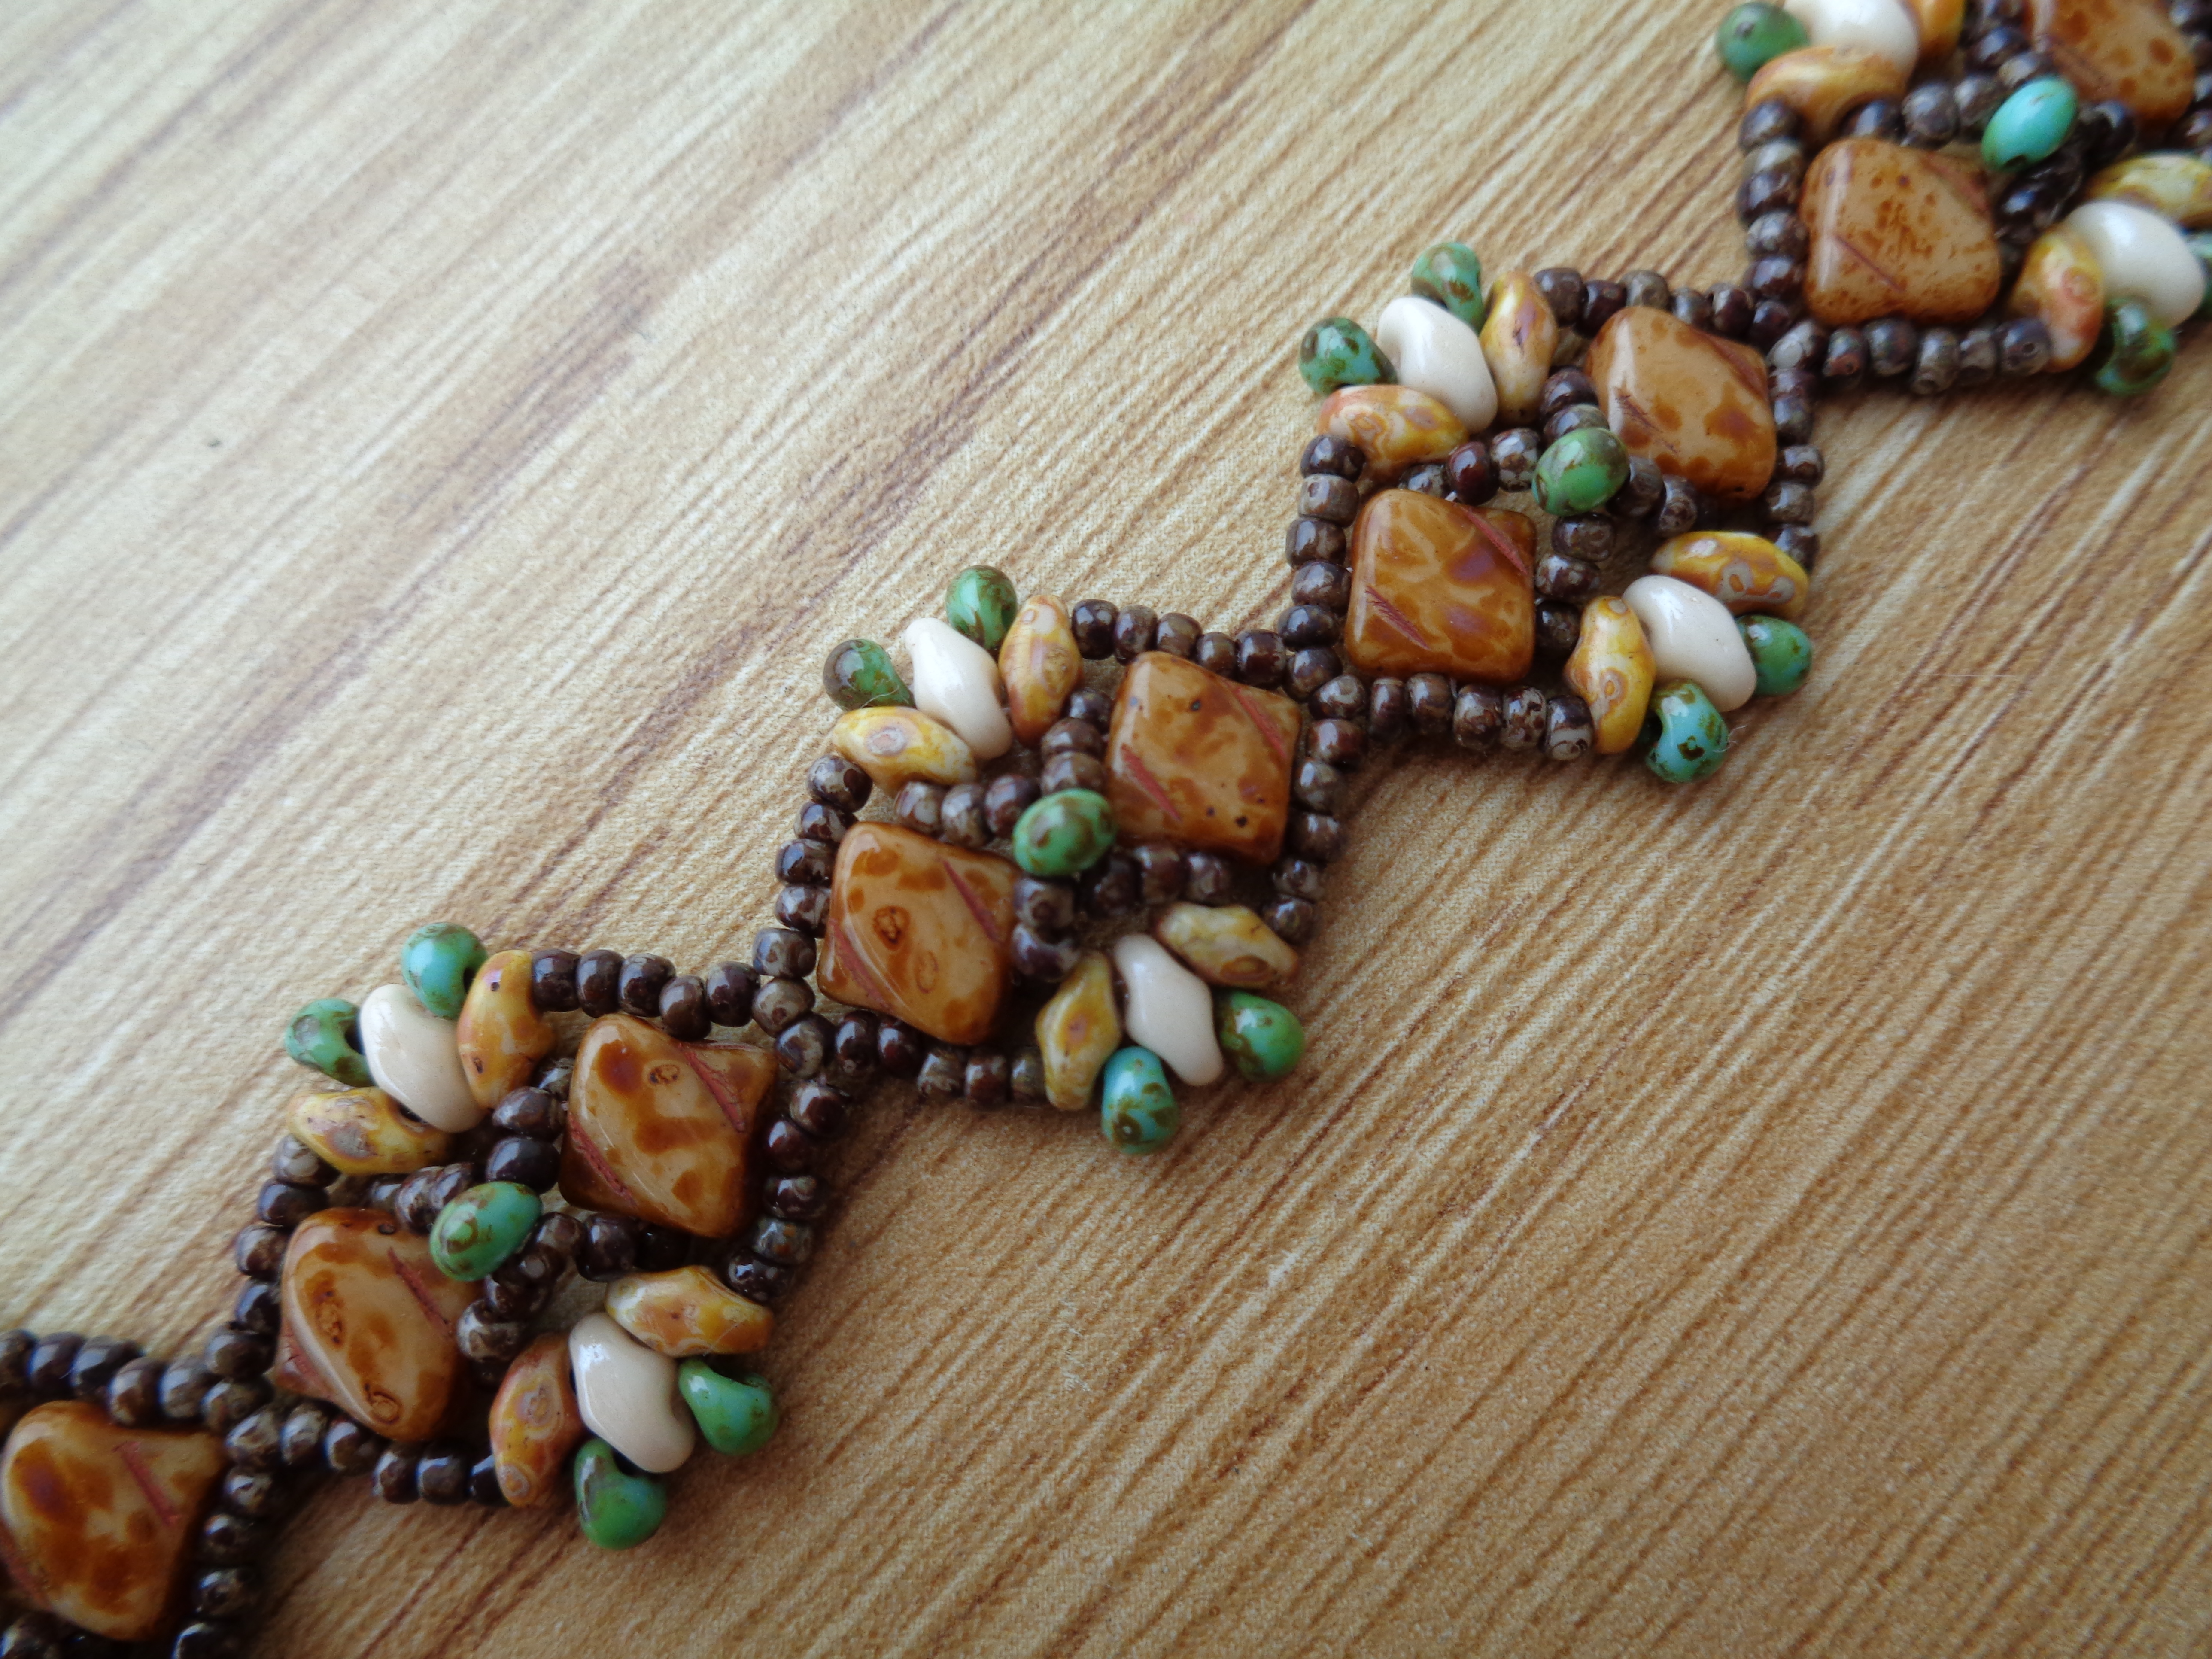
Edit: After posting this, I had several people ask me if I found out whether or not the tutorial for this bracelet is available. I emailed the instructor, just like I recommended in the tutorial, and she does indeed sell both patterns and kits. She told me to tell you all to contact her at beaddreamers@gmail.com and mention that you’re interested in the Twisted Texture Cuff bracelet to place an order. Happy Beading, everyone!

Posted in Tips and Tricks | Tagged , , , , , , , , , , , , , , , | 14 Comments

New Pattern – Peony Necklace with Piggy Beads and SuperDuos

I have been so excited about this new necklace pattern and am so excited to finally share it with you! The pattern is available here, if you want to learn it yourself.

Cover


Tada! This is my newest pattern – the Peony necklace! It uses both Piggy beads and SuperDuos, so all you two-hole bead fanatics should be pleased.

CHALK PINK LUSTER: 4x8mm Two-Hole Piggy Dome Half Hemisphere Czech Glass Beads (30 beads)

Click through to Aria Design Studio, where I buy most of my piggy beads.

I was very perplexed by the new Piggy bead shape. It’s bowl-shaped with two holes going through the bottom of the bowl. One hole is centered, while the other one is off to one side. This makes a weird cup/petal/bowl thing and, even less flattering, it’s named after a pig’s snout… I was not at all sure how I felt about these oddball beads.

Inspiration finally hit when I started fiddling with pearls and SuperDuos to come up with this piece.

This color combination was a total accident – but I love it!

I only had enough beads in this color combination to make five flower units, so I decided to finish off the rest of it with a strand of pearls. I’m very fond of the bright silver seed beads in contrast with the matte Piggy and Czech rounds.

After this one, I did some more careful planning and bought enough materials to make a full necklace. These are totally not my colors, but I love the weight and drape of this piece.

I need to make one of these for myself in colors that are more my style.

I also made one using jump rings as connectors and finished with chain, just to see how it would look with fewer flowers. It turned out way more casual and I am pleased to get so much diversity from one pattern.

A lot more casual, right? Good with a v-neck and jeans.

Anyway, I am very excited about this design and want to share it with everybody. I will definitely be making more, so keep an eye out! Maybe I could make one that looked like poinsettias or a wreath for Christmas… Hmm…

Happy Beading!

Posted in New Pattern Annoucements | Tagged , , , , , , , , , , , , , , | 3 Comments

Tweaked Version of SuperDuo Knit Herringbone Bracelet

So, I have been seeing lots of beautiful bracelets on Pinterest and Facebook made from Potomac Bead Company’s SuperDuo Knit Herringbone video on YouTube and was dying to try it for myself. When I finally got around to it, though, I wasn’t super pleased with the thread showing in the center of the bracelet and the way the turn around looked on the sides. Eventually, I figured out a few tweaks to fix the problems and made these!

DSC00191 DSC00235

I was very pleased with these bracelets and since the original pattern is free and available on YouTube, I wanted to share my tweaks with you, .

So, the first tweak that I made begins at 2:53 where the instructor tells you to pick up one 11/0 and one SuperDuo. In my version, you will pick up two 11/0’s and one SuperDuo, instead. This fills in the gaps and hides the thread. I also think it emphasizes the v-shaped motif of herringbone stitch.

DSC00208 DSC00209 DSC00210 DSC00211

Photo 1: You can see that I’ve picked up two 11/0’s and an SuperDuo
Photo 2: I go down through the two 11/0’s in the row below
Photo 3: I go up through the top hole of the next SuperDuo in the row below
Photo 4: And repeat across the row…

The other tweak I made was on the sides. At 5:42, the instructor says to pick up some 15/0’s to cover the side thread. What I did was go up and around through an 11/0 and then add two more 11/0’s. Here are the photos:

DSC00212 DSC00213 DSC00215 DSC00216

(this is flipped from the last set of pictures – sorry about that)

Photo 1: I’m coming out of the SuperDuo that I passed through after adding my two 11/0’s and SuperDuo. This is where the video tells you to add 15/0’s.
Photo 2: Instead, I go straight up into the beads above and go through the first 11/0 on top of my SuperDuo. This leaves a tiny bit of thread visible, so try to match you colors.
Photo 3: Pull your thread tight and then pick up two 11/0’s.
Photo 4: Go straight up through that top SuperDuo and you’re ready for the next row!

Other than those two tweaks, I pretty much just followed the video. If you have any questions or a step is not clear, please leave me a message in the comments below!

In the meantime, here are some more photos of the two bracelets I’ve made so far like this. The gold one is made with two sets of herringbone and the blue one is three sets wide. I can’t wait to try more color combinations!

DSC00232 DSC00187 DSC00236DSC00192 DSC00238 DSC00189

Happy Beading, everyone!


Posted in Free Beading Tutorial, Tips and Tricks | Tagged , , , , , , , , , , , , , , , | 29 Comments

Golden Roses Necklace

Hello, friends!

Remember me mentioning in my last post that I had a special new piece to show you?

DSC00204

Oculus Pendant Design by Sam Wescott – Yellow Rose Painting by Brenda Meyer

My Oculus Pendant bezel (pattern available here) is specifically made to accommodate 24mm Lunasoft cabs. My beading buddy, Brenda Meyer, paints cabs, so I asked her if she would do a custom flower in the center of a Luna cab, small enough to not be covered by the bezel. I requested a little yellow rose could not be happier with the finished piece!

I added the leaves right away and loved how they complimented Brenda’s piece. After that, though, I was stumped on how to finish the rest of the necklace. I knew I wanted to do more bead weaving, so at first I tried to do a big right angle weave piece with leaves and coordinating pearls.

DSC00203

I am really in love with these Czech glass leaves.

While I really like this sample (and I will probably go ahead and make a second necklace out of it), it’s way too wide and chunky for such a delicate bezel. The seed bead stitching in the focal piece gets completely overwhelmed by the big pearls and leaves.

I ended up making a delicate seed bead chain that used the 4mm, Delicas, and tiny 15/0’s that I used in the original bezel. I love the Czech crystals and think they incorporate the green in the leaves nicely.

DSC00205 DSC00206


All in all, I am very pleased with the overall terracotta/cottage/garden look of this dainty necklace and am proud to own a Brenda Meyer original. She loves doing custom work and will gladly work with you, if you want a painted stone or cabochon of your own!

Brenda sells her pieces through Beaded Bliss in Harrison, OH. If you want to see her premade pieces, visit the shop. If you want to order a custom piece, you can visit the shop and ask the owner or email the shop at beadedbliss104@aol.com.

Check back in the next week or so, to see how I tweaked a free herringbone pattern with superduos!

Posted in Beading Techniques and Experiments, Storytime | Tagged , , , , , , , , , , | 1 Comment

New Design – Oculus Pendants!

Oh, my goodness, friends. I am sorry for being absent from the blog for so long, but I think you’ll forgive me when you see what I’ve been working on!
1 DSC00039

This is my new Oculus Pendant! Those two pictures are two different sides of the same pendant.  The design is a bezel holding two Lunasoft cabochons together, which makes it totally reversible!

The pattern is available in my etsy shop, along with more patterns for my original designs and finished jewelry.

I’ve already taught a class for this pattern twice, so the PDF you’ll be downloading has been thoroughly proofread. I would consider it to be on the harder side of an intermediate pattern, but it’ll be easier if you’re familiar with herringbone stitch.

Here are some more that I have made so far. I’ve got another one half-finished on my bead mat with something special that I’ll be discussing in more detail in my next post. For now, though, feast your eyes!

4  3a 3b DSC00028 DSC00029 DSC00160 DSC00162

Just to reiterate: the pattern is available here and I will have a special one finished soon that I cannot wait to show you!

Happy Beading!

Posted in New Pattern Annoucements | Tagged , , , , , , , , , , , , , , | 1 Comment

Beaded Kumihimo Braids and How to Plan Them

So, I recently splurged on a bunch of Long Magatama beads from Miyuki, with the intention of making a glorious kumihimo necklace. I have recently finished this glorious endeavor and I now present it to you!

Kumi 5

Kumi 4

Tada! After I posted this on various and assorted facebook posts, I was surprised to receive about a bajillion questions about how I figured out the placement of my colors. For this particular necklace I did four strands of galvanized gold magatamas (three long and one short) on every other spot, and the other four spots were filled with frosted transparent rose, canary yellow picasso, yellow-lined AB, and galvanized silver.

Now, you wanna know how I figured out what placement I wanted? Let me share my best secret – the Kumi Planner by Lytha Studios. This is a great little tool where you can place your colors on the wheel and preview how the necklace will turn out!

Kumi Planner

Isn’t it amazing?! I love this thing. You can either put the color on the wheel or on the braid directly to see how you need to configure your board. I use it every time I make a Kumihimo braid – and I make a lot!

Here are a few of my finished Kumihimo pieces –

Kumi 6 Kumi 3 Kumi 2 Kumi 1P1050065P1050077P1050177P1050324P1050580P1060095

I love my kumihimos – especially with beads galore. How do you usually do yours? Let me know in the comments!

Edit: Wanted to add a few additional resources.

Here’s the basics on how to do a beaded kumihimo braid.

And here’s a conversion chart to help you figure out how many beads to string. 

Posted in Tips and Tricks | Tagged , , , , , , , , , , | 14 Comments