
So, I recently splurged on a bunch of Long Magatama beads from Miyuki, with the intention of making a glorious kumihimo necklace. I have recently finished this glorious endeavor and I now present it to you!


Tada! After I posted this on various and assorted facebook posts, I was surprised to receive about a bajillion questions about how I figured out the placement of my colors. For this particular necklace I did four strands of galvanized gold magatamas (three long and one short) on every other spot, and the other four spots were filled with frosted transparent rose, canary yellow picasso, yellow-lined AB, and galvanized silver.
Now, you wanna know how I figured out what placement I wanted? Let me share my best secret – the Kumi Planner by Lytha Studios. This is a great little tool where you can place your colors on the wheel and preview how the necklace will turn out!
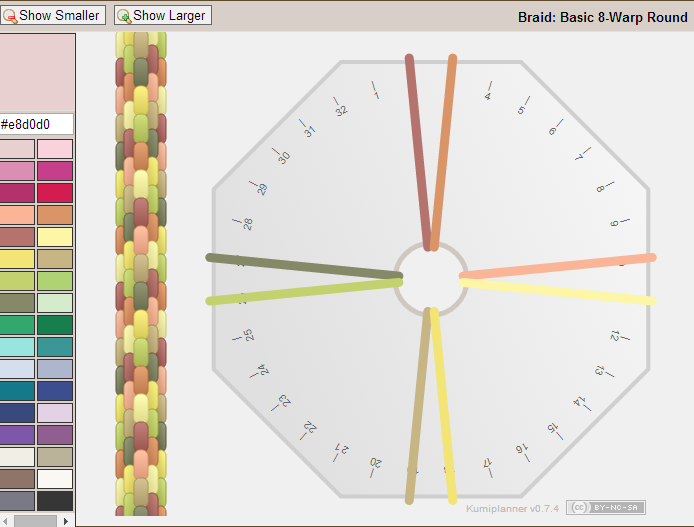
Isn’t it amazing?! I love this thing. You can either put the color on the wheel or on the braid directly to see how you need to configure your board. I use it every time I make a Kumihimo braid – and I make a lot!
Here are a few of my finished Kumihimo pieces –


I love my kumihimos – especially with beads galore. How do you usually do yours? Let me know in the comments!
Edit: Wanted to add a few additional resources.
Here’s the basics on how to do a beaded kumihimo braid.
And here’s a conversion chart to help you figure out how many beads to string.


Thank you for all the information. I have just figure out Kumihimo and have done a couple of bracelets. I love knowing I can use beads other then seed. Thanks again, Pat
LikeLike
Yes, Thank you so much. I too have just discovered Kumihimo – I have literally made 40 bracelets in the past month and a half for my daughter’s skating teams – but really want to now expand my designs with different textures, sizes and colors. This is extremely helpful. Your work is beautiful.
LikeLike
beautiful & thank you for sharing with us, i have only been doing kumihino for 2 months & have had so many interested people in buying from me, so much so i am thinking of branching out soon & going part time at work as i cant make enough at the moment to supply.
LikeLike
There’s this app as well. Love the fact you can save your patterns and it shows you in what order to string your beads. https://play.google.com/store/apps/details?id=com.hobbystepbystep.kumihimobeads
LikeLike
Ooh, that does look useful! Thanks for the link!
LikeLike
HI ,just discovered your website. Your necklaces are beautiful What are the end caps you use? Do they have a special name? I’d like to use this type for my projects. Thanks, Allison
LikeLike
Hi, Allison! They don’t really have a special name, as far as I know. I usually just look for them listed under “bead caps” or “end caps” or “cones”. I usually look for a more conical shape (so that there’s plenty of room to hide a messy eyepin job) and the diameter of the opening needs to be 10mm or bigger. Hope that helps!
LikeLike
Wonderful thank you
>
LikeLike
Wow…just found this post as I just got into Kumihimo. Your designs are amazing!
Thanks for sharing the valuable resources!
– Lisa
LikeLike
Love the long magatama necklace! Did you string them all going the same way, and what do you mean by 3 long and 1 short? Thanks
LikeLike
Hi! I strung them all randomly, so they stick out in all different directions. The long and short refers to long magatamas and short magatamas, which are different bead shapes. Hope that helps! :D
LikeLike
Thanks
LikeLike
WHERE did you get those most beautifully awesome endcaps and clasp?!?!?!
LikeLike
Hi, Ilene! I got most of my clasps and end caps at my local bead shops over the course of several years, but there’s always a whole bunch online. :D
LikeLike